Sony HDR-XR150 Handycam® Handbook - Page 38
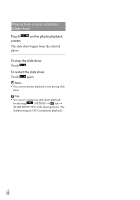
Touch, YES]., Play back movies and photos on, your camcorder p. 29. - blue
 |
UPC - 027242788787
View all Sony HDR-XR150 manuals
Add to My Manuals
Save this manual to your list of manuals |
Page 38 highlights
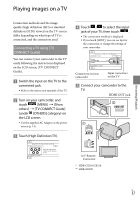
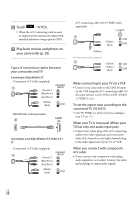
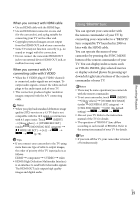
Touch [YES]. When the A/V connecting cable is used to output movies, movies are output with standard definition image quality (STD). Play back movies and photos on your camcorder (p. 29). Types of connection cables between your camcorder and TV Connecting to a high definition TV Component A/V Cable (supplied) (Green) Y (Blue)PB/CB (Red)PR/CR (White) (Red) HDMI Cable (sold separately) Connecting to a non-high-definition 16:9 (wide) or 4:3 TV Component A/V Cable (supplied) (Green) Y (Blue)PB/CB (Red)PR/CR (White) (Red) A/V connecting cable with S VIDEO (sold separately) (White) (Red) (Yellow) A/V connecting cable (supplied) (Yellow) (White) (Red) When connecting to your TV via a VCR Connect your camcorder to the LINE IN input on the VCR using the A/V connecting cable. Set the input selector on the VCR to LINE (VIDEO 1, VIDEO 2, etc.). To set the aspect ratio according to the connected TV (16:9/4:3) Set [TV TYPE] to [16:9] or [4:3] according to your TV (p. 77). When your TV is monaural (When your TV has only one audio input jack) Connect the yellow plug of the A/V connecting cable to the video input jack and connect the white (left channel) or red (right channel) plug to the audio input jack of your TV or VCR. When you connect with component A/V cable If you connect only component video plugs, audio signals are not output. Connect the white and red plugs to output audio signals. US 38
-
 1
1 -
2
-
3
-
4
-
5
-
6
-
7
-
8
-
9
-
10
-
11
-
12
-
13
-
14
-
15
-
16
-
17
-
18
-
19
-
20
-
21
-
22
-
23
-
24
-
25
-
26
-
27
-
28
-
29
-
30
-
31
-
32
-
 33
33 -
 34
34 -
 35
35 -
 36
36 -
 37
37 -
 38
38 -
 39
39 -
 40
40 -
 41
41 -
 42
42 -
 43
43 -
44
-
45
-
46
-
47
-
48
-
49
-
50
-
51
-
52
-
53
-
54
-
55
-
56
-
57
-
58
-
59
-
60
-
61
-
62
-
63
-
64
-
65
-
66
-
67
-
68
-
69
-
70
-
71
-
72
-
73
-
74
-
75
-
76
-
77
-
78
-
79
-
80
-
81
-
82
-
83
-
84
-
85
-
86
-
87
-
88
-
89
-
90
-
91
-
92
-
93
-
94
-
95
-
96
-
97
-
98
-
99
-
100
-
101
-
102
-
103
-
104
-
105
-
106
-
107
-
108
-
109
 |
 |
