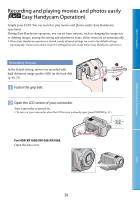
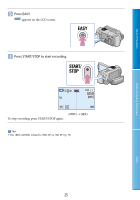
Sony HDR XR200E Handbook - Page 21
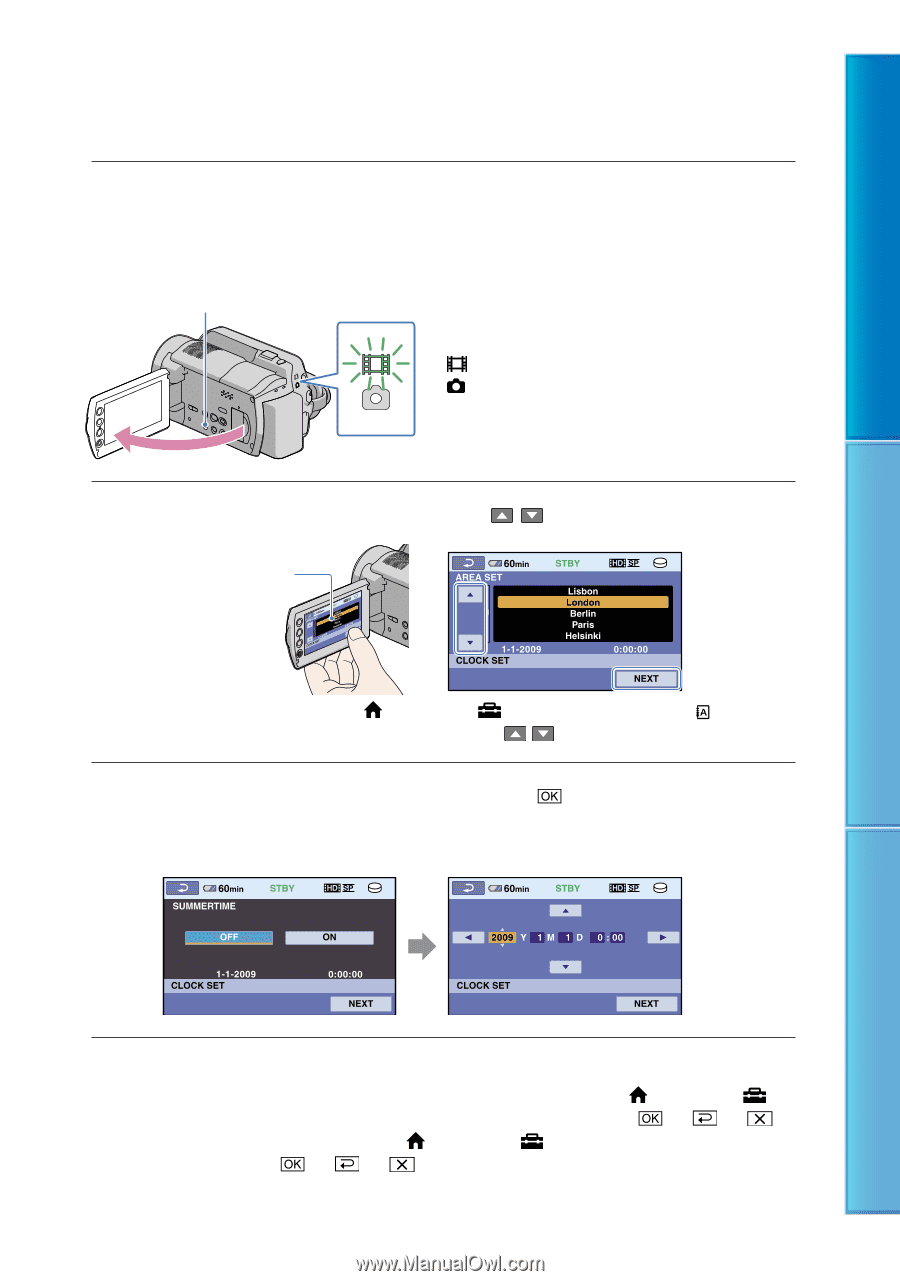
Step 2: Turning the power on, and setting the date and time
 |
UPC - 411378077257
View all Sony HDR XR200E manuals
Add to My Manuals
Save this manual to your list of manuals |
Page 21 highlights
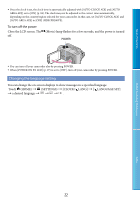
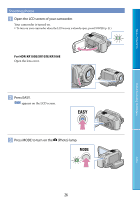
Table of Contents Step 2: Turning the power on, and setting the date and time 1 Open the LCD screen of your camcorder. Your camcorder is turned on. To turn on your camcorder when the LCD screen is open, press POWER. POWER (Movie): To record movies (Photo): To record photos 2 Select the desired geographical area with / , then touch [NEXT]. Touch the button on the LCD screen. To set the date and time again, touch (HOME) (SETTINGS) [CLOCK/ LANG] [CLOCK SET]. When an item is not on the screen, touch / until the item appears. 3 Set [SUMMERTIME], date and time, then touch . The clock starts. If you set [SUMMERTIME] to [ON], the clock advances 1 hour. Useful Recording Techniques Index The date and time do not appear during recording, but they are automatically recorded on the recording media, and can be displayed during playback. To display the date and time, touch (HOME) (SETTINGS) [VIEW IMAGES SET] [DATA CODE] [DATE/TIME You can turn off the operation beeps by touching (HOME) (SETTINGS) [SOUND/DISP SET] [BEEP] [OFF If the button you touch does not react correctly, calibrate the touch panel (p. 129). 21
-
 1
1 -
2
-
3
-
4
-
5
-
6
-
7
-
8
-
9
-
10
-
11
-
12
-
13
-
14
-
15
-
 16
16 -
 17
17 -
 18
18 -
 19
19 -
 20
20 -
 21
21 -
 22
22 -
 23
23 -
 24
24 -
 25
25 -
 26
26 -
27
-
28
-
29
-
30
-
31
-
32
-
33
-
34
-
35
-
36
-
37
-
38
-
39
-
40
-
41
-
42
-
43
-
44
-
45
-
46
-
47
-
48
-
49
-
50
-
51
-
52
-
53
-
54
-
55
-
56
-
57
-
58
-
59
-
60
-
61
-
62
-
63
-
64
-
65
-
66
-
67
-
68
-
69
-
70
-
71
-
72
-
73
-
74
-
75
-
76
-
77
-
78
-
79
-
80
-
81
-
82
-
83
-
84
-
85
-
86
-
87
-
88
-
89
-
90
-
91
-
92
-
93
-
94
-
95
-
96
-
97
-
98
-
99
-
100
-
101
-
102
-
103
-
104
-
105
-
106
-
107
-
108
-
109
-
110
-
111
-
112
-
113
-
114
-
115
-
116
-
117
-
118
-
119
-
120
-
121
-
122
-
123
-
124
-
125
-
126
-
127
-
128
-
129
-
130
-
131
-
132
-
133
-
134
 |
 |