Sony HDR XR200E Handbook - Page 82
Flash Mode Hdr-xr200e/xr200ve, Steps, Settings, Photo Settings], Flash Mode], A Desired, Flash Level]
 |
UPC - 411378077257
View all Sony HDR XR200E manuals
Add to My Manuals
Save this manual to your list of manuals |
Page 82 highlights
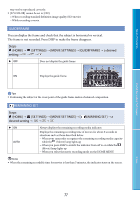
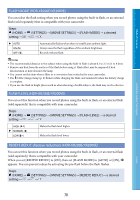
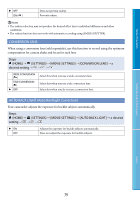
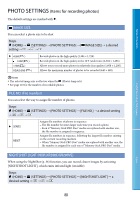
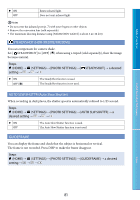
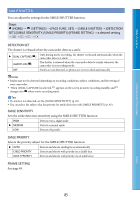
OFF ON Does not display the guide frame. Displays the guide frame. Table of Contents Useful Recording Techniques Tips Positioning the subject at the cross point of the guide frame makes a balanced composition. FLASH MODE (HDR-XR200E/XR200VE) You can select the flash setting when you record photos using the built-in flash, or an external flash (sold separately) that is compatible with your camcorder. Steps (HOME) (SETTINGS) [PHOTO SETTINGS] [FLASH MODE] a desired setting AUTO ON ( ) OFF ( ) Automatically flashes when there is insufficient ambient light. Always uses the flash regardless of the ambient brightness. Records without flash. Notes The recommended distance to the subject when using the built-in flash is about 0.3 to 2.5 m (1 to 8 feet). Remove any dust from the surface of the flash before using it. Flash effect may be impaired if heat discoloration or dust obscures the lamp. You cannot set this item when a filter or a conversion lens is attached to your camcorder. The /CHG (charge) lamp (p. 8) flickers while charging the flash, and remains lit when the battery charge is complete. If you use the flash in bright places such as when shooting a backlit subject, the flash may not be effective. FLASH LEVEL (HDR-XR200E/XR200VE) You can set this function when you record photos using the built-in flash, or an external flash (sold separately) that is compatible with your camcorder. Steps (HOME) (SETTINGS) [PHOTO SETTINGS] [FLASH LEVEL] a desired setting HIGH ( ) NORMAL ( ) LOW ( ) Makes the flash level higher. Makes the flash level lower. 82 Index
-
 1
1 -
2
-
3
-
4
-
5
-
6
-
7
-
8
-
9
-
10
-
11
-
12
-
13
-
14
-
15
-
16
-
17
-
18
-
19
-
20
-
21
-
22
-
23
-
24
-
25
-
26
-
27
-
28
-
29
-
30
-
31
-
32
-
33
-
34
-
35
-
36
-
37
-
38
-
39
-
40
-
41
-
42
-
43
-
44
-
45
-
46
-
47
-
48
-
49
-
50
-
51
-
52
-
53
-
54
-
55
-
56
-
57
-
58
-
59
-
60
-
61
-
62
-
63
-
64
-
65
-
66
-
67
-
68
-
69
-
70
-
71
-
72
-
73
-
74
-
75
-
76
-
 77
77 -
 78
78 -
 79
79 -
 80
80 -
 81
81 -
 82
82 -
 83
83 -
 84
84 -
 85
85 -
 86
86 -
 87
87 -
88
-
89
-
90
-
91
-
92
-
93
-
94
-
95
-
96
-
97
-
98
-
99
-
100
-
101
-
102
-
103
-
104
-
105
-
106
-
107
-
108
-
109
-
110
-
111
-
112
-
113
-
114
-
115
-
116
-
117
-
118
-
119
-
120
-
121
-
122
-
123
-
124
-
125
-
126
-
127
-
128
-
129
-
130
-
131
-
132
-
133
-
134
 |
 |
