Sony KDL32L5000 Operating Instructions - Page 16
Running Initial Setup, Initial Setup, Auto Program, buttons - remote control
 |
UPC - 027242753037
View all Sony KDL32L5000 manuals
Add to My Manuals
Save this manual to your list of manuals |
Page 16 highlights
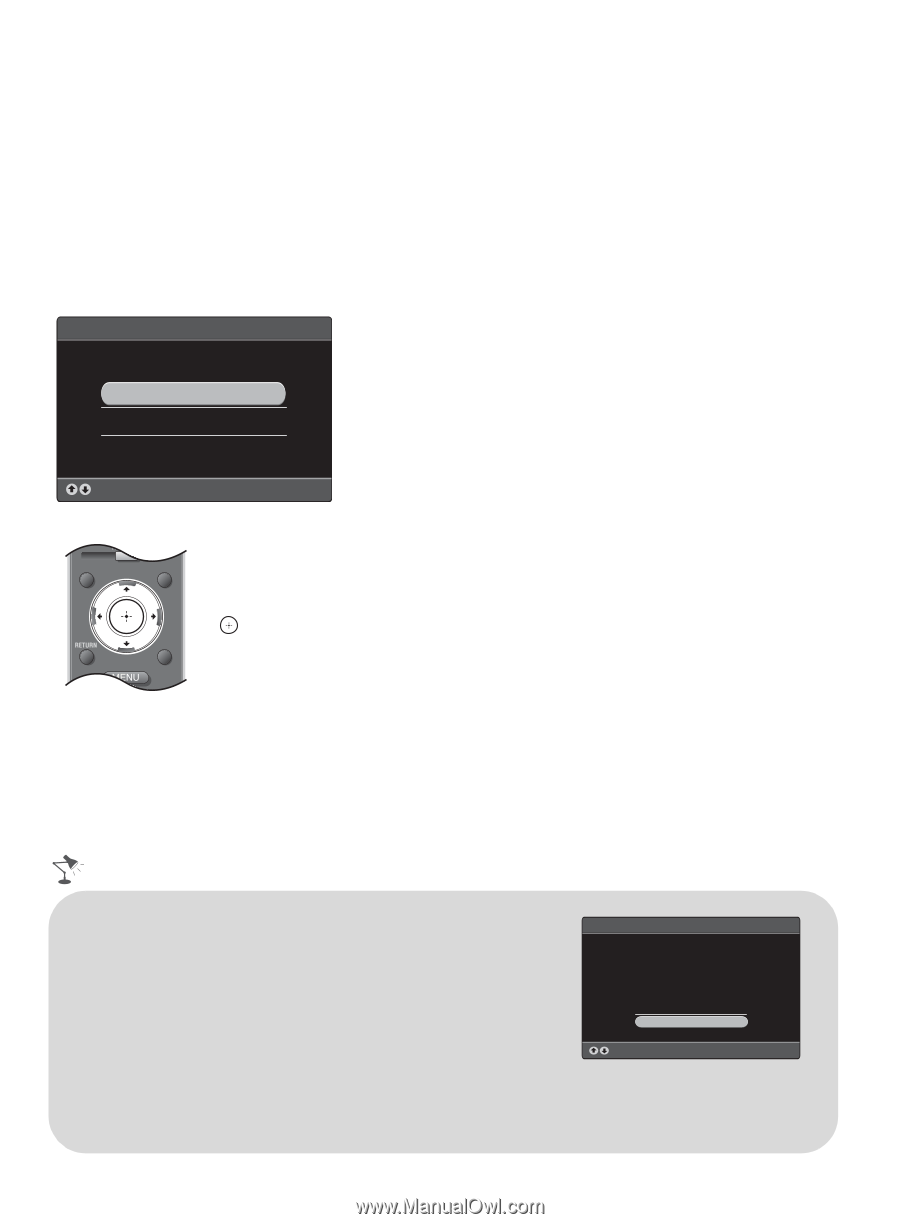
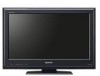
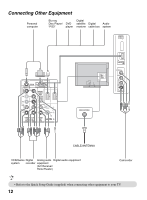
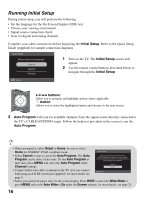
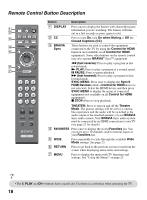
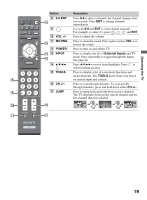
Running Initial Setup During initial setup, you will perform the following: • Set the language for the On Screen Display (OSD) text • Choose your viewing environment • Signal source connection check • Scan for digital and analog channels Complete your cable connections before beginning the Initial Setup. Refer to the Quick Setup Guide (supplied) for sample connection diagrams. Initial Setup Please select your language: English Español Français 1 Turn on the TV. The Initial Setup screen will appear. 2 Use the remote control buttons described below to navigate through the Initial Setup. Select WIDE INPUT V/v/B/b buttons: Allow you to navigate and highlight options where applicable. button: TOOLS Allows you to select the highlighted option and advance to the next screen. 3 Auto Program will scan for available channels from the signal source directly connected to the TV's CABLE/ANTENNA input. Follow the help text provided on the screen to run the Auto Program. • When prompted to select Retail or Home, be sure to select Home for ENERGY STAR compliant mode. Initial Setup • Select Cancel to stop or cancel the Auto Program. The Auto Program can be done at later time. To run Auto Program at later time, press MENU and select the Auto Program under Channel settings. Please select the type of use for this TV. "Retail" optimizes the picture for store display. "Home" optimizes the picture for normal home use and is Energy Star compliant. Retail Home • Connect either your cable or antenna to the TV (you can connect Select both using an A-B RF switch (not supplied); for more details see page 9. • Select your preferred aspect ratio for the screen display. Press WIDE to select the Wide Mode or press MENU and set the Auto Wide to On under the Screen settings; for more details, see page 23. 16
-
 1
1 -
2
-
3
-
4
-
5
-
6
-
7
-
8
-
9
-
10
-
 11
11 -
 12
12 -
 13
13 -
 14
14 -
 15
15 -
 16
16 -
 17
17 -
 18
18 -
 19
19 -
 20
20 -
 21
21 -
22
-
23
-
24
-
25
-
26
-
27
-
28
-
29
-
30
-
31
-
32
-
33
-
34
-
35
-
36
-
37
-
38
-
39
-
40
-
41
-
42
-
43
-
44
-
45
-
46
-
47
-
48
 |
 |