Sony KE-42TS2U Operating Instructions - Page 25
Enjoying High-quality Pictures and Sounds - screen blacking out
 |
View all Sony KE-42TS2U manuals
Add to My Manuals
Save this manual to your list of manuals |
Page 25 highlights
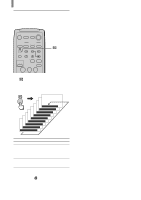
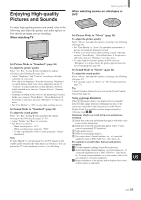
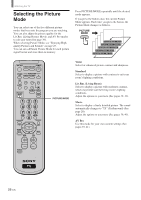
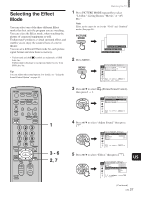
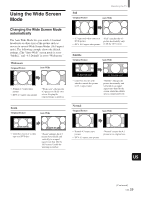
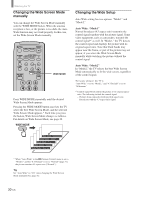
Enjoying High-quality Pictures and Sounds Watching the TV When watching movies on videotapes or DVD To enjoy high-quality pictures and sound, refer to the following and adjust the picture and audio options to best suit the program you are watching. When watching TV Set Picture Mode to "Standard" (page 26) To adjust the picture quality Select "Liv. Rm." (Living Room) and adjust the options, referring to the following (See page 39). • Adjust "Brightness" and "Contrast" according to the light conditions in your room. First, adjust the brightness. Note that increasing "Brightness" too much whitens black color. Next, adjust the contrast. If "Contrast" is reduced and there is little difference between bright and dark areas, increase "Gamma Correct." (Gamma Correction). • If antenna reception level is too low, the picture may be noisy. In this case, increase "Noise Reduct." (Noise Reduction). If the picture is still noisy, decrease "Sharpness" to reduce any noise. • Set "Cine Motion" to "Off" except when watching movies. Set Sound Mode to "Standard" (page 26) To adjust the sound quality Select "Liv. Rm." (Living Room) and adjust the options, referring to the following (See pages 27, 41). • Adjust "Treble" and "Bass" to your taste. • Set "Effect" as follows: - When watching news: "Off" - When watching music programs: "Hall" - To add a surround-like effect to mono programs: "Simul." (Simulated). Note If "Auto Shutoff" is activated (page 53), the TV changes to the standby mode automatically when there is no broadcast. You can prevent the TV from remaining on even if you fall asleep. Set Picture Mode to "Movie" (page 26) To adjust the picture quality Select "Movie" and adjust the options, referring to the following (See page 39). • Set "Cine Motion" to "Auto" for smoothest presentation of movies on screen (24 frame per second). • If there is too much noise when watching a rental videotape, increase "Noise Reduct." (Noise Reduction). If the picture is still noisy, decrease "Sharpness" to reduce noise. • To enjoy high-level picture quality of DVD, increase "Sharpness" to a degree where the picture appears clear, but not overly sharp (See page 40). Set Sound Mode to "Movie" (page 26) To adjust the sound quality Select "Movie" and adjust the options, referring to the following (See page 27). • For surround sound, set "Effect" to "TS" (TruSurround) (See page 27). Tip Caption Vision is displayed if you activate the Closed Caption feature (See page 24). Notes on Image Retention If the 1-5 images (below) are displayed for an extended period of time, image retention (afterimage) in areas of the screen may result due to the characteristics of the Plasma Display Panel. It is possible to reduce image retention by following steps A-C. Situations which can result in burn-in and picture retention 1 Black bars at the top and bottom that appear with wide video source (Letter box picture) 2 Black bars to the left and right that appear with 4:3 video source (conventional TV broadcast) 3 Video game sources 4 DVD on-screen menu displays 5 On-screen menus, channel numbers, etc., of connected equipment such as DSS, Cable box, video decks, etc. Precautions to avoid/reduce burn-in and picture retention A Use the automatic orbiting Screen Saver function. B Avoid displaying channel numbers, on-screen menus etc. of connected equipment such as DSS, Cable box, video decks, etc. To erase channel numbers, on-screen menus, refer to the user manual of connected equipment. C Reduce brightness of the picture and/or display video source in Wide Zoom or Full Mode. US (US) 25
-
 1
1 -
2
-
3
-
4
-
5
-
6
-
7
-
8
-
9
-
10
-
11
-
12
-
13
-
14
-
15
-
16
-
17
-
18
-
19
-
 20
20 -
 21
21 -
 22
22 -
 23
23 -
 24
24 -
 25
25 -
 26
26 -
 27
27 -
 28
28 -
 29
29 -
 30
30 -
31
-
32
-
33
-
34
-
35
-
36
-
37
-
38
-
39
-
40
-
41
-
42
-
43
-
44
-
45
-
46
-
47
-
48
-
49
-
50
-
51
-
52
-
53
-
54
-
55
-
56
-
57
-
58
-
59
-
60
-
61
-
62
-
63
-
64
-
65
-
66
-
67
-
68
-
69
-
70
-
71
-
72
-
73
-
74
-
75
-
76
-
77
-
78
-
79
-
80
-
81
-
82
-
83
-
84
-
85
-
86
-
87
-
88
-
89
-
90
-
91
-
92
-
93
-
94
-
95
-
96
-
97
-
98
-
99
-
100
-
101
-
102
-
103
-
104
-
105
-
106
-
107
-
108
-
109
-
110
-
111
-
112
-
113
-
114
-
115
-
116
-
117
-
118
-
119
-
120
-
121
-
122
-
123
-
124
-
125
-
126
-
127
-
128
-
129
-
130
-
131
-
132
-
133
-
134
-
135
-
136
-
137
-
138
-
139
-
140
-
141
-
142
-
143
-
144
-
145
-
146
-
147
-
148
-
149
-
150
-
151
-
152
-
153
-
154
-
155
-
156
-
157
-
158
-
159
-
160
-
161
-
162
-
163
-
164
-
165
-
166
-
167
-
168
-
169
-
170
-
171
-
172
-
173
-
174
-
175
-
176
-
177
-
178
-
179
-
180
-
181
-
182
-
183
-
184
-
185
-
186
-
187
-
188
 |
 |