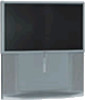
Sony KP-51WS510 Operating Instructions
Sony KP-51WS510 - 51" 16:9 Hi-scan Projection Television Manual
 |
View all Sony KP-51WS510 manuals
Add to My Manuals
Save this manual to your list of manuals |
Sony KP-51WS510 manual content summary:
- Sony KP-51WS510 | Operating Instructions - Page 1
- Sony KP-51WS510 | Operating Instructions - Page 2
SERVICEABLE PARTS INSIDE. REFER SERVICING TO QUALIFIED SERVICE maintenance (servicing) instructions in screen for long periods of time, especially at a high brightness convergence adjustment Before you use your projection TV, make sure to adjust convergence. For details, see "Adjusting the Convergence - Sony KP-51WS510 | Operating Instructions - Page 3
MODELS: KP-46WT510, KP-51WS510, KP-57WS510, and KP-65WS510. Please keep this notice with the instruction manual have it checked by qualified service personnel before operating it changes suddenly, the picture may be blurred or show poor color due STAR® Partner, Sony Corporation has determined - Sony KP-51WS510 | Operating Instructions - Page 4
instructions placed on the set or described in the operating instructions or service manual set is left unattended and unused for long periods of time, unplug it from the wall outlet as a precaution against may touch dangerous voltage points or short out parts that could result in a fire or electric - Sony KP-51WS510 | Operating Instructions - Page 5
Use only a cart or stand recommended by Sony for the specific model of TV. No part of the TV set should overhang any edge respect to proper grounding of the mast and supporting structure, grounding of the lead-in wire to NFPA 70 Ground clamp Electrical service equipment NEC: National Electrical Code - Sony KP-51WS510 | Operating Instructions - Page 6
change in performance, it indicates a need for service. Servicing Do not attempt to service the set by yourself since opening the cabinet may expose you to dangerous voltage or other hazards. Refer all servicing to qualified service personnel. Replacement Parts When replacement parts instructions - Sony KP-51WS510 | Operating Instructions - Page 7
Automatically - FLASH FOCUS 33 Adjusting the Convergence Manually 34 Using the Menus Overview 51 Using the Video Menu 52 Using the Audio Menu 54 Using the Channel Menu 56 Using the Wide Menu 58 Using the Timer Menu 60 Using the Setup Menu 61 Other Information Programming the Remote Control - Sony KP-51WS510 | Operating Instructions - Page 8
you for purchasing the Sony Projection TV. This manual is for models KP-46WT510, KP-51WS510, KP-57WS510, and KP-65WS510. KP-51WS510 is used for the DRC feature doubles vertical and horizontal lines, resulting in four times the density for quality sources such as DVD, Satellite and Digital - Sony KP-51WS510 | Operating Instructions - Page 9
Sony Projection TV ❑ Wide Screen Mode: Allows you to watch 4:3 normal broadcasts in wide screen mode (16:9 aspect ratio). ❑ Auto Wide: Allows you to select the wide screen mode automatically. ❑ Flash Focus™: Allows you to adjust convergence automatically. ❑ Manual Convergence: Allows you to manually - Sony KP-51WS510 | Operating Instructions - Page 10
two AA batteries. No peripheral cables are included. If you intend to add additional equipment to your projection TV, please check the hookup instructions for your desired setup before you begin. You may need to purchase cables and/ or splitters to complete the hookup properly. Inserting Batteries - Sony KP-51WS510 | Operating Instructions - Page 11
. Please move your projection TV using the casters. (KP-51WS510, KP-57WS510, and KP-65WS510 only) Installing and Connecting the Projection TV Handle (KP-65WS510 only) Installing the Projection TV 65"min. 57" min. 51" min. 46" min. 2.4 2.1 1.8 1.6 m m m m (approx. (approx. (approx. (approx - Sony KP-51WS510 | Operating Instructions - Page 12
Video cable High quality video cable for enhanced picture quality Align guides and push into connection. Audio/Video cable Push into connection. CONTROL S cable CONTROL S connections are exclusive to Sony products and allow greater control of all Sony equipment. Push into connection. DVI cable DVI - Sony KP-51WS510 | Operating Instructions - Page 13
Installing and Connecting the Projection TV Projection TV Controls and Connectors Front Panel Menu Controls The front panel menu controls allow access to the on-screen menus without the use of a remote control. Pressing MENU brings up the on-screen menus. The arrow buttons move the on-screen - Sony KP-51WS510 | Operating Instructions - Page 14
Installing and Connecting the Projection TV Projection TV Rear and Front Panel Connectors Rear of projection TV 0 Front of projection TV 14 - Sony KP-51WS510 | Operating Instructions - Page 15
and is not intended for use with personal computers. See the instruction manual that came with your equipment for details about connecting and using your audio or video component. 0 CONTROL S IN/OUT To control other Sony equipment with the projection TV's remote control, connect the CONTROL S IN - Sony KP-51WS510 | Operating Instructions - Page 16
Installing and Connecting the Projection TV Basic Connections (Connecting Cable TV or Antenna) Connecting Directly to Cable or an Antenna The connection you choose depends on the cable found in your home. Newer homes are equipped with standard coaxial cable (see A); older homes probably have 300- - Sony KP-51WS510 | Operating Instructions - Page 17
Twin View feature. With this setup you can: ❑ Use the projection TV remote control to change channels using your cable box when the signal is scrambled. ❑ Use the projection TV remote control to change channels using your projection TV when the signal is not scrambled. (Your projection TV's tuner - Sony KP-51WS510 | Operating Instructions - Page 18
hookup on page 17 instead. 1 Connect the coaxial connector from your cable service to the cable box's IN jack. 2 Using a coaxial cable, connect menu (see page 56). ✍ Your Sony remote control can be programmed to operate your cable box (see "Programming the Remote Control" on page 71). ✍ To change - Sony KP-51WS510 | Operating Instructions - Page 19
Installing and Connecting the Projection TV Installing and Connecting the Projection TV Connecting a VCR and Cable Use this hookup if: ❑ You have cable TV that does not require a cable box. Disconnect all power sources before making any connections. 1 Connect the cable TV cable to the VCR's IN jack - Sony KP-51WS510 | Operating Instructions - Page 20
want to enjoy the Twin View feature. With this setup you can: ❑ Use the projection TV remote control to change channels on your cable box when the signal is scrambled. To program your Sony remote control to operate your cable box, see "Programming the Remote Control" on page 71. ❑ Use the projection - Sony KP-51WS510 | Operating Instructions - Page 21
projection TV ✍ If your VCR is not equipped with S VIDEO, use a VIDEO cable (yellow) instead of the S VIDEO cable. ✍ You will not be able to change channels on the VCR. Set your projection TV and VCR to channel 3 or 4, depending on your cable box. ✍ Pressing ANT on the remote control switches - Sony KP-51WS510 | Operating Instructions - Page 22
to the video input intended for playback by pressing TV/VIDEO on the remote control. ✍ You may need to change the video input on your VCR. Consult your VCR's operating manual for instructions. ✍ If both VCRs have an S VIDEO jack, you can use the S VIDEO connection instead of the yellow video cable - Sony KP-51WS510 | Operating Instructions - Page 23
Installing and Connecting the Projection TV Installing and Connecting the Projection TV Connecting a Satellite Receiver Disconnect all power sources before making any connections. 1 Connect the satellite antenna cable to the satellite receiver's SATELLITE IN jack. 2 Using AUDIO and S VIDEO cables, - Sony KP-51WS510 | Operating Instructions - Page 24
) VCR YC-15V/30V (not supplied) Cable VMC-810S/ 820S (not supplied) ✍ Be sure your VCR's video input is set correctly. Consult your VCR's operating manual for instructions. ✍ Use TV/VIDEO to select - VIDEO 1 to watch satellite TV or the VCR (your VCR must be turned on). - VHF/UHF to watch cable - Sony KP-51WS510 | Operating Instructions - Page 25
Installing and Connecting the Projection TV Installing and Connecting the Projection TV Connecting an Audio Receiver Disconnect all power sources before making any connections. Using audio cables, connect the projection TV's AUDIO OUT (VAR/FIX) jacks to the audio receiver's audio LINE IN jacks. - Sony KP-51WS510 | Operating Instructions - Page 26
6 connections. ✍ The Y, B-Y and R-Y jacks on your DVD player are sometimes labeled Y, CB and CR, or Y, PB and PR. If so, connect the cables to like colors. 2 Using an audio cable, connect the DVD player's Audio OUT jacks to the projection TV's AUDIO IN jacks. Be sure to use the same row - Sony KP-51WS510 | Operating Instructions - Page 27
Installing and Connecting the Projection TV Installing and Connecting the Projection TV Connecting a DVD Player with A/V Connectors Use this hookup if: ❑ Your DVD player does not have component (Y, PB, PR) jacks. ✍ If your DVD player has video component output connectors: for best picture quality - Sony KP-51WS510 | Operating Instructions - Page 28
. z Some Digital TV Receivers are equipped with a DVI connection. Refer to your Digital TV Receiver manual for setup instructions using this connection. Disconnect all power sources before making any connections. 1 Using three separate component video cables, connect the Digital TV Set-top box - Sony KP-51WS510 | Operating Instructions - Page 29
Installing and Connecting the Projection TV Installing and Connecting the Projection TV Connecting a Camcorder For easy connection of the camcorder, the projection TV has front Audio and Video inputs (shown below). However, if you prefer, you can also connect the camcorder to the projection TV's - Sony KP-51WS510 | Operating Instructions - Page 30
To take advantage of this feature, connect your receiver with Video 1. ✍ Change "Video Label" for the VIDEO 1 input to "Receiver" (see page AUDIO/VIDEO cable, connect the video equipment to the AV receiver. 6 Select the Setup menu and set "Video Label" to "Receiver" to fix your TV's input to AV - Sony KP-51WS510 | Operating Instructions - Page 31
TV Installing and Connecting the Projection TV Using the CONTROL S Feature CONTROL S allows you to control your projection TV system and other Sony equipment with one remote control. In addition to allowing you to control multiple devices with one remote control, the CONTROL S feature allows - Sony KP-51WS510 | Operating Instructions - Page 32
installing it. If you do not want to set up the channels at this time, you can do it later by using the Auto Program feature in the Channel menu (see page 57). ✍ The Auto Setup feature does not apply for installations that use a cable box for all channel selection. Using Auto - Sony KP-51WS510 | Operating Instructions - Page 33
Adjusting the Convergence Automatically - FLASH FOCUS™ - The projection tube image appears on the screen in three colors (red, green and blue). If they do not converge, the color is poor close to the projection TV. ✍ If you would like to manually perform additional fine adjustments, see page 34. 33 - Sony KP-51WS510 | Operating Instructions - Page 34
tune the color alignment of each section of the TV screen. ✍ Before using Manual Convergence, you replaced with a white cross. Once you have finished this, press . The changes to yellow again. 7 Repeat steps 4 to 6 to adjust other crosses. When finished, press MENU to exit the manual convergence - Sony KP-51WS510 | Operating Instructions - Page 35
Installing and Connecting the Projection TV Notes on Adjusting the Convergence Manually ❑ For best results, stand about 3 to 5 feet back from the picture when adjusting the convergence. Begin with the crosses in the center area of the screen and, once those are adjusted, move to the crosses on the - Sony KP-51WS510 | Operating Instructions - Page 36
- Sony KP-51WS510 | Operating Instructions - Page 37
press once to view the remaining time. Changes between the VHF/UHF input and the AUX input. Press once to display the current time and channel label (if set) modes: Vivid, Standard, Movie and Pro. Also available in the Video menu. For details, see "Selecting Video Options" on page 52. Displays the - Sony KP-51WS510 | Operating Instructions - Page 38
have programmed into the remote control. For instructions, see "Programming the Remote Control" on changes after 2 seconds. Press ENTER to select immediately. qj Turns on/off Twin View. For details, see "Using Twin View™" on page 44. GUIDE Displays the program guide of your satellite. qk MENU - Sony KP-51WS510 | Operating Instructions - Page 39
S-Link. 2N Play 3m Rewind 4 REC Record 5x Stop 6 DVD MENU Displays the DVD menu. 7 MTS/SAP Press to scroll through the Multi-channel TV Sound ( the DVD/VCR player you have programmed into the remote control. For instructions, see "Programming the Remote Control" on page 71. q; M Fast - Sony KP-51WS510 | Operating Instructions - Page 40
remote control for use with the projection TV. 2 ANT- (AUX input) Press to change between the VHF/UHF input and the AUX input. 3 TV (POWER) Turns the on page 47). q; SLEEP Press repeatedly until the projection TV displays the approximate time in minutes (15, 30, 45, 60, or 90) that you want - Sony KP-51WS510 | Operating Instructions - Page 41
to display the channel number, current time and channel label (if set). To 6, and VIDEO 7. If you select Skip as a Video Label in the Setup menu, your projection TV will skip the video input you selected (see "Video Label" such as Brightness, Color, etc.) to suit your taste. For details, see "Mode" on - Sony KP-51WS510 | Operating Instructions - Page 42
TV. (for details, see page 28) 2 Press TV/VIDEO to select VIDEO 5, 6 or 7. 3 Select a digital channel on the DTV receiver. For details, see the Operating Manual of the DTV receiver. 4 Adjust the volume of the projection TV as necessary. 42 - Sony KP-51WS510 | Operating Instructions - Page 43
list of favorite channels that you preset. To display a list of your favorite channels: ✍ Your Favorite Channel options can be set automatically or manually. The factory setting for Favorite Channel is Auto. When Favorite Channel is set to Auto, the last eight channels selected with 0-9 buttons will - Sony KP-51WS510 | Operating Instructions - Page 44
Picture To cancel twin pictures ❑ Press again (or press ). Although two pictures appear on the screen at the same time, only one picture is active. For an active picture, you can: ❑ Change channels. ❑ Adjust the volume. ❑ Switch the input sources from VHF/UHF to cable by pressing ANT or TV/VIDEO - Sony KP-51WS510 | Operating Instructions - Page 45
: - If you use a cable box to view all channels, the same channel appears in both windows because the cable box unscrambles only one channel at a time. - If you use a cable box, you can view the cable box output in one window and view a different source (such as a VCR or DVD player - Sony KP-51WS510 | Operating Instructions - Page 46
the Picture Size The zoom feature lets you change the size of the left and right pictures. To enlarge the left picture (reduce the . V ✍ When you adjust the twin screen sizes, the projection TV memorizes the change. The next time you use the Twin View function, the memorized sizes appear. 46 - Sony KP-51WS510 | Operating Instructions - Page 47
Using the Features Using the Features Using the Freeze Function The FREEZE button allows you to temporarily capture a program's picture. You can use this feature to write down information such as phone numbers, recipes, etc. To use the Freeze function 1 When the program information you want to - Sony KP-51WS510 | Operating Instructions - Page 48
channels. 10 2 Move the joystick up and down so that the channel you wish to view is displayed in the cyan frame, and press . z To change the direction of scrolling, move the joystick up or down once. To increase scrolling speed, hold the joystick up or down. To return to scrolling - Sony KP-51WS510 | Operating Instructions - Page 49
Using the Features Using the Features 4 Press . The selected channel will be enlarged for normal viewing. 8 To cancel Scrolling Channel Index Press again to resume normal viewing. ✍ Sound will only be heard from the center picture. ✍ If one of the pictures received through Scrolling Channel Index - Sony KP-51WS510 | Operating Instructions - Page 50
the ✍ When viewing high-definition programs broadcast in 720p/1080i, it is not Wide Mode settings in the possible to change between Wide Screen modes. Screen menu. For details, see page 58. ❑ Press WIDE MODE repeatedly to toggle through the following Wide Mode settings. Example Wide Zoom - Sony KP-51WS510 | Operating Instructions - Page 51
to scroll through the features. 4 See the specific menu page for instructions on moving through the menu. The menu gives you access to the following features: Menu Icon Description Page Allows you to make adjustments to your Video inputs, and selecting the language of the on-screen menus. 51 - Sony KP-51WS510 | Operating Instructions - Page 52
screen. To restore the factory default settings for Picture, Brightness, Color, Hue, Sharpness and Color Temp ❑ Press RESET on the remote control when in the Video menu. Selecting Video Options z To quickly and easily change from one Video Mode to another, use the PIC MODE on the remote control - Sony KP-51WS510 | Operating Instructions - Page 53
Using the Menus Option DRC Mode Digital Reality Creation Description Creates a high-resolution picture with 4x density, for high quality sources (i.e., DVD player, Satellite receiver). Interlaced Recommended for moving pictures. Progressive Recommended for still images and text. CineMotion - Sony KP-51WS510 | Operating Instructions - Page 54
select an option. That option's settings appear. 5 Use the joystick to scroll through the settings. 6 Press to select the desired setting. 7 Press MENU to exit the menu screen. To restore the factory default settings for Treble, Bass and Balance ❑ Press RESET on the remote control when in the Audio - Sony KP-51WS510 | Operating Instructions - Page 55
Using the Menus Option Speaker Description On Off Audio Out Easy control of volume adjustments Variable Fixed Select to turn on the projection TV speakers. Select to turn off the projection TV speakers and listen to the projection TV's sound only through your external audio system speakers. The - Sony KP-51WS510 | Operating Instructions - Page 56
screen. Selecting Channel Options The Channel menu includes the following options: Option Description Favorite Channel Auto Select if you want Favorite Channel options to be set automatically to the last eight channels selected with the 0-9 buttons. Manual Select if you want to input your - Sony KP-51WS510 | Operating Instructions - Page 57
cable box or satellite receiver connected AUX 2-6 "Fix" your projection TV's channel setting to 3 or 4 and use the cable box, VCR or satellite receiver to change channels. Select one of these settings if you have connected the device to the VHF/UHF jack. Same as 2-6, except you select one of these - Sony KP-51WS510 | Operating Instructions - Page 58
6 Press to select the desired option. 7 Press MENU to exit the menu screen. Selecting Wide Options z To change from one Wide Mode to another, use the WIDE Off Select to enlarge the 4:3 picture, while the upper and lower parts of the picture are condensed to fit the wide screen. Select to return - Sony KP-51WS510 | Operating Instructions - Page 59
anything but Off, the Wide Mode setting changes only for the current channel. When you change channels (or inputs), Wide Mode is automatically replaced with the 4:3 Default setting. To retain the current Wide Mode setting as channels and inputs are changed, set 4:3 Default to Off. Option Vertical - Sony KP-51WS510 | Operating Instructions - Page 60
1 Move the joystick to "Timer 1" or "Timer 2", then press . 2 Use the joystick to enter your day, time, channel, and timer duration preferences; then, press to select each one. 3 Press MENU to exit the menu screen. To reset the Clock or Timers ❑ Press RESET on the remote control after selecting that - Sony KP-51WS510 | Operating Instructions - Page 61
their content and rating levels. For details about setting, see "Using the Parent Menu" on page 63. Caption Vision Allows you to select from three closed caption CC1. XDS (Extended Data Service) Displays a network name, program name, program length, and time of the show if the broadcaster offers - Sony KP-51WS510 | Operating Instructions - Page 62
so you can identify them when using TV/ VIDEO. When in the Setup menu's Video Label feature, use the joystick to highlight an input to label, then you have set the Video Label for Video 1 to "Receiver", you are able to change channels with the remote, and the TV input will stay on Video 1. Refer to " - Sony KP-51WS510 | Operating Instructions - Page 63
Menu Using the Menus The Parent menu allows you to set up the TV to block programs according to their content and rating levels. These ratings are assigned by a federal rating board 1 Press MENU. 2 menu options appear. ✍ You need the password entered here for any future access into the Parent menu - Sony KP-51WS510 | Operating Instructions - Page 64
, the Parental Control is activated automatically. If you want to select the ratings from Custom, see "Using Custom Rating Options" on page 66. 10 Press MENU to exit the menu screen. 64 - Sony KP-51WS510 | Operating Instructions - Page 65
. (see below) To deactivate the Parental Control feature ❑ Set Parental Lock to Off when in the Parent menu. To change the password 1 Select Change Password option when in the Parent menu using the joystick, and press . 2 Enter a new four-digit password using the 0-9 buttons. 3 Confirm the new - Sony KP-51WS510 | Operating Instructions - Page 66
the programs that match the ratings will be blocked. To unblock a rating, select it by moving the joystick up or down, then press . The indicator changes into "-" and all "lower" ratings are unblocked. 66 - Sony KP-51WS510 | Operating Instructions - Page 67
to select "TV Rating" or "Program," and press . 6 The "TV Rating" setting menu appears. 7 Move the joystick up or down to select the rating to be blocked, and it by moving the joystick up or down, then press . The indicator changes into "-" and all "lower" ratings are unblocked. Some TV ratings have - Sony KP-51WS510 | Operating Instructions - Page 68
8 for other extenders. All programs that match the ratings you select and higher, except for the extenders that were canceled, will be blocked. 10 Press MENU to exit the menu screen. 68 - Sony KP-51WS510 | Operating Instructions - Page 69
blocked: emergency broadcasts, political programs, sports, news, public service announcements, religious programs and weather. Using the Menus US custom U.S.A. as the country of residence on page 63, the Custom Rating Menu includes the following options. (If you selected Canada, see page 70.) - Sony KP-51WS510 | Operating Instructions - Page 70
Using the Menus Canadian custom rating options If you selected Canada as the country of residence on page 63, the Custom Rating Menu includes the following options. (If you selected U.S.A., see page 69.) Option English Rating French Rating USA Rating Description C All children. C8+ Children 8 - Sony KP-51WS510 | Operating Instructions - Page 71
Player Switch Position on Remote Control AV1 AV2 AV3 DVD Programmable Code Number 303 302 301 751 If you have video equipment other than Sony brand that you want to control with the projection TV's remote control, use the following procedures to program the remote control. ✍ The equipment must - Sony KP-51WS510 | Operating Instructions - Page 72
code number you previously entered at that setting is erased. ❑ In some rare cases, you may not be able to operate your component with the Sony remote control. In this case, use the component's own remote control unit. 72 - Sony KP-51WS510 | Operating Instructions - Page 73
, 311 Other Information Manufacturer Code Wards 327, 328, 335, 331, 332 Yamaha 314, 330, 336, 337 Zenith 331 DVD Players Manufacturer Sony Panasonic Pioneer RCA Toshiba Code 751 753 752 755 754 Cable Boxes Manufacturer Hamlin/Regal Jerrold/G.I./ Motorola Oak Panasonic Pioneer Scientific - Sony KP-51WS510 | Operating Instructions - Page 74
. To Do This ... Turn on/off Change channels Record Play Stop Fast forward Rewind the tape Pause Search the picture forward or backward Change input mode Press green POWER button (inside Display the DVD menu DVD MENU Display the menu (Setup) MENU Operate the DVD menu M, m, - Sony KP-51WS510 | Operating Instructions - Page 75
JUMP Operating a Satellite Receiver To Do This ... Turn on/off Select Satellite Receiver Select a channel Change channels Back to previous channel Display channel number Display DBS guide Display DBS menu Move highlight (cursor) Select item Press SAT/CABLE (POWER) SAT/CABLE (FUNCTION) 0-9 buttons - Sony KP-51WS510 | Operating Instructions - Page 76
Troubleshooting If, after reading these operating instructions, you have additional questions related to the use of your Sony television, please call our Customer Information Services Center at 1-800-222-SONY (7669) (U.S. residents only) or (416) 499-SONY (7669) (Canadian residents only). Problem - Sony KP-51WS510 | Operating Instructions - Page 77
antenna or a cable (when the problem is caused by reflections from nearby mountains or tall buildings). Cannot operate menu ❏ If the item you want to or the remote control 4 setting if you are using another device to change channels. ❏ If you are using another device to control channels, be - Sony KP-51WS510 | Operating Instructions - Page 78
not been set to skip your video inputs. See the Setup channels in your second picture menu on page 62. Favorite Channel does not display your choices ❏ Verify that Favorite Channel is set to Manual in the Channel menu (see "Favorite Channel" on page 56). Some video sources do not appear when you - Sony KP-51WS510 | Operating Instructions - Page 79
ohm external terminal for VHF/UHF NTSC, American TV Standard 46 inches (116.84 cm) (KP-46WT510) 51 inches (129.54 cm) (KP-51WS510) 57 inches (144.78 cm) (KP-57WS510) 65 inches (165 cm) (KP-65WS510) 2-13 14-69 1-125 120V, 60 Hz 4 3 6 1 1 1 2 (Y, PB, PR) 2 1 20 W × 2 1 terminal, 3.3V T.M.D.S., 50 - Sony KP-51WS510 | Operating Instructions - Page 80
) 172 lb (78.2 kg) (KP-51WS510) 195 lb (88.6 kg) (KP-57WS510) 300 lb (136 kg) (KP-65WS510) 230 W Under 1 W RM-Y909 2 supplied for remote control VMC-810/820/830 HG RKC-515HG RK-G69HG VMC-10/30 HG STR-V555ES or equivalent SU-46WT5 Design and specifications are subject to change without notice. 80 - Sony KP-51WS510 | Operating Instructions - Page 81
38 DVD MENU button 39 DVD player using with TV remote control 74 with A/V connectors, connecting 27 with component video connectors, connecting 26 E Effect Off 54 Simulated 54 TruSurround 54 Enlarging pictures, in Twin View 46 Extended Data Service 61 F Favorite Channel auto 56 described 8 manual 56 - Sony KP-51WS510 | Operating Instructions - Page 82
using 40 Specifications 79-80 Steady Sound adjusting 54 described 8 Surround sound 54 SYSTEM Off button 39 T Time set current 60 set daylight saving 60 Timer menu 51, 60 Timer setting 60 Treble, adjusting 54 Troubleshooting 76-78 TV function button 38 TV power button 38 TV/VIDEO button 38 Twin View - Sony KP-51WS510 | Operating Instructions - Page 83
-
 1
1 -
 2
2 -
 3
3 -
 4
4 -
 5
5 -
 6
6 -
 7
7 -
8
-
9
-
10
-
11
-
12
-
13
-
14
-
15
-
16
-
17
-
18
-
19
-
20
-
21
-
22
-
23
-
24
-
25
-
26
-
27
-
28
-
29
-
30
-
31
-
32
-
33
-
34
-
35
-
36
-
37
-
38
-
39
-
40
-
41
-
42
-
43
-
44
-
45
-
46
-
47
-
48
-
49
-
50
-
51
-
52
-
53
-
54
-
55
-
56
-
57
-
58
-
59
-
60
-
61
-
62
-
63
-
64
-
65
-
66
-
67
-
68
-
69
-
70
-
71
-
72
-
73
-
74
-
75
-
76
-
77
-
78
-
79
-
80
-
81
-
82
-
83
 |
 |
