Sony MHC-NX1 Operating Instructions (primary manual) - Page 34
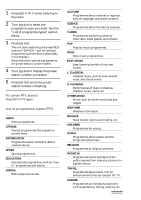
Timer-recording radio, programmes
 |
View all Sony MHC-NX1 manuals
Add to My Manuals
Save this manual to your list of manuals |
Page 34 highlights
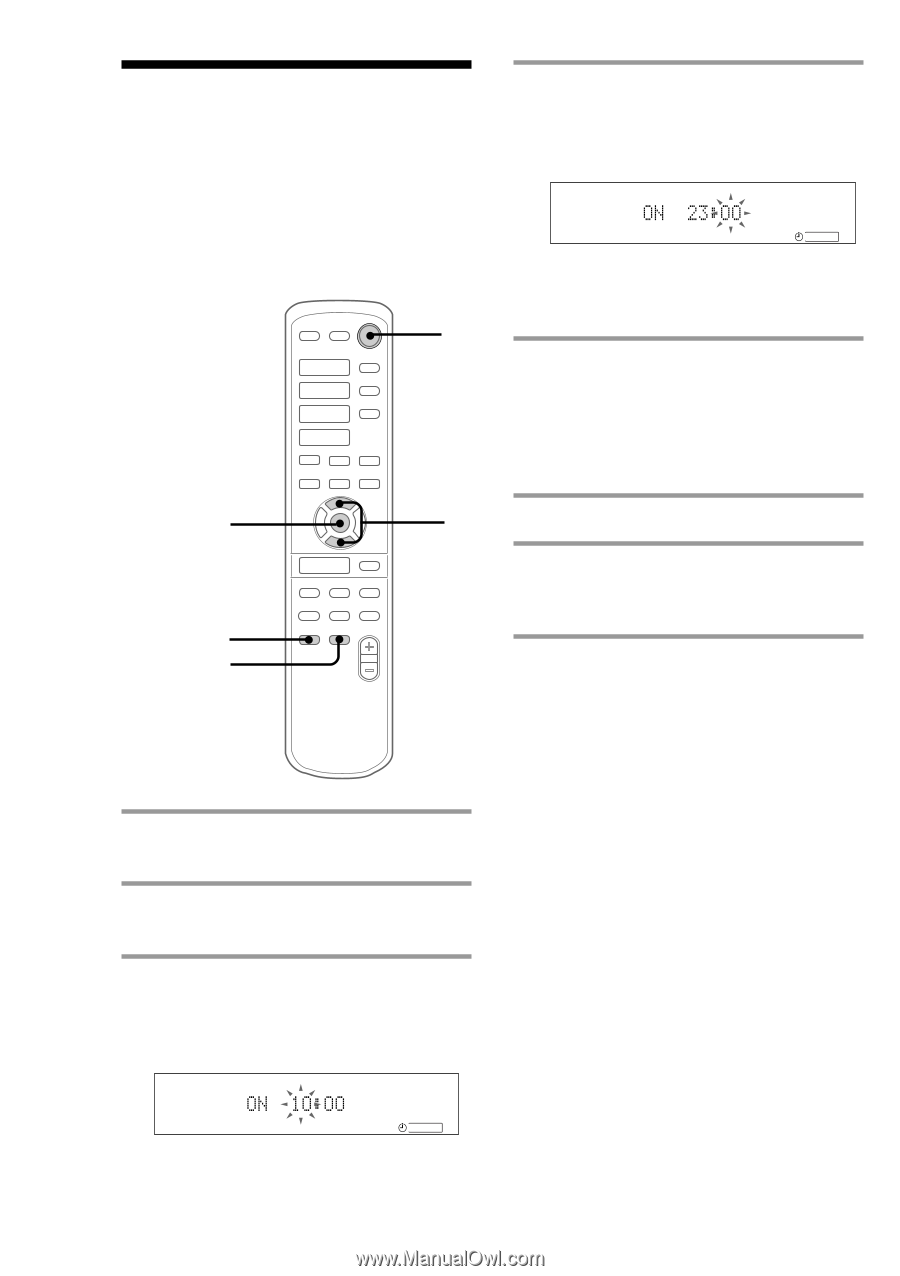
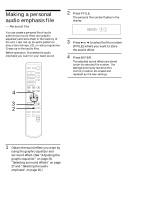
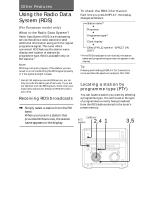
Timer-recording radio programmes 4 Set the time to start recording. Press V or v to set the hour, then press ENTER. The minute indication starts flashing. To timer-record, you must preset the radio station (see "Step 3: Presetting radio stations") and set the clock (see "Step 2: Setting the time") beforehand. REC Press V or v to set the minute, then press ENTER. 7 The hour indication flashes again. · 5 Set the time to stop recording following the above procedure. ª· ª· =+ p 0 ) P The start time appears, followed by the stop time, the recording source and the radio station, then the original display appears. 3,4 V B b v · p 3,4 6 Insert a recordable tape into deck B. 7 Turn off the power. When the recording starts, the volume level is set to the minimum. 2 TIMER SELECT To check the setting Press TIMER SELECT and press V or v to select "REC", then press ENTER. To change the setting, start over from step 1. 1 Tune in the preset radio station (see "Listening to the radio" on page 12). 2 Press CLOCK/TIMER. "SET (DAILY 1)" appears. To cancel the timer operation Press TIMER SELECT and press V or v to select "TIMER OFF", then press ENTER. Note If the power is on at the preset time, the recording will not be made. 3 Press V or v to select "REC", then press ENTER. "ON" appears and the hour digits flash in the display. REC 34
-
 1
1 -
2
-
3
-
4
-
5
-
6
-
7
-
8
-
9
-
10
-
11
-
12
-
13
-
14
-
15
-
16
-
17
-
18
-
19
-
20
-
21
-
22
-
23
-
24
-
25
-
26
-
27
-
28
-
 29
29 -
 30
30 -
 31
31 -
 32
32 -
 33
33 -
 34
34 -
 35
35 -
 36
36 -
 37
37 -
 38
38 -
 39
39 -
40
-
41
-
42
-
43
-
44
 |
 |