Sony MZ-NF610 SonicStage v1.5 Operating Instructions - Page 20
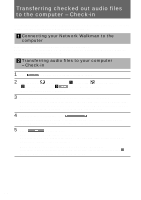
Transferring checked out audio files to the computer – Check-in - walkman type s
 |
View all Sony MZ-NF610 manuals
Add to My Manuals
Save this manual to your list of manuals |
Page 20 highlights
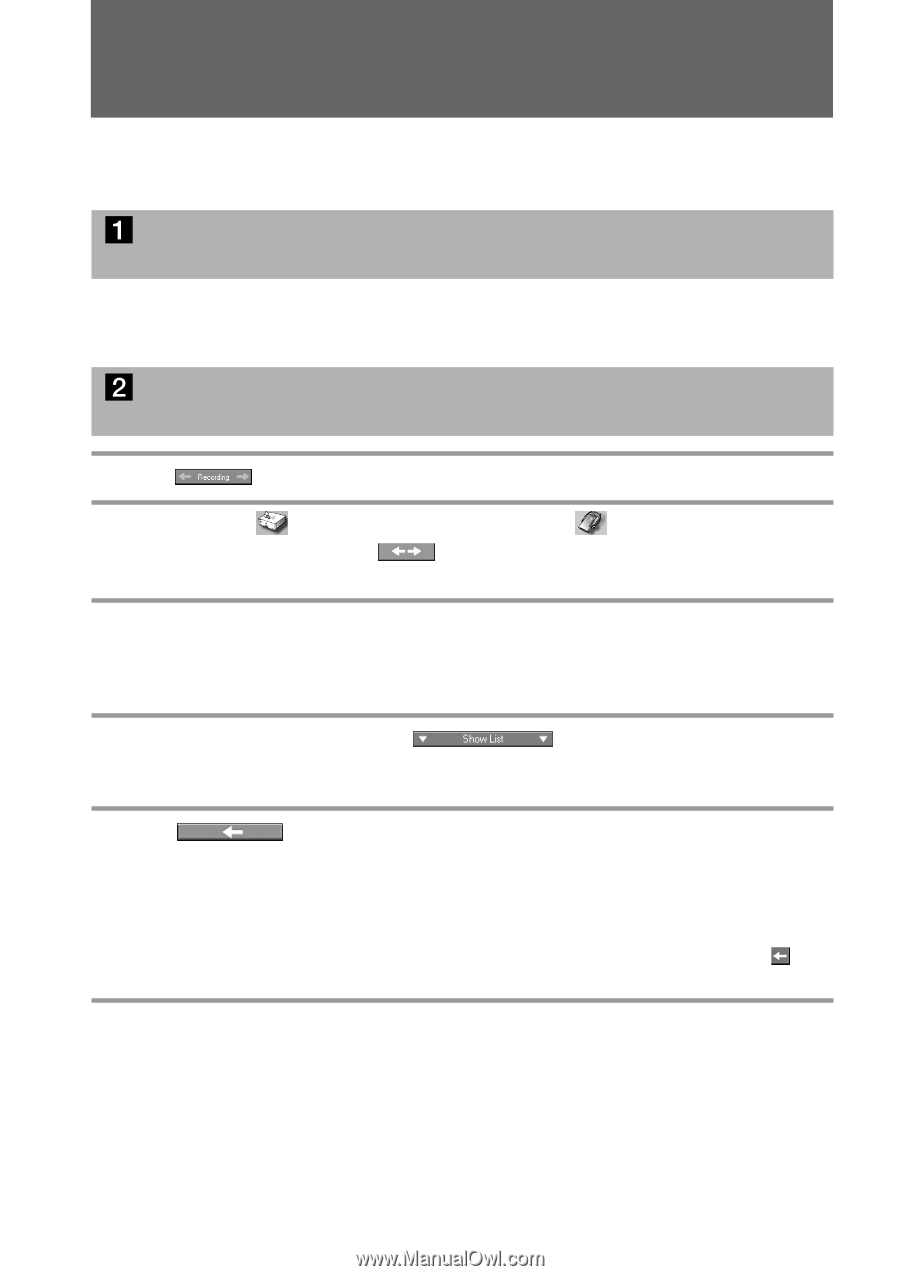
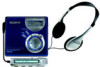
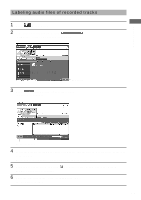
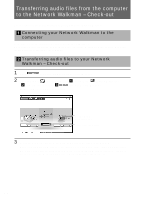
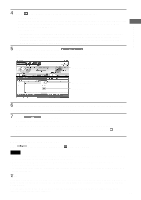
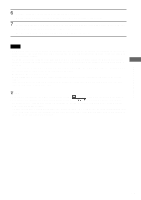
Transferring checked out audio files to the computer - Check-in Transferring audio files from your Network Walkman to the computer is called "Check-in." You can check in audio files only to the computer from which they were checked out. Connecting your Network Walkman to the computer For details, refer to the instruction manual of your Network Walkman. When using the device supporting MG Memory Stick, insert the "MagicGate Memory Stick" media into the device before connecting to the computer. Transferring audio files to your computer - Check-in 1 Click to display the Recording Assistant Window. 2 Click and select (Music Drive) for [1 Sources] and (Device/Media) for [2 Targets], and then click 3 (Jump to Record Window). The Record/Transfer window is displayed. 3 Select the device/media from the drop-down list at the right of the window. When using the Network Walkman supporting two or more medium types, select the target medium. When you check in from the built-in flash memory, select "Network Walkman (Internal)," and when you check in from the "Memory Stick", select "Network Walkman (Memory...)." 4 If the list area is not displayed, click . The list area is displayed at the bottom of the Transfer window. The list of tracks stored in your Network Walkman will be displayed on the right side of the list area. 5 Click (Check-In All). All tracks in your Network Walkman are checked in. When using the Network Walkman supporting two or more medium types, all tracks stored in the target medium selected in step 3 are checked in. When you want to select tracks or groups to be checked in Select tracks or groups you want to check in from the list at the right of the list area and click (Check-In). Only selected tracks or groups will be checked in. 20
-
 1
1 -
2
-
3
-
4
-
5
-
6
-
7
-
8
-
9
-
10
-
11
-
12
-
13
-
14
-
 15
15 -
 16
16 -
 17
17 -
 18
18 -
 19
19 -
 20
20 -
 21
21 -
 22
22 -
 23
23 -
 24
24 -
 25
25 -
26
-
27
-
28
-
29
-
30
-
31
-
32
-
33
-
34
-
35
-
36
 |
 |