Sony NEX-VG900 "Handycam" Handbook - Page 45
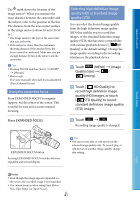
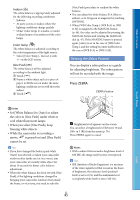
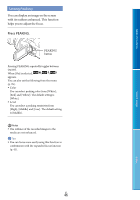
Setting the Zebra Pattern, Press ZEBRA.
 |
View all Sony NEX-VG900 manuals
Add to My Manuals
Save this manual to your list of manuals |
Page 45 highlights
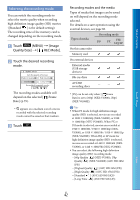
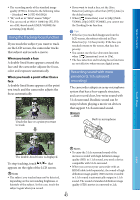
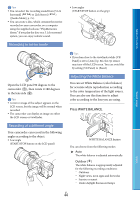
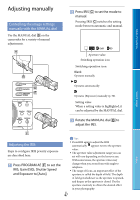
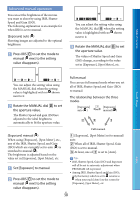
Table of Contents Indoor () The white balance is appropriately adjusted for the following recording conditions: Indoors At party scenes or studios where the lighting conditions change quickly Under video lamps in a studio, or under sodium lamps or incandescent-like color lamps Color Temp. ( ) The white balance is adjusted according to the color temperature of the light source: Select [Color Temp.] , then set it with +/- on the LCD screen. One Push ( ) The white balance will be adjusted according to the ambient light. Touch [ ]. Frame a white object such as a piece of paper, to fill the screen under the same lighting conditions as you will shoot the subject. Touch [ ]. [One Push] procedure to readjust the white balance. You can adjust the white balance B-A (blue to amber), or G-M (green to magenta) by touching [OPTION]. When [WB Color Temp.], [WB B-A] or [WB G-M] is assigned to the MANUAL button (p. 49), the value can be adjusted by pressing the MANUAL button and rotating the MANUAL dial (p. 47). If the MANUAL button is pressed again, [Auto] is set in the case of [WB Color Temp.], and the setting becomes ineffective in the case of [WB B-A] or [WB G-M]. Setting the Zebra Pattern You can display a zebra pattern as a guide for adjusting brightness. The zebra pattern will not be recorded with the image. Press ZEBRA. ZEBRA button Search image Notes Set [White Balance] to [Auto] or adjust the color in [One Push] under white or cool white fluorescent lamps. When you select [One Push], keep framing white objects. While the camcorder is recording a movie, is grayed out and [One Push] cannot be set. Tips If you have changed the battery pack while [Auto] was selected, or taken your camcorder outdoors after inside use (or vice versa), aim your camcorder at a nearby white object for about 10 seconds for better color balance adjustment. When the white balance has been set with [One Push], if the lighting conditions changed by bringing your camcorder outdoors from inside the house, or vice versa, you need to redo the (brightness level) appears on the screen. You can select a brightness level between 70 and 100+ in 5 IRE from the menu (p. 76). Press ZEBRA again to cancel. Notes With a subject that exceeds a brightness level of 100 IRE, the image may become overexposed. Tips IRE (Institute of Radio Engineers) is a measure of the video signal level that is used as the bases of brightness; the reference level (pedestal level) is set to 0 (%) and the maximum level (completely white level) is set to 100 (%). US 45 Index
-
 1
1 -
2
-
3
-
4
-
5
-
6
-
7
-
8
-
9
-
10
-
11
-
12
-
13
-
14
-
15
-
16
-
17
-
18
-
19
-
20
-
21
-
22
-
23
-
24
-
25
-
26
-
27
-
28
-
29
-
30
-
31
-
32
-
33
-
34
-
35
-
36
-
37
-
38
-
39
-
 40
40 -
 41
41 -
 42
42 -
 43
43 -
 44
44 -
 45
45 -
 46
46 -
 47
47 -
 48
48 -
 49
49 -
 50
50 -
51
-
52
-
53
-
54
-
55
-
56
-
57
-
58
-
59
-
60
-
61
-
62
-
63
-
64
-
65
-
66
-
67
-
68
-
69
-
70
-
71
-
72
-
73
-
74
-
75
-
76
-
77
-
78
-
79
-
80
-
81
-
82
-
83
-
84
-
85
-
86
-
87
-
88
-
89
-
90
-
91
-
92
-
93
-
94
-
95
-
96
-
97
-
98
-
99
-
100
-
101
-
102
-
103
-
104
-
105
-
106
-
107
-
108
-
109
-
110
-
111
-
112
-
113
-
114
-
115
-
116
 |
 |