Sony NEX-VG900 "Handycam" Handbook - Page 84
USB Connect Setting, Disc Burn, LCD Brightness, VF Color Temp., VF/Panel, Mass Storage, Normal, Bright
 |
View all Sony NEX-VG900 manuals
Add to My Manuals
Save this manual to your list of manuals |
Page 84 highlights
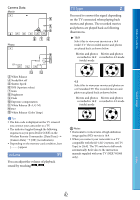
USB Connect Setting Beep Table of Contents Search image You can set the USB transfer mode for connecting the camcorder to a computer or other USB device. On A melody sounds when you start/stop recording, or operate the touch panel. Auto The camcorder automatically selects the USB transfer mode depending on the connected device. Mass Storage This is a USB transfer mode compatible to many types of USB devices. Off Cancels the melody. LCD Brightness You can adjust the brightness of the LCD screen. MTP This is a USB transfer mode compatible with certain types of computers. Normal Normal setting (normal brightness). Bright Notes When you connect the camcorder to other devices using the [MTP] mode, movies that have been recorded with the same image quality as the one currently selected (selected with the [ / Setting] menu) can only be displayed on the connected device. When the camcorder is connected to an external device in the [MTP] mode, movie files will be displayed with the recorded date, however, some information, such as area information, included in the movie files cannot be displayed on the connected device. To import images from the camcorder to your computer, use the supplied "PlayMemories Home" software. If the "Device Stage*" window does not open when you connect the camcorder to a computer equipped with Windows 7, set [USB Connect Setting] to [Auto]. * "Device Stage" is a menu of Windows 7, that is used to manage devices (camcorder, camera, etc.) that are connected to the computer. Select this when the LCD screen is not bright enough. Tips This adjustment does not affect the recorded images in any way. The brightness is set to [Bright] automatically when using the AC Adaptor. VF Color Temp. You can change the color temperature of the viewfinder with the MANUAL dial or +/-. When the color temperature value is lowered, the viewfinder is tinged with red and when raised, the viewfinder is tinged with blue. VF/Panel The camcorder detects the condition and switches the display between the viewfinder and LCD screen. Disc Burn Auto Movies and photos recorded on your camcorder can be saved on a disc with one touch. Notes [Disc Burn] is not available even though the camcorder is connected to a computer. The camcorder automatically switches the display between the viewfinder and the LCD screen using eye sensor control. Panel The screen is displayed on the LCD screen when the panel is opened. US 84 Index
-
 1
1 -
2
-
3
-
4
-
5
-
6
-
7
-
8
-
9
-
10
-
11
-
12
-
13
-
14
-
15
-
16
-
17
-
18
-
19
-
20
-
21
-
22
-
23
-
24
-
25
-
26
-
27
-
28
-
29
-
30
-
31
-
32
-
33
-
34
-
35
-
36
-
37
-
38
-
39
-
40
-
41
-
42
-
43
-
44
-
45
-
46
-
47
-
48
-
49
-
50
-
51
-
52
-
53
-
54
-
55
-
56
-
57
-
58
-
59
-
60
-
61
-
62
-
63
-
64
-
65
-
66
-
67
-
68
-
69
-
70
-
71
-
72
-
73
-
74
-
75
-
76
-
77
-
78
-
 79
79 -
 80
80 -
 81
81 -
 82
82 -
 83
83 -
 84
84 -
 85
85 -
 86
86 -
 87
87 -
 88
88 -
 89
89 -
90
-
91
-
92
-
93
-
94
-
95
-
96
-
97
-
98
-
99
-
100
-
101
-
102
-
103
-
104
-
105
-
106
-
107
-
108
-
109
-
110
-
111
-
112
-
113
-
114
-
115
-
116
 |
 |