Sony PCV-RX741 Online Help Center (primary manual) - Page 75
To Install Memory, computer. For memory replacement or upgrades
 |
View all Sony PCV-RX741 manuals
Add to My Manuals
Save this manual to your list of manuals |
Page 75 highlights
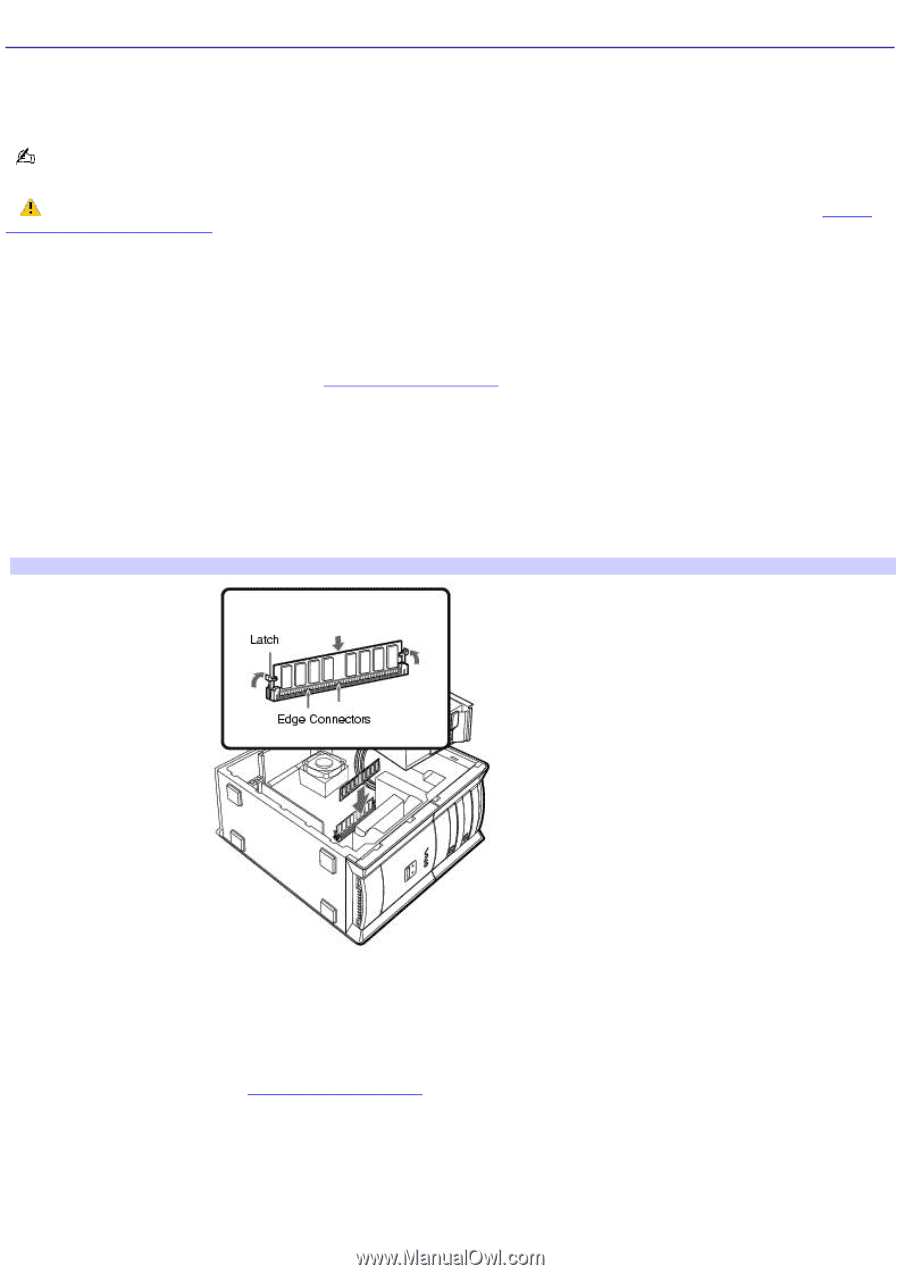
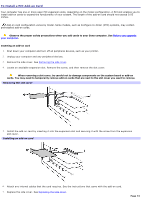
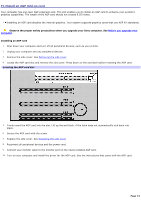
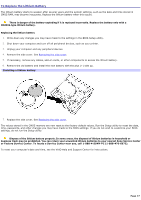
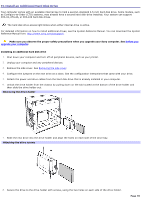
To Install Memory The preinstalled memory configuration may vary, depending on the computer you purchased. Your computer may ship with all available memory slots filled. See the Specifications sheet for details about the amount of memory installed in your computer. For memory replacement or upgrades, use only 3.3V 64-bit PC-133 SDRAM Dual Inline Memory Modules (DIMM). You can purchase additional memory modules, accessories, and peripheral equipment from your local retailer. Observe the proper safety precautions when you add or remove memory in your Sony computer. See Before you upgrade your computer. Removing memory 1. Shut down your computer and turn off all peripheral devices, such as your printer. 2. Unplug your computer and any peripheral devices. 3. Remove the side cover as described in Removing the side cover. 4. Gently place the unit on its side. If necessary, remove any cables, add-on boards, or other components to access the DIMM slots. 5. Locate the DIMM you wish to remove. 6. Push down on the handles located on both sides of the module to eject it from the slot. 7. Grasp one edge of the DIMM module and lift it out. Store the module in a static-free bag. Rem ov ing/Installing m em ory Installing memory 1. Shut down your computer and turn off all peripheral devices, such as your printer. 2. Unplug your computer and any peripheral devices. 3. Remove the side cover. See Removing the side cover. 4. Gently place the unit on its side. If necessary, remove any cables, add-on cards, or other components to access the DIMM slots. Remove the power supply before installing the DIMMS, by following these steps: Remove the screw that secures the power supply unit to the chassis. Pull the tab that releases the power supply from the chassis. Page 75
-
 1
1 -
2
-
3
-
4
-
5
-
6
-
7
-
8
-
9
-
10
-
11
-
12
-
13
-
14
-
15
-
16
-
17
-
18
-
19
-
20
-
21
-
22
-
23
-
24
-
25
-
26
-
27
-
28
-
29
-
30
-
31
-
32
-
33
-
34
-
35
-
36
-
37
-
38
-
39
-
40
-
41
-
42
-
43
-
44
-
45
-
46
-
47
-
48
-
49
-
50
-
51
-
52
-
53
-
54
-
55
-
56
-
57
-
58
-
59
-
60
-
61
-
62
-
63
-
64
-
65
-
66
-
67
-
68
-
69
-
 70
70 -
 71
71 -
 72
72 -
 73
73 -
 74
74 -
 75
75 -
 76
76 -
 77
77 -
 78
78 -
 79
79 -
 80
80
 |
 |