Sony SLV-N900 Operating Instructions - Page 57
Basic Operations, To stop recording
 |
View all Sony SLV-N900 manuals
Add to My Manuals
Save this manual to your list of manuals |
Page 57 highlights
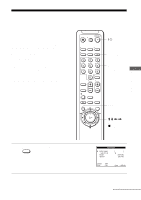
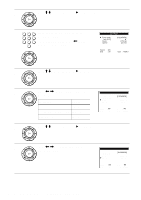
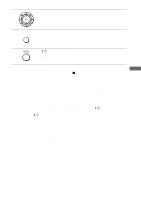
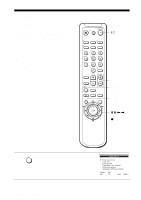
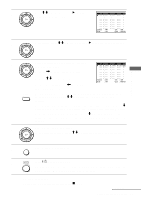
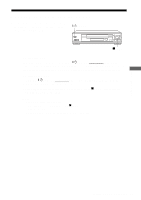
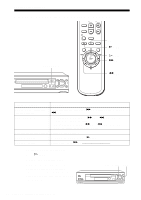
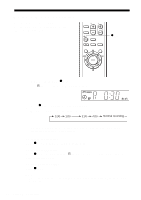
Basic Operations 2 Press M/m to move the cursor (B) to "Timer set/check," then press OK. PLAY CH START STOP DATE SPD OK Select : Bb Set : Vv End : OK Quit : MENU 3 If necessary, press M/m to move the cursor (B) to the row that is to be set. PLAY OK 4 Set the channel number, start and stop time, date, and tape speed: PLAY CH START STOP DATE SPD 3 5 8 : 0 0 PM 9 : 0 0 PM 9 / 3 0 SP OK 1 Press , to flash each item in turn. 2 Press M/m to set each item. Select : Bb Set : Vv End : OK Quit : MENU To correct a setting, press < to return to that setting and reset. INPUT SELECT To record from a source connected to the LINE IN 1 or LINE-2 IN jacks, press INPUT SELECT or M/m to display "L1" or "L2" in the "CH" position. To record the same program every day or the same day every week, press m while the date is flashing. For details, see "Daily/weekly recording" below. To use the Auto Tape Speed function, press m to display "AUTO" in the "SPD" position. For details, see "To use the Auto Tape Speed function" on page 55. 5 Press OK to confirm the setting. PLAY To enter another setting, press M/m to select the next row and repeat step 4. OK 6 MENU Press MENU to exit the menu. 7 Press ?/1 to turn off the VCR. The TIMER indicator appears in the display window and the VCR stands by for recording. When using a cable box, leave it on. To stop recording To stop the VCR while recording, press x STOP. continued Setting the timer manually 57
-
 1
1 -
2
-
3
-
4
-
5
-
6
-
7
-
8
-
9
-
10
-
11
-
12
-
13
-
14
-
15
-
16
-
17
-
18
-
19
-
20
-
21
-
22
-
23
-
24
-
25
-
26
-
27
-
28
-
29
-
30
-
31
-
32
-
33
-
34
-
35
-
36
-
37
-
38
-
39
-
40
-
41
-
42
-
43
-
44
-
45
-
46
-
47
-
48
-
49
-
50
-
51
-
 52
52 -
 53
53 -
 54
54 -
 55
55 -
 56
56 -
 57
57 -
 58
58 -
 59
59 -
 60
60 -
 61
61 -
 62
62 -
63
-
64
-
65
-
66
-
67
-
68
-
69
-
70
-
71
-
72
-
73
-
74
-
75
-
76
-
77
-
78
-
79
-
80
-
81
-
82
-
83
-
84
 |
 |
