Sony STR-DB1070 Service Manual - Page 12
TEST MODE, AM Channel Step 9 kHz/10 kHz Selection Mode - reset
 |
View all Sony STR-DB1070 manuals
Add to My Manuals
Save this manual to your list of manuals |
Page 12 highlights
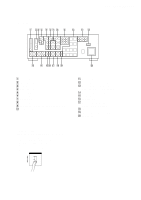
STR-DB870/DB1070 SECTION 4 TEST MODE Factory Set Mode All preset contents are reset to the default setting. Procedure: While pressing the [SET UP] and [DIMMER] buttons, press the I/1 button to turn on the main power. The message "TUNER FACTORY PRESET" appears and the present contents are reset to the default values. All Clear Mode All preset contents are cleared when this mode is activated. Use this mode before returning the product to clients upon completion of repair. Procedure: While pressing the [A.F.D.] and [MODE +] buttons, press the I/1 button to turn on the main power. The message "Memory Cleared" appears and the memories are reset to the default values. Sound Field Clear Mode The preset sound field is cleared when this mode is activated. Use this mode before returning the product to clients upon completion of repair. Procedure: While pressing the [MODE +] button, press the I/1 button to turn on the main power. The message "S.F Initialize" appears and initialization is performed. AM Channel Step 9 kHz/10 kHz Selection Mode (US, Canadian and E Models) Either the 9 kHz step or 10 kHz step can be selected for the AM channel step. Procedure: 1. Set the FUNCTION to AM. Press the I/1 button to turn off the main power. 2. While depressing the [PRESET TUNING +] button, press the I/1 button to turn on the main power. 3. Either the message "AM 9 kHz Step" or "AM 10 kHz Step" appears. Select the desired step. Version Mode When this mode is used, the microprocessor version number is displayed. Procedure: Press three buttons of [SHIFT], [MODE +] and [TUNING --] simultaneously. The microprocessor version number appears. Fluorescent Indicator Tube Test Mode All fluorescent segments are tested. When this test is activated, all segments turn on at the same time, then each segment turns on one after another. Procedure: 1. While pressing, the [A.F.D.] and [DIMMER] buttons, press the I/1 button to turn on the main power. 2. All segments turn on at the same time, then each segment turns on press the [A.F.D.] button. 3. To release from this mode, press the I/1 button or discon- nect the power cord. Demonstration Mode Procedure: While pressing the [SET UP] button simultaneously, press the I/1 button to turn on the main power. The set enters the DEMO mode. Wait a while, then the demonstration starts. If the I/1 button is pressed often the demonstration has started, the power is turned off, and the demonstration resumes if the I/1 button is pressed again. 12
-
 1
1 -
2
-
3
-
4
-
5
-
6
-
 7
7 -
 8
8 -
 9
9 -
 10
10 -
 11
11 -
 12
12 -
 13
13 -
 14
14 -
 15
15 -
 16
16 -
 17
17 -
18
-
19
-
20
-
21
-
22
-
23
-
24
-
25
-
26
-
27
-
28
-
29
-
30
-
31
-
32
-
33
-
34
-
35
-
36
-
37
-
38
-
39
-
40
-
41
-
42
-
43
-
44
-
45
-
46
-
47
-
48
-
49
-
50
-
51
-
52
-
53
-
54
-
55
-
56
-
57
-
58
-
59
-
60
-
61
-
62
-
63
-
64
-
65
-
66
-
67
-
68
-
69
-
70
-
71
-
72
-
73
-
74
-
75
-
76
-
77
-
78
-
79
-
80
-
81
-
82
-
83
-
84
-
85
-
86
 |
 |
