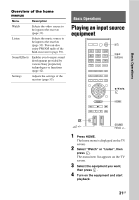
Sony STR-DH540 Operating Instructions - Page 29
To cancel Auto Calibration, Preparing the Receiver - speaker
 |
View all Sony STR-DH540 manuals
Add to My Manuals
Save this manual to your list of manuals |
Page 29 highlights
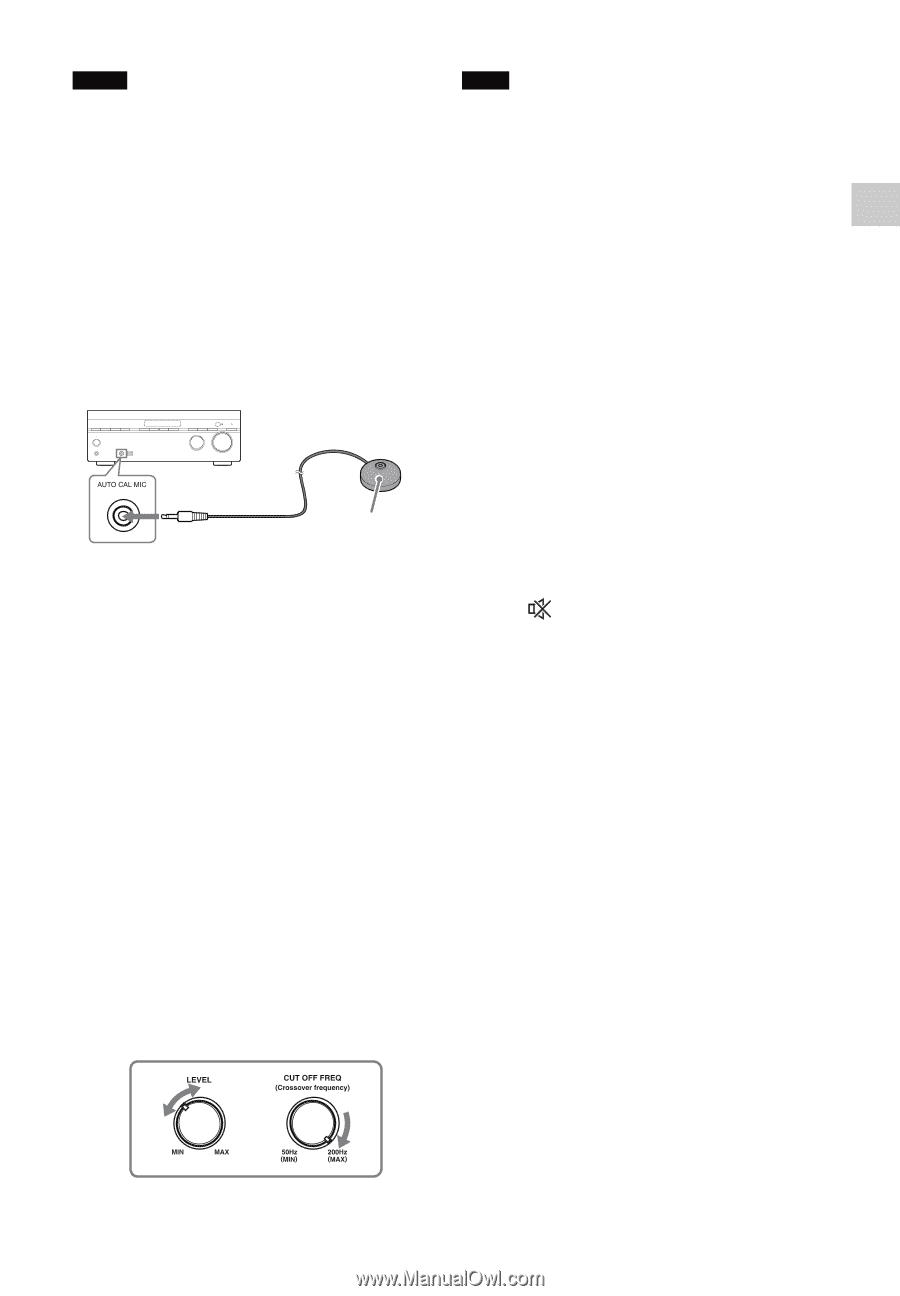
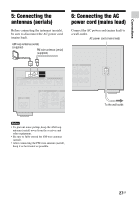
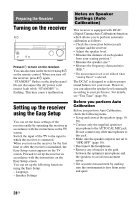
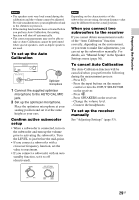
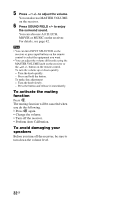
Preparing the Receiver Notes • The speakers emit very loud sound during the calibration and the volume cannot be adjusted. Provide consideration to your neighborhood and to the children in presence. • If the muting function has been activated before you perform Auto Calibration, the muting function will shut off automatically. • The correct measurements may not be able to take or Auto Calibration cannot be performed when special speakers, such as dipole speakers are used. To set up the Auto Calibration Optimizer microphone 1 Connect the supplied optimizer microphone to the AUTO CAL MIC jack. 2 Set up the optimizer microphone. Place the optimizer microphone at your seating position and set it at the same height as your ears. Confirm active subwoofer setup • When a subwoofer is connected, turn on the subwoofer and turn up the volume prior to activating the subwoofer. Turn the LEVEL to just before the mid-point. • If you connect a subwoofer with a crossover frequency function, set the value to maximum. • If you connect a subwoofer with an auto standby function, set it to off (deactivated). Note Depending on the characteristics of the subwoofer you are using, the setup distance value may be different from the actual position. When you connect two subwoofers to the receiver If you cannot obtain measurement results of the "Auto Calibration" function correctly, depending on the environment, or you want to make fine adjustments, you can set up the subwoofers manually. For details, see "Manual Setup" in the Speaker Settings menu (page 56). To cancel Auto Calibration The Auto Calibration function will be canceled when you perform the following during the measurement process: - Press ?/1. - Press the input buttons on the remote control or turn the INPUT SELECTOR on the receiver. - Press . - Press SPEAKERS on the receiver. - Change the volume level. - Connect the headphones. To set up the receiver manually See "Adjusting Settings" (page 53). 29GB
-
 1
1 -
2
-
3
-
4
-
5
-
6
-
7
-
8
-
9
-
10
-
11
-
12
-
13
-
14
-
15
-
16
-
17
-
18
-
19
-
20
-
21
-
22
-
23
-
 24
24 -
 25
25 -
 26
26 -
 27
27 -
 28
28 -
 29
29 -
 30
30 -
 31
31 -
 32
32 -
 33
33 -
 34
34 -
35
-
36
-
37
-
38
-
39
-
40
-
41
-
42
-
43
-
44
-
45
-
46
-
47
-
48
-
49
-
50
-
51
-
52
-
53
-
54
-
55
-
56
-
57
-
58
-
59
-
60
-
61
-
62
-
63
-
64
-
65
-
66
-
67
-
68
-
69
-
70
-
71
-
72
-
73
-
74
-
75
-
76
-
77
-
78
-
79
-
80
 |
 |