Sony STR-DH540 Operating Instructions - Page 58
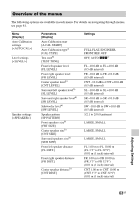
Audio Settings menu, Crossover Freq. Speaker, crossover frequency, Test Tone, Distance Unit - audio video receiver
 |
View all Sony STR-DH540 manuals
Add to My Manuals
Save this manual to your list of manuals |
Page 58 highlights
x Crossover Freq. (Speaker crossover frequency) Lets you set the bass crossover frequency of speakers that the speaker size has been set to "Small" in the Speaker Settings menu. Measured speaker crossover frequency is set for each speaker after the Auto Calibration. 1 Select the parameter under the speaker which you want to adjust the crossover frequency, then press . 2 Adjust the value, then press . x Test Tone Lets you select the test tone type on the "Test Tone" screen. Tips • To adjust the level of all speakers at the same time, press 2 +/-. You can also use MASTER VOLUME on the receiver. • The adjusted value is shown on the TV screen during adjustment. To output test tone from each speaker You can output test tone from the speakers in sequence. 1 Select "Test Tone", then press . 2 Select "Test Tone" again, then press . 3 Adjust the parameter, then press . • Off • Auto: The test tone is output from each speaker in sequence. 4 Select the speaker which you want to adjust the speaker level, then press . 5 Adjust the level of the selected speaker, then press . x Distance Unit Lets you select the unit of measurement for setting distances. • feet: The distance is displayed in feet. • meter: The distance is displayed in meters. Audio Settings menu You can adjust settings for the audio to suit your preference. x Night Mode Lets you retain a theater-like environment at low volume levels. For details, see "Using the Night Mode function" (page 45). x Equalizer Lets you adjust the bass and treble level for front speakers. For details, see "Adjusting the equalizer" (page 45). x Sound Field Lets you select a sound effect applied to input signals. For details, see "Enjoying Sound Effects" (page 42). You can set the function for each input independently. x A/V Sync. (Synchronizes audio with video output) Lets you delay the output of audio to minimize the time gap between audio output and visual display. • On (Delay time: 60 ms): The audio output is delayed so that the time gap between the audio output and visual display is minimized. • Off (Delay time: 0 ms): The audio output is not delayed. Notes • This function is useful when you use a large LCD or plasma monitor or a projector. • This function does not work when "Analog Direct" is being used. • The delay time may vary depending on audio format, sound field, speaker pattern and speaker distance settings. 58GB
-
 1
1 -
2
-
3
-
4
-
5
-
6
-
7
-
8
-
9
-
10
-
11
-
12
-
13
-
14
-
15
-
16
-
17
-
18
-
19
-
20
-
21
-
22
-
23
-
24
-
25
-
26
-
27
-
28
-
29
-
30
-
31
-
32
-
33
-
34
-
35
-
36
-
37
-
38
-
39
-
40
-
41
-
42
-
43
-
44
-
45
-
46
-
47
-
48
-
49
-
50
-
51
-
52
-
 53
53 -
 54
54 -
 55
55 -
 56
56 -
 57
57 -
 58
58 -
 59
59 -
 60
60 -
 61
61 -
 62
62 -
 63
63 -
64
-
65
-
66
-
67
-
68
-
69
-
70
-
71
-
72
-
73
-
74
-
75
-
76
-
77
-
78
-
79
-
80
 |
 |