Sony TCD-D7 Primary User Manual - Page 14
Before, Recording
 |
View all Sony TCD-D7 manuals
Add to My Manuals
Save this manual to your list of manuals |
Page 14 highlights
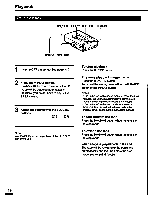
Recording Before Recording Use the following switches according to your needs. MIC SENS Op CS SP/LP REC MODE ♦ SP/LP switch SP: When the recording is to be made in the standard play mode. (The recording quality will be better with this mode.) LP: When the recording is to be made in the long play mode. LP mode The recording time varies with the type of DAT cassette you use. See the chart below. DT-120 DT-90 DT-60 SP mode 2 hours 1.5 hours 1 hour LP mode 4 hours 3 hours 2 hours Notes •a the sampling frequency (see page 20) of the digital input is either 44.1 kHz or 48 kHz while recording via the digital connection, the LP mode recording cannot be made even it you select the LP position with the SP/LP switch. •You cannot play back a tape recorded in the LP mode on another DAT deck which is not equipped with the LP mode function. •lf you play back a tape, whose recording speed has been changed halfway from the SP mode to the LP mode, on a DAT deck which is not equipped with the LP mode function, you may experience some loud noise where the recording speed changes. In such a case, turn down the volume. The tape counter display while the LP mode is used The absolute time (see page 16) and the remaining tape time are based on the SP mode. Therefore, the actual time will be twice the amount of what is being shown on the display window. ♦ MIC SENS switch (for recording with a microphone) H: Normally set the switch to this position. L: When recording relatively loud sound (the built-in 20 dB attenuator will be activated). ♦ REC MODE switch (When another device such as a microphone or a stereo set is connected to either the MIC or the LINE IN jack of the unit.) MANUAL: When adjusting the recording level manually. The recorded sound will become more faithful to the source sound. See page 16 for more details about adjusting the recording level. MUSIC: When recording music.(The adjustment of the recording level will be made automatically.) SPEECH: When recording a meeting or a conference etc. (The adjustment of the recording level will be made automatically.) To confirm the source of input Press the REC button twice while the unit is in the stop mode, or if the unit is in the recording or pause mode, press the REC button once. One of the following indications will come on for approx. one second: lllrf en , t .n, C rin• These indications come on when the source of input has been changed as well. 14
-
 1
1 -
2
-
3
-
4
-
5
-
6
-
7
-
8
-
 9
9 -
 10
10 -
 11
11 -
 12
12 -
 13
13 -
 14
14 -
 15
15 -
 16
16 -
 17
17 -
 18
18 -
 19
19 -
20
-
21
-
22
-
23
-
24
-
25
-
26
-
27
-
28
-
29
-
30
 |
 |
