Sony VPL-FHZ700L Startup Guide - Page 29
Safety precautions for installing the unit on a ceiling, On Installation, For dealers
 |
View all Sony VPL-FHZ700L manuals
Add to My Manuals
Save this manual to your list of manuals |
Page 29 highlights
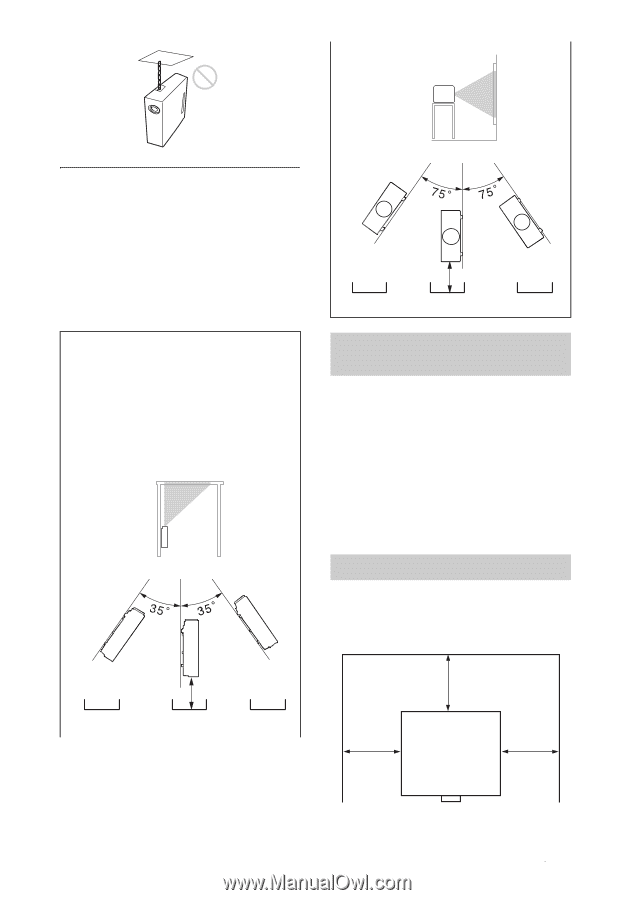
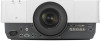
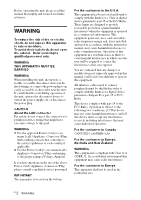
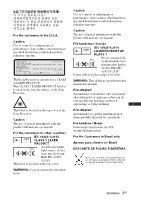
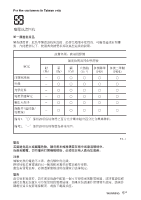
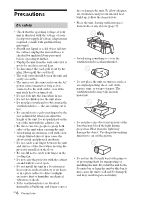
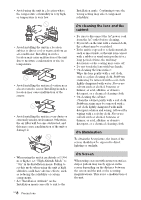
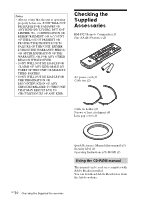
Portrait 2 (The buttons of the unit face down) For dealers • When the projector is mounted on the ceiling, a Sony bracket or recommended equivalent must be used for installation. • Be sure to secure the cabinet cover firmly when installing to the ceiling firmly. • When attaching or removing the lens, be sure to consult with qualified Sony personnel. Caution When installing the unit at the angle illustrated, if the ventilation holes are facing down, install a metal tray (min. 70 cm × 40 cm (27 9/16" × 15 3/4")) at the distance indicated below directly under the ventilation holes. Ensure that foreign materials or liquids do not drop into the ventilation holes. Front Up (Projects upward) From 10 cm (3 15/16") to 50 cm (19 11/16") Metal tray From 30 cm (11 13/16") to 50 cm (19 11/16") Metal tray Safety precautions for installing the unit on a ceiling • Never mount the projector on the ceiling or move it by yourself. Be sure to consult the store where you purchased the projector or a dedicated installer. • When installing the unit on a ceiling, be sure to use a safety wire, etc., to prevent the unit from falling. For the installation, be sure to consult the store where you purchased the projector or a dedicated installer. On Installation • When installing the unit, leave space between any walls, etc. and the unit as illustrated. More than 30 cm (11 13/16") More than 10 cm (3 15/16") More than 30 cm (11 13/16") 7 Precautions GB
-
 1
1 -
2
-
3
-
4
-
5
-
6
-
7
-
8
-
9
-
10
-
11
-
12
-
13
-
14
-
15
-
16
-
17
-
18
-
19
-
20
-
21
-
22
-
23
-
 24
24 -
 25
25 -
 26
26 -
 27
27 -
 28
28 -
 29
29 -
 30
30 -
 31
31 -
 32
32 -
 33
33 -
 34
34 -
35
-
36
-
37
-
38
-
39
-
40
-
41
-
42
-
43
-
44
-
45
-
46
-
47
-
48
-
49
-
50
-
51
-
52
-
53
-
54
-
55
-
56
-
57
-
58
-
59
-
60
-
61
-
62
-
63
-
64
-
65
-
66
-
67
-
68
-
69
-
70
-
71
-
72
-
73
-
74
-
75
-
76
-
77
-
78
-
79
-
80
-
81
-
82
-
83
-
84
-
85
-
86
-
87
-
88
-
89
-
90
-
91
-
92
-
93
-
94
-
95
-
96
-
97
-
98
-
99
-
100
-
101
-
102
-
103
-
104
-
105
-
106
-
107
-
108
-
109
-
110
-
111
-
112
-
113
-
114
-
115
-
116
-
117
-
118
-
119
-
120
-
121
-
122
-
123
-
124
-
125
-
126
-
127
-
128
-
129
-
130
-
131
-
132
-
133
-
134
-
135
-
136
-
137
-
138
-
139
-
140
-
141
-
142
-
143
-
144
-
145
-
146
-
147
 |
 |