Sony WX-4500X Operating Instructions - Page 22
Adjusting the volume of the subwoofer(s), Selecting the spectrum analyzer - diagram
 |
View all Sony WX-4500X manuals
Add to My Manuals
Save this manual to your list of manuals |
Page 22 highlights
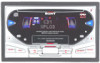
Level Adjusting the volume of the subwoofer(s) 1 Press (SOURCE) to select a source (radio, CD, MD, or tape). 2 Press (SOUND) repeatedly until "Sub" appears. 3 Press (SEEK/AMS -) or (SEEK/AMS +) to adjust the volume. After 3 seconds, the display returns to normal playback mode. Tip The volume level is adjustable from -10 dB to +10 dB. (Below -10 dB, "ATT" is displayed.) Adjusting the cut-off frequency for the subwoofer(s) To match the characteristics of the connected subwoofer(s), you can cut out the unwanted high and middle frequency signals entering the subwoofer(s). By setting the cut-off frequency (see the diagram below), the subwoofer(s) will output only low frequency signals so you can get a clearer sound image. Cut-off frequency off 3 Press (SEEK/AMS -) or (SEEK/AMS +) to select the cut-off frequency. Each time you press (SEEK/AMS), the frequency changes as follows: off (default setting) y 125 Hz y 78 Hz 4 Push the jog roller. After the frequency setting is complete, the display returns to normal playback mode. Selecting the spectrum analyzer The sound signal level is displayed on a spectrum analyzer. You can select a display from 7 patterns (SA 1 to SA 7), or the automatic display mode where all the patterns appear. During playback or radio reception, press (SA) repeatedly to select the desired setting. Each time you press (SA), the item changes. To cancel the Spectrum Analyzer, select "SA off" in step 2. Note When the Motion Display mode is set to "1" or "2," the Spectrum Analyzer does not appear. Frequency (Hz) 1 During playback or radio reception, press (MENU). 2 Rotate the jog roller until "LPF" appears. 22
-
 1
1 -
2
-
3
-
4
-
5
-
6
-
7
-
8
-
9
-
10
-
11
-
12
-
13
-
14
-
15
-
16
-
 17
17 -
 18
18 -
 19
19 -
 20
20 -
 21
21 -
 22
22 -
 23
23 -
 24
24 -
 25
25 -
 26
26 -
 27
27 -
28
-
29
-
30
-
31
-
32
-
33
-
34
-
35
-
36
-
37
-
38
-
39
-
40
-
41
-
42
-
43
-
44
-
45
-
46
-
47
-
48
-
49
-
50
-
51
-
52
-
53
-
54
-
55
-
56
-
57
-
58
-
59
-
60
-
61
-
62
-
63
-
64
-
65
-
66
-
67
-
68
-
69
-
70
-
71
-
72
-
73
-
74
-
75
-
76
-
77
-
78
-
79
-
80
 |
 |
