Stihl MS 180 C-BE Product Instruction Manual
Stihl MS 180 C-BE Manual
 |
View all Stihl MS 180 C-BE manuals
Add to My Manuals
Save this manual to your list of manuals |
Stihl MS 180 C-BE manual content summary:
- Stihl MS 180 C-BE | Product Instruction Manual - Page 1
STIHL MS 170, 180 { Instruction Manual Manual de instrucciones Warning! To reduce the risk of kickback injury use STIHL reduced kickback bar and STIHL PMMC3 (3/8" Picco) or PMC3 (3/8" Picco) chain depending on sprocket pitch or other available low kickback components. Advertencia! Para reducir el - Stihl MS 180 C-BE | Product Instruction Manual - Page 2
Instruction Manual 1 - 57 Manual de instrucciones 59 - 121 - Stihl MS 180 C-BE | Product Instruction Manual - Page 3
Evaporative Emissions Control Warranty Statement Trademarks { MS 170, MS 170 C, MS 180, MS 180 C Allow only persons who fully understand 42 this manual to operate your chain saw. 46 To receive maximum performance and 48 satisfaction from your STIHL chain saw, 50 it is important that you read - Stihl MS 180 C-BE | Product Instruction Manual - Page 4
to time. Therefore, some changes, modifications and improvements may not be covered in this manual. If the operating characteristics or the appearance of your machine differs from those described in this manual, please contact your STIHL dealer for assistance. 2 MS 170, MS 170 C, MS 180, MS 180 C - Stihl MS 180 C-BE | Product Instruction Manual - Page 5
STIHL chain saws. Different models may have English different parts and controls. See the appropriate section of your instruction manual for a description of the controls and the function of the parts of your model. Safe use of a chain saw tunnel syndrome. MS 170, MS 170 C, MS 180, MS 180 C 3 - Stihl MS 180 C-BE | Product Instruction Manual - Page 6
brush or the moving parts of the unit. Secure hair so it is above shoulder level. Good footing is very important. Wear sturdy boots with nonslip soles. Steel-toed safety boots are recommended. Wear an approved safety hard hat to reduce the risk of injury to your head. Chain saw noise may damage your - Stihl MS 180 C-BE | Product Instruction Manual - Page 7
of doubt, have it checked by your STIHL servicing dealer. THE USE OF THE POWER TOOL Transporting the Power Tool Warning! To reduce the risk of injury from saw chain contact, never carry or transport your power tool with the saw chain moving. Always engage the chain brake when taking more than a few - Stihl MS 180 C-BE | Product Instruction Manual - Page 8
it to your authorized STIHL dealer for repair. 001BA227 KN 001BA226 KN 001BA220 KN To do this with this STIHL cap, raise the grip on the top of the cap until it is upright at a 90° angle. Insert the cap in the fuel tank opening with the raised positioning 6 MS 170, MS 170 C, MS 180, MS 180 C - Stihl MS 180 C-BE | Product Instruction Manual - Page 9
Chain" of your instruction manual. STIHL Oilomatic chain, guide bar and sprocket must match each other in gauge and pitch. Before replacing any bar and chain, see the chapter entitled "Specifications" in the instruction manual and the section "Kickback" and the "ANSI B 175.1-2000 chain saw chain saw - Stihl MS 180 C-BE | Product Instruction Manual - Page 10
. With the first recommended method, the chain saw is started on the ground. Make sure the chain brake is engaged (see "Chain Brake" chapter in your instruction manual) and place the chain saw on firm ground or other solid surface in an open area. Maintain good balance and secure footing. Grip the - Stihl MS 180 C-BE | Product Instruction Manual - Page 11
any other part of your body. Warning! To reduce the risk of injury from loss of control, never work on a ladder or any other insecure support. Never chain saw in a cramped environment and have taken proper precautions to avoid injury from falling limbs or branches. MS 170, MS 170 C, MS 180, MS 180 - Stihl MS 180 C-BE | Product Instruction Manual - Page 12
saw when reaching the end of a cut. The pressure may cause the bar and rotating chain good visibility and daylight conditions only. Work carefully. Warning! Your chain saw to cause respiratory problems, cancer, birth a smaller particle size, may cause respiratory MS 170, MS 170 C, MS 180, MS 180 C - Stihl MS 180 C-BE | Product Instruction Manual - Page 13
Instructions chain saw with a damaged or missing chain catcher. Warning! Inspect antivibration elements periodically. Replace saw chain or cause the saw to kickback. Warning! The muffler and other parts serviced and repaired by your STIHL servicing dealer only. MS 170, MS 170 C, MS 180, MS 180 C 11 - Stihl MS 180 C-BE | Product Instruction Manual - Page 14
maintained by a STIHL servicing dealer. Reactive Forces including Kickback Warning! Reactive forces may occur any time the chain is rotating. Reactive forces can cause serious personal injury. Kickback: Kickback may occur when the moving saw chain near the upper quadrant of the bar nose contacts - Stihl MS 180 C-BE | Product Instruction Manual - Page 15
listed as complying in the "Specifications" section of the instruction manual or - other replacement bar and chain combinations marked in accordance with the standard for use on the powerhead or - replacement chain designated "low kickback saw chain." See the section on "Low kickback saw chain - Stihl MS 180 C-BE | Product Instruction Manual - Page 16
entitled "Chain Brake" of your instruction manual. Also make sure that the chain is not turning at idle speed (see above at "Important Adjustments"). Low Kickback Saw Chain and Reduced Kickback Bars STIHL offers a variety of bars and chains. STIHL reduced kickback bars and low kickback chains are - Stihl MS 180 C-BE | Product Instruction Manual - Page 17
, these bars may be less effective in reducing kickback. Warning! For a properly balanced saw and in order to comply with § 5.12.1 of ANSI B 175.1-2000, use only bar lengths listed in the specifications chapter of the instruction manual for your chain saw powerhead. MS 170, MS 170 C, MS 180, MS 180 - Stihl MS 180 C-BE | Product Instruction Manual - Page 18
Pushback 1. Be alert to forces or situations that may cause material to pinch the top of the chain. 2. Do not cut more than one log at a time. 3. Do not twist the saw when withdrawing the bar from a plunge cut or underbuck cut because the chain can pinch. 16 MS 170, MS 170 C, MS 180, MS 180 C - Stihl MS 180 C-BE | Product Instruction Manual - Page 19
should stand on the uphill side if possible. Felling Instructions 1 1/2 1 21/2 When felling, maintain a distance of at least 2 1/2 tree lengths from the nearest person. When felling in the vicinity away from the tree, but not on the escape paths. MS 170, MS 170 C, MS 180, MS 180 C 17 - Stihl MS 180 C-BE | Product Instruction Manual - Page 20
the gunning sight on the shroud and housing to check the desired direction of fall: Position the saw so that the gunning sight points exactly in the direction you want the tree to fall. 001BA153 below at approx. 40 degree angle. N Remove resulting 90° piece. 18 MS 170, MS 170 C, MS 180, MS 180 C - Stihl MS 180 C-BE | Product Instruction Manual - Page 21
sized or larger trees make cuts at both sides of the trunk, at same height as subsequent felling cut. N Cut to no more than width of guide bar bar contacts a wedge, it may cause kickback. Wedges should be of wood or plastic - never steel, which can damage the chain. MS 170, MS 170 C, MS 180, MS 180 - Stihl MS 180 C-BE | Product Instruction Manual - Page 22
the bumper spikes of the chain saw directly behind the location of the intended hinge and pivot the saw around this point only as far as the hinge. The bumper spike rolls against the trunk. Warning! Felling a tree that has a diameter greater than the length of the guide bar requires use of either - Stihl MS 180 C-BE | Product Instruction Manual - Page 23
previously. If you are inexperienced with a chain saw, plunge-cutting should not be attempted. Seek the help of a professional. Warning! In order to reduce the risk of personal injury, never stand directly behind the tree when it is about to fall, since part of the trunk may split and come back - Stihl MS 180 C-BE | Product Instruction Manual - Page 24
STIHL replacement parts for maintenance and repair. Use of non-STIHL parts may cause serious or fatal injury. Strictly follow the maintenance and 2 repair instructions in the appropriate section of your instruction manual or performing maintenance on saw chains. MS 170, MS 170 C, MS 180, MS 180 C - Stihl MS 180 C-BE | Product Instruction Manual - Page 25
pressure washer. The solid jet of water may damage parts of the machine. Store chain saw in a dry place and away from children. Before storing for longer than a few days, always empty the fuel tank (see chapter "Storing the Machine" in the instruction manual). MS 170, MS 170 C, MS 180, MS 180 C 23 - Stihl MS 180 C-BE | Product Instruction Manual - Page 26
Attachment STIHL is the only manufacturer in the industry to produce its own chain saws, guide bars, saw chains and chain sprockets. A cutting attachment consists of the saw chain, guide bar and chain sprocket. The cutting attachment that comes standard is designed to exactly match the chain saw - Stihl MS 180 C-BE | Product Instruction Manual - Page 27
Mounting the tensioning gear 2310BA013 KN N Remove screw (2) 1 3 N Position tensioning gear (1) and guide bar (3) relative to one another 2 2310BA016 KN 2310BA017 KN 1 N Insert and tighten screw (2) 2310BA014 KN N Remove and reverse tensioning gear (1) MS 170, MS 170 C, MS 180, MS 180 C 25 - Stihl MS 180 C-BE | Product Instruction Manual - Page 28
- chain brake is released Fitting the saw chain 3 2 181BA013 KN N Place the saw chain on the chain sprocket (2) N Slide the guide bar over chain sprocket cover, the teeth of the adjusting wheel and the tensioning gear must mesh; if necessary, 2310BA018 KN 26 MS 170, MS 170 C, MS 180, MS 180 - Stihl MS 180 C-BE | Product Instruction Manual - Page 29
wingnut (2) firmly by hand. N Fold down the hinged clip. N Go to "Tensioning the Saw Chain" A new chain has to be retensioned more often than one that has been in use for some time. N Check chain tension frequently - see chapter on "Operating Instructions". MS 170, MS 170 C, MS 180, MS 180 C 27 - Stihl MS 180 C-BE | Product Instruction Manual - Page 30
since it is specially formulated for use in STIHL engines. Do not use BIA or TCW rated (twostroke water cooled) mix oils or other mix oils that state they are for use in both water cooled and air cooled engines (e.g., outboard motors, snowmobiles, chain saws, mopeds, etc.). Take care when handling - Stihl MS 180 C-BE | Product Instruction Manual - Page 31
to ensure proper mixing of the oil with the fuel. Gasoline Oil (STIHL 50:1 or equivalent high-quality oils) US gal. 1 2 1/2 5 to reduce the risk of burns or other personal injury from escaping gas vapor and fumes, remove the fuel filler cap carefully so as to MS 170, MS 170 C, MS 180, MS 180 C 29 - Stihl MS 180 C-BE | Product Instruction Manual - Page 32
be a fault in the oil supply system: Check chain lubrication, clean the oilways, contact your dealer 001BA158 KN for assistance if necessary STIHL recommends that you have servicing and repair work carried out exclusively by an authorized STIHL servicing dealer. MS 170, MS 170 C, MS 180, MS 180 C - Stihl MS 180 C-BE | Product Instruction Manual - Page 33
, chain brake). The chain brake is designed to be activated also by the inertia of the front hand guard if the forces are sufficiently high. The hand guard is accelerated toward the bar nose - even if your left hand is not behind the hand guard, e.g. during a MS 170, MS 170 C, MS 180, MS 180 C 31 - Stihl MS 180 C-BE | Product Instruction Manual - Page 34
Chain brake maintenance The chain brake is subject to normal wear. It is necessary to have it serviced and maintained regularly by trained personnel, such as your STIHL servicing dealer, at the following intervals: Full-time usage: Part the engine was flooded 32 MS 170, MS 170 C, MS 180, MS 180 C - Stihl MS 180 C-BE | Product Instruction Manual - Page 35
not let the starter grip snap back - guide it vertically back into the housing so that the starter rope can rewind properly With a new engine or after a long period of disuse, it may be necessary to pull the starter rope several times - to prime the fuel line. MS 170, MS 170 C, MS 180, MS 180 C 33 - Stihl MS 180 C-BE | Product Instruction Manual - Page 36
not let the starter grip snap back - guide it vertically back into the housing so that the starter rope can rewind properly Starting the chain saw Only versions with decompression valve There must not for approx. one minute) N Hold and start the chain saw 34 MS 170, MS 170 C, MS 180, MS 180 C - Stihl MS 180 C-BE | Product Instruction Manual - Page 37
times with the starter - to clear the combustion chamber N Replace the spark plug - see "Spark plug" N Set the master control lever to warm start n - even if the engine is cold N Restart the engine N Move the master control lever to the stop position 0 MS 170, MS 170 C, MS 180, MS 180 C 35 - Stihl MS 180 C-BE | Product Instruction Manual - Page 38
and begins to sag. The drive links must not come out of the bar groove on the underside of the bar - the chain may otherwise jump off the bar. Retension the chain - see "Tensioning the Saw Chain". The chain contracts as it cools down. If it is not slackened off, it can damage the crankshaft - Stihl MS 180 C-BE | Product Instruction Manual - Page 39
Chain type Picco Rapid Rapid Rapid Pitch Minimum groove depth 3/8" P 0.20" (5.0 mm) 1/4" 0.16" (4.0 mm) 3/8"; 0.325" 0.24" (6.0 mm) 0.404" 0.28" (7.0 mm) If groove depth is less than specified: N Replace the guide bar Install parts in reverse order. MS 170, MS 170 C, MS 180, MS 180 C 37 - Stihl MS 180 C-BE | Product Instruction Manual - Page 40
The carburetor has replace if necessary N Check spark arresting screen - clean or replace it if necessary N Carefully screw the idle speed screw (LD) down counterclockwise (left-hand thread) until it is firmly seated, then 2 turns clockwise (standard setting LD = 2) MS 170, MS 170 C, MS 180, MS 180 - Stihl MS 180 C-BE | Product Instruction Manual - Page 41
saw chain continues to keep rotating in idle even after adjustment, have the chain saw checked by a servicing and unfavorable running conditions (mostly at part throttle etc.) affect the condition nose which may result in trouble in operation. Removing the spark MS 170, MS 170 C, MS 180, MS 180 C 39 - Stihl MS 180 C-BE | Product Instruction Manual - Page 42
- drain fuel tank Chain oil and fuel mixture must be stored in canisters approved for this purpose. N Undo the screws on the fan housing and hand guard respectively N Remove the fan housing N Tension or, if necessary, replace the starter rope or rewind spring 40 MS 170, MS 170 C, MS 180, MS 180 C - Stihl MS 180 C-BE | Product Instruction Manual - Page 43
the carburetor diaphragms sticking together. N Remove the saw chain and guide bar, clean them and spray with corrosion inhibiting oil. N Thoroughly clean the machine - pay special attention to the cylinder fins and air filter. N If you use a biological chain and bar lubricant, e.g. STIHL BioPlus - Stihl MS 180 C-BE | Product Instruction Manual - Page 44
result, STIHL recommends STIHL servicing dealers. Compliance with the angles and dimensions listed below is absolutely necessary. An improperly sharpened saw chain - especially depth gauges that are too low - can lead to increased kickback tendency of the chain saw - risk of injury! Chain pitch - Stihl MS 180 C-BE | Product Instruction Manual - Page 45
KN N Guide the file: horizontally (at a right angle to the side surface of the guide bar) in accordance with the specified angle - according to the The depth gauge determines the depth to which the cutter penetrates the wood and thus the chip thickness. MS 170, MS 170 C, MS 180, MS 180 C 43 - Stihl MS 180 C-BE | Product Instruction Manual - Page 46
, dress the leading edge of the depth gauge parallel to the service mark (see arrow) - when doing this, be careful not to further lower the highest point of the depth gauge Depth gauges that are too low increase the kickback tendency of the chain saw. 44 MS 170, MS 170 C, MS 180, MS 180 C - Stihl MS 180 C-BE | Product Instruction Manual - Page 47
taper square file and file gauge Taper square file Sharpening set1) Part number Part number 0814 252 3356 - - - 0814 252 3356 5605 007 1027 0814 252 3356 5605 007 1027 0814 252 3356 5605 007 1028 0814 252 3356 5605 007 1029 0814 252 3356 5605 007 1030 MS 170, MS 170 C, MS 180, MS 180 C 45 - Stihl MS 180 C-BE | Product Instruction Manual - Page 48
saw problem Guide bar Clean and turn over Deburr Replace Chain sprocket Check Air filter Clean Replace Anti-vibration elements Check Have replaced by dealer1) 46 X X X X X X X X X X X X XX X X X X X X X X X X X XX X X X X X X X MS 170, MS 170 C, MS 180, MS 180 - Stihl MS 180 C-BE | Product Instruction Manual - Page 49
, replace if necessary1) Check X Chain catcher Replace Safety labels Replace 1) STIHL recommends a STIHL servicing dealer. 2) Firmly tighten down the cylinder base screws of professional saws (3.4 kW or more) after 10 to 20 hours of operation. X X X X X X X MS 170, MS 170 C, MS 180, MS 180 - Stihl MS 180 C-BE | Product Instruction Manual - Page 50
10 9 11 8 16 15 14 # 17 18 19 23 20 24 22 21 25 1 Shroud Lock 2 Carburetor Adjusting Screw 3 Decompression Valve1) (Automatically Resetting) 4 Chain Brake 5 Muffler with Spark Arresting Screen 6 Chain Sprocket 7 Chain Sprocket Cover 8 Chain Catcher 9 Front Chain Tensioner1) 10 Guide Bar 11 - Stihl MS 180 C-BE | Product Instruction Manual - Page 51
Catcher Helps to reduce the risk of operator contact by a chain when it breaks or comes off the bar. 9 Front Chain Tensioner Permits precise adjustment of chain tension. 10 Guide Bar Supports and guides the saw chain. 11 Oilomatic Saw Chain A loop consisting of cutters, tie straps and drive links - Stihl MS 180 C-BE | Product Instruction Manual - Page 52
lengths: 12, 14, 16 in. (30, 35, 40 cm) Pitch: 3/8" P (9.32 mm) Groove width: 0.043 in. (1.1 mm) 3/8" Picco chain Low kickback STIHL saw chain (with green label) Picco Micro Mini Comfort 3 (61 PMMC3) Pitch: 3/8" P (9.32 mm) Drive link gauge: 0.043 in. (1.1 mm) 50 MS 170, MS 170 C, MS 180 - Stihl MS 180 C-BE | Product Instruction Manual - Page 53
lengths: 12, 14, 16 in. (30, 35, 40 cm) Pitch: 3/8" P (9.32 mm) Groove width: 0.050 in. (1.3 mm) 3/8" Picco chain Low kickback STIHL saw chain (with green label) Picco Micro Comfort 3 (63 PMC3) Pitch: 3/8" P (9.32 mm) Drive link gauge: 0.050 in. (1.3 mm) MS 170, MS 170 C, MS 180, MS 180 - Stihl MS 180 C-BE | Product Instruction Manual - Page 54
quote the saw model, the part numbers and names of the parts. Model Serial number Guide bar part number Maintenance and Repairs Users of this unit should carry out only the maintenance operations described in this manual. Other repair work may be performed only by authorized STIHL service shops - Stihl MS 180 C-BE | Product Instruction Manual - Page 55
emission-related part on your engine is defective, the part will be replaced by STIHL Incorporated at no cost to the owner. Any warranted part which is not scheduled for replacement as required maintenance, or which is scheduled only for regular inspection to MS 170, MS 170 C, MS 180, MS 180 C 53 - Stihl MS 180 C-BE | Product Instruction Manual - Page 56
/or durability, and alterations or modifications not recommended or approved in writing by STIHL Incorporated, and N replacement of parts and other services and adjustments necessary for required maintenance at and after the first scheduled replacement point. 54 MS 170, MS 170 C, MS 180, MS 180 C - Stihl MS 180 C-BE | Product Instruction Manual - Page 57
part on your equipment is defective, the part will be repaired or replaced by STIHL Incorporated free of charge. Owner's Warranty Responsibilities As the small off-road equipment engine owner, you are responsible for performance of the required maintenance listed in your instruction manual. STIHL - Stihl MS 180 C-BE | Product Instruction Manual - Page 58
shall remedy warranty defects at any authorized STIHL servicing dealer or warranty station. Any such work shall be free of charge to the owner if it is determined that a warranted part is defective. Any manufacturer approved or equivalent replacement part may be used for any warranty maintenance - Stihl MS 180 C-BE | Product Instruction Manual - Page 59
™ STIHL RAPID™ STIHL SuperCut™ STIHL Territory™ TapAction™ TrimCut™ This listing of trademarks is subject to change. Any unauthorized use of these trademarks without the express written consent of ANDREAS STIHL AG & Co. KG, Waiblingen is strictly prohibited. MS 170, MS 170 C, MS 180, MS 180 C 57 - Stihl MS 180 C-BE | Product Instruction Manual - Page 60
English 58 MS 170, MS 170 C, MS 180, MS 180 C - Stihl MS 180 C-BE | Product Instruction Manual - Page 61
es reciclable. Impreso en papel libre de cloro. Acerca de este manual de instrucciones 60 Medidas de seguridad y técnicas de manejo 61 Accesorio inadecuado puede causar lesiones graves e incluso mortales. MS 170, MS 170 C, MS 180, MS 180 C 59 © ANDREAS STIHL AG & Co. KG, 2011 0458-207-8621 - Stihl MS 180 C-BE | Product Instruction Manual - Page 62
del freno de la cadena STIHL Quickstop Sentido de rotación de manual. Si las características de funcionamiento o la apariencia de su máquina difieren de las descritas en este manual, comuníquese con el concesionario STIHL para obtener la ayuda que requiera. 60 MS 170, MS 170 C, MS 180, MS 180 - Stihl MS 180 C-BE | Product Instruction Manual - Page 63
afilados. Si los cortadores entran en contacto con alguna parte del cuerpo del operador, le causarán una herida, seguridad y avisos contenidos en este manual se refieren al uso de todas las motosierras de STIHL. Los distintos modelos pueden contar fatigado. MS 170, MS 170 C, MS 180, MS 180 C 61 - Stihl MS 180 C-BE | Product Instruction Manual - Page 64
del síndrome del túnel carpiano, sírvase notar lo siguiente: - La mayor parte de las herramientas motorizadas de STIHL se ofrecen con un sistema antivibración ("AV") cuyo propósito es reducir la transmisi el operador debe usar el equipo protector adecuado. 62 MS 170, MS 170 C, MS 180, MS 180 C - Stihl MS 180 C-BE | Product Instruction Manual - Page 65
87.1 (o la norma nacional correspondiente). Para reducir el riesgo de lesionarse la cara, STIHL recomienda usar también una careta o protector facial adecuado sobre las gafas o anteojos de de dudas, pida que el concesionario de servicio de STIHL la revise. MS 170, MS 170 C, MS 180, MS 180 C 63 - Stihl MS 180 C-BE | Product Instruction Manual - Page 66
detrás de usted. Combustible La herramienta motorizada STIHL utiliza una mezcla de aceite-gasolina como combustible (vea el capítulo "Combustible" en el manual del propietario). Advertencia! La gasolina es un tapa de llenado difiere con los distintos modelos. 64 MS 170, MS 170 C, MS 180, MS 180 C - Stihl MS 180 C-BE | Product Instruction Manual - Page 67
apriétela en la boca de llenado del tanque. Para hacer esto con esta tapa STIHL, levante la empuñadura en la parte superior de la tapa hasta dejarla vertical a un ángulo de 90°. Inserte la tapa ía estar averiada o rota; ponga la máquina fuera de servicio de MS 170, MS 170 C, MS 180, MS 180 C 65 - Stihl MS 180 C-BE | Product Instruction Manual - Page 68
en el capítulo "Montaje de la espada y la cadena" del manual de instrucciones. La cadena Oilomatic, la espada y la rueda dentada STIHL deben coincidir entre sí en cuanto a calibre y paso. Antes de cambiar específicas de arranque, vea la sección correspondiente del MS 170, MS 170 C, MS 180, MS 180 C - Stihl MS 180 C-BE | Product Instruction Manual - Page 69
que el freno de la cadena esté aplicado (vea el capítulo "Freno de la cadena" en el manual de instrucciones) y apoye la motosierra sobre terreno firme u otra superficie sólida en un lugar abierto. Mantenga o los dedos y también dañar el mecanismo de arranque. MS 170, MS 170 C, MS 180, MS 180 C 67 - Stihl MS 180 C-BE | Product Instruction Manual - Page 70
correspondiente del manual de instrucciones. Si no puede regular correctamente el ralentí, pida a su concesionario STIHL que revise corte. No toque nunca con las manos ni con cualquier parte del cuerpo una herramienta de corte en movimiento. Advertencia! y 68 MS 170, MS 170 C, MS 180, MS 180 C - Stihl MS 180 C-BE | Product Instruction Manual - Page 71
de trabajo para obtener ventilación adecuada antes de proceder y/o tome descansos frecuentes para permitir la disipación de los gases antes de que se puedan concentrarse. MS 170, MS 170 C, MS 180, MS 180 C 69 - Stihl MS 180 C-BE | Product Instruction Manual - Page 72
inhalación repetida o de grandes cantidades de polvo u otros contaminantes del aire, especialmente los de partículas pequeñas puede causar enfermedades respiratorias o de otro tipo. Esto incluye el polvo, especialmente de la cadena está dañado o se ha perdido. 70 MS 170, MS 170 C, MS 180, MS 180 C - Stihl MS 180 C-BE | Product Instruction Manual - Page 73
duda acerca de la sustitución de los elementos antivibración, consulte a su concesionario de servicio STIHL. Advertencia! La motosierra no está diseñada para ser utilizada como palanca o pala o sobre otros materiales combustibles mientras todavía está caliente. MS 170, MS 170 C, MS 180, MS 180 C 71 - Stihl MS 180 C-BE | Product Instruction Manual - Page 74
para reducir el riesgo de incendio debido a la emisión de partículas calientes. Debido al calor de la reacción catalítica, estas haga reparar el silenciador por un concesionario de servicio STIHL. Fuerzas reactivas, incluido el contragolpe Advertencia! Las fuerzas MS 170, MS 170 C, MS 180, MS 180 C - Stihl MS 180 C-BE | Product Instruction Manual - Page 75
de espadas y cadenas que aparecen en la sección "Especificaciones" del manual de instrucciones u - otras combinaciones de espadas y cadenas de repuesto marcadas de servicio de STIHL en su localidad. No use la sierra hasta haber corregido la avería. MS 170, MS 170 C, MS 180, MS 180 C 73 - Stihl MS 180 C-BE | Product Instruction Manual - Page 76
otras partes del cadena" del manual de instrucciones. STIHL desarrolló un sistema de codificación por color para ayudar a identificar las espadas de contragolpe reducido y las cadenas de bajo contragolpe. Los accesorios de corte con etiquetas de aviso verdes o 74 MS 170, MS 170 C, MS 180, MS 180 - Stihl MS 180 C-BE | Product Instruction Manual - Page 77
etiqueta verde, cadenas de bajo contragolpe con etiqueta verde y un freno rápido de cadena Quickstop STIHL, tanto para los usuarios con experiencia como para aquéllos que carezcan de ella en la de un contragolpe. Siempre corte con una cadena bien afilada. MS 170, MS 170 C, MS 180, MS 180 C 75 - Stihl MS 180 C-BE | Product Instruction Manual - Page 78
en el capítulo de especificaciones del manual de instrucciones para el motor de su en ninguna de las motosierras de STIHL. Toda motosierra equipada con una gu El tirón ocurre cuando la cadena en la parte inferior de la espada se detiene repentinamente cuando queda MS 170, MS 170 C, MS 180, MS 180 C - Stihl MS 180 C-BE | Product Instruction Manual - Page 79
el rechazo 1. Esté alerta a las fuerzas o situaciones que pueden permitir que el material aprisione la parte superior de la cadena. 2. No corte más de un tronco a la vez. 3. No tuerza la la policía, empresas de servicios públicos o autoridades del ferrocarril. MS 170, MS 170 C, MS 180, MS 180 C 77 - Stihl MS 180 C-BE | Product Instruction Manual - Page 80
, despeje todas las ramas y matorrales de la base del árbol y lugar de trabajo y limpie la parte inferior con un hacha. Después, establezca dos rutas de escape (B) y retire todos los obstáculos. Estas corte horizontal. N Quite el pedazo de 45° resultante. 78 MS 170, MS 170 C, MS 180, MS 180 C - Stihl MS 180 C-BE | Product Instruction Manual - Page 81
cuña, puede producirse un contragolpe. Las cuñas deben ser de madera o de plástico, pero jamás de acero porque se dañaría la cadena. MS 170, MS 170 C, MS 180, MS 180 C 79 - Stihl MS 180 C-BE | Product Instruction Manual - Page 82
todo de corte por secciones Para el método de corte por secciones haga la primera parte del corte de tala moviendo la espada en abanico hacia el eje de inclinación. Después, usando la púa de tope como pivote, cambie de posición la sierra para el próximo corte. 80 MS 170, MS 170 C, MS 180, MS 180 C - Stihl MS 180 C-BE | Product Instruction Manual - Page 83
. El corte por penetración se hace con la punta de la espada. Comience el corte aplicando la parte inferior de la punta de la espada contra el árbol en un ángulo. Corte hasta que la profundidad evite tocar el tronco o las ramas con la punta de la espada. MS 170, MS 170 C, MS 180, MS 180 C 81 - Stihl MS 180 C-BE | Product Instruction Manual - Page 84
vez. La madera astillada deberá cortarse con mucho cuidado. Las astillas afiladas pueden atraparse y salir lanzadas hacia 2 el operador. 1 001BA152 KN Troncos bajo tensión: 82 MS 170, MS 170 C, MS 180, MS 180 C - Stihl MS 180 C-BE | Product Instruction Manual - Page 85
que no esté descrito en su manual de instrucciones. Este tipo de trabajo debe ser realizado únicamente por el concesionario de servicio de STIHL. Por ejemplo, si se utilizan herramientas espada y el piñón; sustituya las ruedas o cadenas desgastadas. Mantenga MS 170, MS 170 C, MS 180, MS 180 C 83 - Stihl MS 180 C-BE | Product Instruction Manual - Page 86
tanque de combustible (vea el capítulo "Almacenamiento de la máquina" en el manual de instrucciones). Accesorio de corte STIHL es el único fabricante en la industria que produce sus propios motosierras, espadas, cadenas de poco tiempo de uso. 001BA191 KN 84 MS 170, MS 170 C, MS 180, MS 180 C - Stihl MS 180 C-BE | Product Instruction Manual - Page 87
143BA003 KN N Coloque la espada sobre los espárragos (1) - los bordes de corte en la parte superior de la espada deben quedar apuntando hacia la derecha. N Enganche la espiga del tensor deslizante en dedos. N Pase al capítulo "Tensado de la cadena de aserrado" MS 170, MS 170 C, MS 180, MS 180 C 85 - Stihl MS 180 C-BE | Product Instruction Manual - Page 88
2310BA017 KN 2310BA014 KN N Inserte y apriete el tornillo (2) 1 N Retire e invierta el engranaje tensor (1). 86 1 Póngase guantes protectores - ¡riesgo de lesiones causadas por las cortadoras afiladas! MS 170, MS 170 C, MS 180, MS 180 C 181BA012 KN - Stihl MS 180 C-BE | Product Instruction Manual - Page 89
KN Al colocar la cubierta del piñón de la cadena, los dientes de la rueda de ajuste y el engranaje tensor deben engranar; de ser necesario, MS 170, MS 170 C, MS 180, MS 180 C 87 - Stihl MS 180 C-BE | Product Instruction Manual - Page 90
que las que han estado en uso por algún tiempo. N Revise la tensión de la cadena frecuentemente - vea el capítulo "Instrucciones de manejo". 88 MS 170, MS 170 C, MS 180, MS 180 C - Stihl MS 180 C-BE | Product Instruction Manual - Page 91
evita si siempre se utiliza combustible con un mismo contenido de etanol.. Use solamente el aceite STIHL para motores de dos tiempos o un aceite de marca equivalente para motores de dos tiempos mano para asegurar que se mezclen bien el aceite y la gasolina. MS 170, MS 170 C, MS 180, MS 180 C 89 - Stihl MS 180 C-BE | Product Instruction Manual - Page 92
español / EE.UU Gasolina Aceite (STIHL 50:1 ó aceite de alta calidad equivalente) Llenado de combustible gal EE.UU. 1 2 1/2 5 oz fl EE.UU. 2,6 6,4 de la manguera. No retuerza la manguera de combustible - no utilice herramientas afiladas ni puntiagudas. 90 MS 170, MS 170 C, MS 180, MS 180 C - Stihl MS 180 C-BE | Product Instruction Manual - Page 93
el medio ambiente, diseñado para uso con cadenas y espadas. Se recomienda el aceite STIHL Bioplus, el cual es rápidamente biodegradable. El aceite de cadena biodegradable debe ser resistente llene en exceso el tanque. N Cierre la tapa de llenado. 001BA158 KN MS 170, MS 170 C, MS 180, MS 180 C 91 - Stihl MS 180 C-BE | Product Instruction Manual - Page 94
de aceite y comuníquese con el concesionario para obtener ayuda. STIHL recomienda que un concesionario STIHL autorizado efectúe los trabajos de mantenimiento y reparación. Revisión de lubricaci activa por inercia en ciertas situaciones de contragolpe. 92 MS 170, MS 170 C, MS 180, MS 180 C - Stihl MS 180 C-BE | Product Instruction Manual - Page 95
a desgaste normal. Es necesario hacerlo revisar en un lugar con personal competente, como el concesionario STIHL, cada vez que se cumplan los siguientes intervalos: Uso continuo: Uso a tiempo parcial: Uso l - esta posición se usa para arrancar el motor frío MS 170, MS 170 C, MS 180, MS 180 C 93 - Stihl MS 180 C-BE | Product Instruction Manual - Page 96
firmemente contra el suelo - el pulgar debe quedar agarrando la barra de empuñadura N Coloque el pie derecho a través del mango trasero 143BA018 KN 94 MS 170, MS 170 C, MS 180, MS 180 C - Stihl MS 180 C-BE | Product Instruction Manual - Page 97
modo que la cuerda de arranque se enrolle debidamente. Arranque de la motosierra Asegúrese que no haya nadie dentro del alcance de la motosierra. MS 170, MS 170 C, MS 180, MS 180 C 95 - Stihl MS 180 C-BE | Product Instruction Manual - Page 98
el bloqueo (2) y oprima levemente el gatillo de aceleración (4); la palanca de control maestro (3) salta a la posición de marcha F y el motor funciona a ralentí 207BA007 KN 96 MS 170, MS 170 C, MS 180, MS 180 C - Stihl MS 180 C-BE | Product Instruction Manual - Page 99
á rápidamente el bloque de motor y el mando de la cadena (embrague, freno de la cadena). N Mueva la palanca de control maestro a la posición de parada 0 MS 170, MS 170 C, MS 180, MS 180 C 97 - Stihl MS 180 C-BE | Product Instruction Manual - Page 100
por un período prolongado. Cadena fría La tensión es correcta cuando la cadena encaja ajustadamente contra la parte inferior de la espada pero todavía puede ser tirada a lo largo de la espada con la mano. ), en la zona utilizada para la mayoría de los cortes. 98 MS 170, MS 170 C, MS 180, MS 180 C - Stihl MS 180 C-BE | Product Instruction Manual - Page 101
nima de ranura 3/8 pulg P 5,0 mm (0,20 pulg) 1/4" 4,0 mm (0,16 pulg) 3/8"; 0.325" 6,0 mm (0,24 pulg) 0.404" 7,0 mm De lo contrario las pestañas de los eslabones impulsores rasparán la parte inferior de la ranura - los cortadores y las amarras no viajarán MS 170, MS 170 C, MS 180, MS 180 C 99 - Stihl MS 180 C-BE | Product Instruction Manual - Page 102
úyalo de ser necesario N Gire cuidadosamente el tornillo de ajuste de marcha en vacío (LD) en sentido contrahorario para meterlo (roscas izquierdas) hasta que esté MS 170, MS 170 C, MS 180, MS 180 C - Stihl MS 180 C-BE | Product Instruction Manual - Page 103
palanca de control maestro en la posición de arranque en frío l N Retire la envuelta - vea "Envuelta" N Quite el casquillo de la bujía N Destornille la bujía MS 170, MS 170 C, MS 180, MS 180 C 101 - Stihl MS 180 C-BE | Product Instruction Manual - Page 104
! Para reducir el riesgo de incendio y de quemaduras, utilice solamente las bujías autorizadas por STIHL. Siempre empuje el casquillo (1) de la bujía firmemente en el borne (2) del tamaño adecuado debe almacenarse en envases aprobados para este fin. 102 MS 170, MS 170 C, MS 180, MS 180 C - Stihl MS 180 C-BE | Product Instruction Manual - Page 105
se usa lubricante biodegradable para cadenas y espadas, tal como STIHL BioPlus, llene completamente el tanque de aceite de la cadena. STIHL recomienda el uso de piñones originales de STIHL para asegurar el funcionamiento correcto del freno de la cadena. 143BA042 KN MS 170, MS 170 C, MS 180, MS 180 - Stihl MS 180 C-BE | Product Instruction Manual - Page 106
ñón de cadena N Limpie la caja de cojinetes de aguja y la punta del cigüeñal y lubrique con grasa STIHL (accesorio especial). N Empuje la caja de cojinetes de aguja sobre el cigüeñal. N Después de instalar el los ángulos de los cortadores durante el afilado. 104 MS 170, MS 170 C, MS 180, MS 180 C - Stihl MS 180 C-BE | Product Instruction Manual - Page 107
limpiar las ranuras y agujeros de aceite. Afilado correcto B A Angulo de afilado Las cadenas de aserrado STIHL se afilan con un ángulo de 30°. Las cadenas desgarradoras, que se afilan con un ángulo la lima usualmente son suficientes para un afilado sencillo MS 170, MS 170 C, MS 180, MS 180 C 105 - Stihl MS 180 C-BE | Product Instruction Manual - Page 108
calibrador de profundidad sobresale más allá del calibrador de afilado, será necesario modificar el calibrador de profundidad Cadenas de aserrado con eslabón impulsor con saliente (2) - la parte superior del eslabón impulsor con 689BA061 KN 106 MS 170, MS 170 C, MS 180, MS 180 C - Stihl MS 180 C-BE | Product Instruction Manual - Page 109
afilado, limpie la cadena de aserrado completamente, quitándole las partículas metálicas y el polvo - lubrique la cadena de 4327 1110 893 4000 0814 252 3356 5605 007 1027 0,325 (8,25) 4,8 (3/16) 5605 772 4806 5605 750 4328 1110 893 4000 0814 252 3356 5605 007 MS 170, MS 170 C, MS 180, MS 180 C 107 - Stihl MS 180 C-BE | Product Instruction Manual - Page 110
cadena Afilar Revisar (desgaste, daño) Espada Limpiar e invertir Quitar las rebabas Reemplazar Piñón de la cadena Revisar Filtro de aire Limpiar Reemplazar X X X X X X X X X X X X XX X X X X X X X X X X X XX X X X X 108 MS 170, MS 170 C, MS 180, MS 180 C - Stihl MS 180 C-BE | Product Instruction Manual - Page 111
X Etiquetas de seguridad Reemplazar X 1) STIHL recomienda acudir a un concesionario STIHL para servicio. 2) Apriete firmemente los tornillos de la base del cilindro de sierras profesionales (3,4 kW o más) después de 10 a 20 horas de funcionamiento. MS 170, MS 170 C, MS 180, MS 180 C 109 - Stihl MS 180 C-BE | Product Instruction Manual - Page 112
de la cadena1) 13 Manija de tuerca mariposa para tensor rápido de cadena1) 14 Tapa de llenado de aceite 15 Púa de tope 16 Protector delantero de la mano 17 Mango delantero (manillar) 18 Casquillo de buj Número de serie 207BA003 KN 1) Dependiendo del modelo 110 MS 170, MS 170 C, MS 180, MS 180 C - Stihl MS 180 C-BE | Product Instruction Manual - Page 113
la cadena con la rueda de ajuste. 14 Tapa de llenado de aceite Para tapar retener firmemente la sierra contra la madera. 16 Protector delantero de la mano Protege contra adura para la mano izquierda ubicada en la parte delantera de la sierra. 18 Casquillo de buj MS 170, MS 170 C, MS 180, MS 180 C 111 - Stihl MS 180 C-BE | Product Instruction Manual - Page 114
Moderate = 50 horas Motor Motor STIHL de un cilindro, dos tiempos MS 170 Cilindrada: Diámetro: Carrera: Potencia del motor según ISO 7293: Marcha en vacío: 30,1 cm3 (1,84 pulg cúb.) 37 mm (1,45 pulg) 28 mm (1,1 pulg) 1,3 kW (1.7 hp) a 8500 rpm 2800 rpm MS 180 C Cilindrada: Diámetro: Carrera - Stihl MS 180 C-BE | Product Instruction Manual - Page 115
175.12000. Comuníquese con su concesionario STIHL para obtener las recomendaciones más recientes acerca de nuevas combinaciones de espada/cadena desarrolladas después de la publicación de este manual. español / EE.UU Accesorio de corte (MS 180 C) Los accesorios de corte recomendados de conformidad - Stihl MS 180 C-BE | Product Instruction Manual - Page 116
espada/cadena desarrolladas después de la publicación de este manual. Accesorios especiales Comuníquese con su concesionario STIHL para información acerca de accesorios especiales que pueden estar disponibles ímetros en una lengüeta y en pulgadas en la otra. 114 MS 170, MS 170 C, MS 180, MS 180 C - Stihl MS 180 C-BE | Product Instruction Manual - Page 117
este manual, STIHL Incorporated debe garantizar el sistema de control de emisiones en el motor pequeño para uso fuera de carretera por el intervalo mencionado más arriba, siempre que dicho motor no haya estado sujeto a maltrato, negligencia o cuidado inapropiado. MS 170, MS 170 C, MS 180, MS 180 - Stihl MS 180 C-BE | Product Instruction Manual - Page 118
usted tiene la responsabilidad de realizar el mantenimiento requerido descrito en su manual de instrucciones. STIHL Incorporated le recomienda guardar todos los recibos comprobantes de los trabajos de reclama garantía para un componente y se comprueba que la 116 MS 170, MS 170 C, MS 180, MS 180 C - Stihl MS 180 C-BE | Product Instruction Manual - Page 119
, y las alteraciones o modificaciones no recomendadas o aprobadas por escrito por STIHL Incorporated, y N la sustitución de piezas y otros servicios y ajustes necesarios para el mantenimiento requerido en y después del primer punto de reemplazo programado. MS 170, MS 170 C, MS 180, MS 180 C 117 - Stihl MS 180 C-BE | Product Instruction Manual - Page 120
mantenimiento requerido descrito en su manual de instrucciones. STIHL Incorporated le recomienda guardar todos STIHL Incorporated garantiza al comprador inicial y a cada comprador subsiguiente que el motor está libre de defectos en el material y fabricación que 118 MS 170, MS 170 C, MS 180, MS 180 - Stihl MS 180 C-BE | Product Instruction Manual - Page 121
abajo) debe garantizarse por el período de garantía definido en la subsección COBERTURA POR STIHL INCORPORATED, vea más arriba. Si uno de estos componentes falla durante el período de garant o la reparación de los componentes relacionados con el MS 170, MS 170 C, MS 180, MS 180 C 119 - Stihl MS 180 C-BE | Product Instruction Manual - Page 122
meros de registro EE.UU. 2,821,860; 3,010,057, 3,010,058, 3,400,477; y 3,400,476) 4-MIX® AUTOCUT® EASYSTART® FARM BOSS® iCademy® OILOMATIC® STIHL Cutquik® STIHL DUROMATIC® STIHL Quickstop® STIHL ROLLOMATIC® STIHL WOOD BOSS® TIMBERSPORTS® WOOD BOSS® YARD BOSS® 120 MS 170, MS 170 C, MS 180, MS 180 C - Stihl MS 180 C-BE | Product Instruction Manual - Page 123
™ Esta lista de marcas comerciales está sujeta a cambios. Queda terminantemente prohibido todo uso de estas marcas comerciales sin el consentimiento expreso por escrito de ANDREAS STIHL AG & Co. KG, Waiblingen. MS 170, MS 170 C, MS 180, MS 180 C español / EE.UU 121 - Stihl MS 180 C-BE | Product Instruction Manual - Page 124
known to the State of California to cause cancer, birth defects or other reproductive harm. 0458-207-8621-A englisch / spanisch USA U www.stihl.com ! ADVERTENCIA! El gas de escape del motor de esta máquina contiene productos químicos que en el estado de California son considerados como causantes de
-
 1
1 -
 2
2 -
 3
3 -
 4
4 -
 5
5 -
 6
6 -
 7
7 -
8
-
9
-
10
-
11
-
12
-
13
-
14
-
15
-
16
-
17
-
18
-
19
-
20
-
21
-
22
-
23
-
24
-
25
-
26
-
27
-
28
-
29
-
30
-
31
-
32
-
33
-
34
-
35
-
36
-
37
-
38
-
39
-
40
-
41
-
42
-
43
-
44
-
45
-
46
-
47
-
48
-
49
-
50
-
51
-
52
-
53
-
54
-
55
-
56
-
57
-
58
-
59
-
60
-
61
-
62
-
63
-
64
-
65
-
66
-
67
-
68
-
69
-
70
-
71
-
72
-
73
-
74
-
75
-
76
-
77
-
78
-
79
-
80
-
81
-
82
-
83
-
84
-
85
-
86
-
87
-
88
-
89
-
90
-
91
-
92
-
93
-
94
-
95
-
96
-
97
-
98
-
99
-
100
-
101
-
102
-
103
-
104
-
105
-
106
-
107
-
108
-
109
-
110
-
111
-
112
-
113
-
114
-
115
-
116
-
117
-
118
-
119
-
120
-
121
-
122
-
123
-
124
 |
 |
{
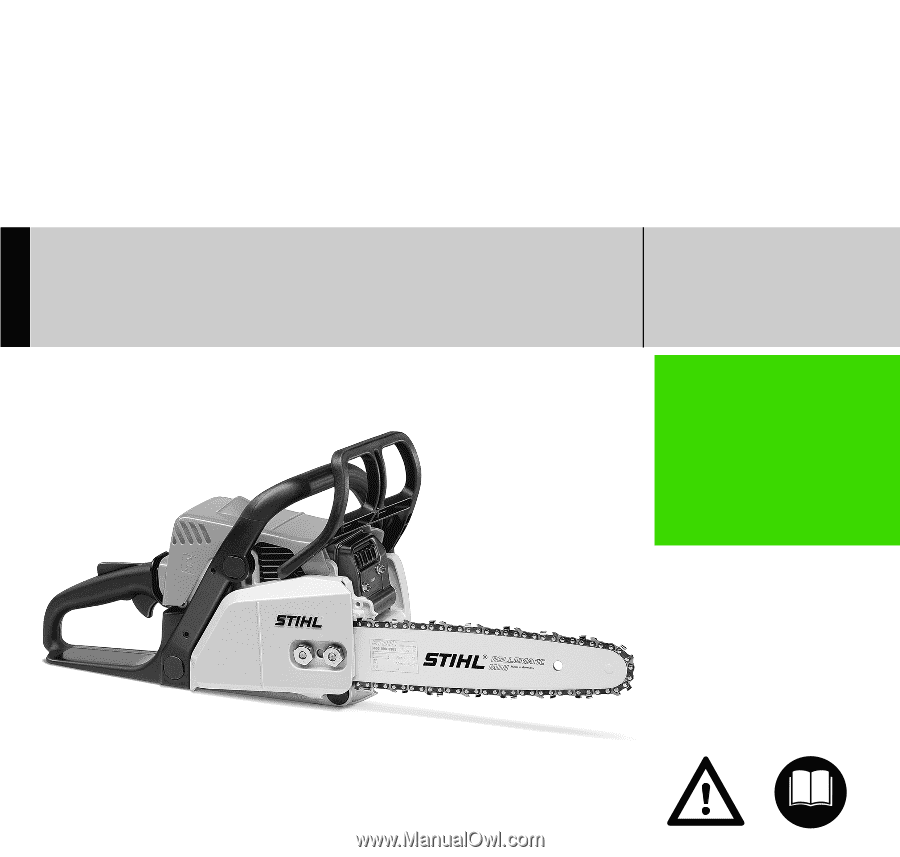
STIHL MS 170, 180
Instruction Manual
Manual de instrucciones
Read and follow all safety precautions in
Instruction Manual – improper use can cause
serious or fatal injury.
Lea y siga todas las precauciones de
seguridad dadas en el manual de
instrucciones – el uso incorrecto puede causar
lesiones graves o mortales.
Warning!
To reduce the risk of kickback injury use
STIHL reduced kickback bar and STIHL
PMMC3 (3/8" Picco) or PMC3 (3/8" Picco)
chain depending on sprocket pitch or other
available low kickback components.
Advertencia!
Para reducir el riesgo de lesionarse como
resultado de un culatazo, utilice la barra de
contragolpe reducido y la cadena PMMC3
(Picco de 3/8 pulg) o PMC3 (Picco de 3/8 pulg)
de STIHL, dependiendo de la rueda dentada
usada y de otros componentes reductores de
contragolpe.