TP-Link TD-W8960N User Guide
TP-Link TD-W8960N Manual
 |
UPC - 845973060343
View all TP-Link TD-W8960N manuals
Add to My Manuals
Save this manual to your list of manuals |
TP-Link TD-W8960N manual content summary:
- TP-Link TD-W8960N | User Guide - Page 1
TD-W8960N Wireless N ADSL2+ Modem Router Rev: 2.0.0 1910010281 - TP-Link TD-W8960N | User Guide - Page 2
COPYRIGHT & TRADEMARKS Specifications are subject to change without notice. is a registered trademark of TP-LINK TECHNOLOGIES CO., LTD. Other brands and product names are trademarks or registered trademarks of their respective holders. No part of the specifications may be reproduced - TP-Link TD-W8960N | User Guide - Page 3
installation. This equipment generates, uses and can radiate radio frequency energy and, if not installed and used in accordance with the instructions compliance could void the user's authority to operate only Mobile Configurations. The antennas used for this transmitter must be installed to provide - TP-Link TD-W8960N | User Guide - Page 4
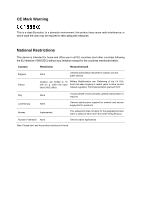
environment, this product may cause radio interference, in which case the user may be required to take adequate measures. National Restrictions This device Luxembourg None General authorization required for network and service supply(not for spectrum) Norway Implemented This subsection - TP-Link TD-W8960N | User Guide - Page 5
TECHNOLOGIES CO., LTD DECLARATION OF CONFORMITY For the following equipment: Product Description: Wireless N ADSL2+ Modem Router Model No.: TD-W8960N Trademark: TP-LINK We declare under our own responsibility that the above products satisfy all the technical regulations applicable to the product - TP-Link TD-W8960N | User Guide - Page 6
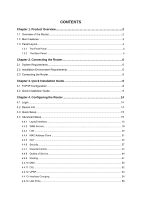
Requirements 6 2.3 Connecting the Router ...6 Chapter 3. Quick Installation Guide 8 3.1 TCP/IP Configuration ...8 3.2 Quick Installation Guide 9 Chapter 4. Configuring the Router 14 4.1 Login ...14 4.2 Device Info ...14 4.3 Quick Setup...15 4.4 Advanced Setup...15 4.4.1 Layer2 Interface ...15 - TP-Link TD-W8960N | User Guide - Page 7
4.5.3 MAC Filter ...78 4.5.4 Wireless Bridge ...79 4.5.5 Advanced ...80 4.5.6 Station info ...81 4.6 Diagnostics...82 4.7 Management ...83 4.7.1 Settings ...83 4.7.2 System Log ...85 4.7.3 SNMP Agent ...87 4.7.4 TR-069 client...88 4.7.5 Access Control ...89 4.7.6 Update Software ...90 4.7.7 Reboot - TP-Link TD-W8960N | User Guide - Page 8
: ¾ One TD-W8960N Wireless N ADSL2+ Modem Router ¾ One DC power Adapter for TD-W8960N Wireless N ADSL2+ Modem Router ¾ Quick Installation Guide ¾ One RJ45 cable ¾ Two RJ11 cables ¾ One ADSL splitter ¾ One Resource CD for TD-W8960N Wireless N ADSL2+ Modem Router, including: • This User Guide • Other - TP-Link TD-W8960N | User Guide - Page 9
TD-W8960N Wireless N ADSL2+ Modem Router User Guide Chapter 1. Product Overview Thank you for choosing the TD-W8960N Wireless N ADSL2+ Modem Router. 1.1 Overview of the Router The TD-W8960N Wireless N ADSL2+ Modem Router integrates 4-port Switch, Firewall, NAT-Router and Wireless AP. Powered by 2x2 - TP-Link TD-W8960N | User Guide - Page 10
access policies based on time of day for children or staff ¾ Supports Virtual Server, Port Triggering and DMZ host ¾ Supports UPnP, Dynamic DNS, Static Routing ¾ Supports bridge mode and Router function ¾ Supports Web management ¾ Supports firmware upgrade ¾ Supports Flow Statistics ¾ Supports - TP-Link TD-W8960N | User Guide - Page 11
TD-W8960N Wireless N ADSL2+ Modem Router User Guide 1.3 Panel Layout 1.3.1 The Front Panel The Router's LEDs are located on the front panel. Figure 1-1 The Router's LEDs and the QSS button are located on the front panel (View from left to right). Name Status Description Power On Power is on - TP-Link TD-W8960N | User Guide - Page 12
TD-W8960N Wireless N ADSL2+ Modem Router User Guide 1.3.2 The Back Panel The Router's ports, where the cables are connected, and RESET button are located on the back panel. Figure 1-2 ¾ LINE: Connect to the Modem Port of Splitter or to the telephone line. ¾ 1, 2, 3, 4 (LAN): The ports (1, 2, 3, 4) - TP-Link TD-W8960N | User Guide - Page 13
TD-W8960N Wireless N ADSL2+ Modem Router User Guide Chapter 2. Connecting the Router 2.1 System Requirements ¾ Broadband Internet Access Service (DSL/Cable/Ethernet). ¾ PCs with a working Ethernet Adapter and an Ethernet cable with RJ45 connectors. ¾ TCP/IP protocol on each PC. ¾ Web browser, such - TP-Link TD-W8960N | User Guide - Page 14
TD-W8960N Wireless N ADSL2+ Modem Router User Guide Figure 2-1 7 - TP-Link TD-W8960N | User Guide - Page 15
W8960N Wireless N ADSL2+ Modem Router User Guide Chapter 3. Quick Installation Guide This chapter will show you how to configure the basic functions of your TD-W8960N Wireless N ADSL2+ Modem Router using Quick Setup Wizard within minutes. 3.1 TCP/IP Configuration The default IP address of the Router - TP-Link TD-W8960N | User Guide - Page 16
Installation Guide With a Web-based utility, it is easy to configure and manage the TD-W8960N Wireless N ADSL2+ Modem Router. The Web-based utility can be used on any Windows, Macintosh or UNIX OS with a Web browser, such as Microsoft Internet Explorer, Mozilla Firefox or Apple Safari. 1. To access - TP-Link TD-W8960N | User Guide - Page 17
TD-W8960N Wireless N ADSL2+ Modem Router User Guide Figure 3-4 ) Note: 1) Do not mix up the user name and password with your ADSL account user name and password which are needed for PPP connections. 2) If the above screen does not pop up, it means that your Web-browser has been set to a proxy. - TP-Link TD-W8960N | User Guide - Page 18
TD-W8960N Wireless N ADSL2+ Modem Router User Guide Figure 3-6 ) Note: The Quick Setup Wizard will guide you to configure the WAN Service over ATM interface. 4. On the Wireless Configurations screen, we use the default SSID, select Network Authentication (take WPA-PSK/WPA2-PSK for example), set a - TP-Link TD-W8960N | User Guide - Page 19
TD-W8960N Wireless N ADSL2+ Modem Router User Guide Figure 3-7 ) Note: All the existed ATM&WAN service will be cleared after clicking the Save button on this Quick Setup page. 5. You will see the Finish screen below, click Reboot to save these settings. Figure 3-8 6. Now, your ADSL Modem Router has - TP-Link TD-W8960N | User Guide - Page 20
TD-W8960N Wireless N ADSL2+ Modem Router User Guide Figure 3-9 7. You will see the current configuration has been added to Layer2 Interface list (4.4.1 Layer2 Interface) shown in Figure 3-10 and WAN Service list (4.4.2 WAN Service) shown in Figure 3-11. Figure 3-10 Figure 3-11 ) Note: More detailed - TP-Link TD-W8960N | User Guide - Page 21
TD-W8960N Wireless N ADSL2+ Modem Router User Guide Chapter 4. Configuring the Router This chapter will show each Web page's key function and the configuration way. 4.1 Login After your successful login, you will see the six main menus on the left of the Web-based utility. On the right, there - TP-Link TD-W8960N | User Guide - Page 22
TD-W8960N Wireless N ADSL2+ Modem Router User Guide ) Note: Click the other submenus under the main menu Device Info, and you will be able to view the corresponding information about WAN, Statistics, Route, ARP and DHCP. 4.3 Quick Setup Please refer to Section 3.2 Quick Installation Guide. 4.4 - TP-Link TD-W8960N | User Guide - Page 23
TD-W8960N Wireless N ADSL2+ Modem Router User Guide ¾ ATM Interface: Configure the Router to access Internet as an ADSL user. ISP provides you VPI (Virtual Path Identifier), VCI (Virtual Channel Identifier) settings and the DSL Interface with RJ11 connector. (Figure 2-1) ¾ ETH Interface: Configure - TP-Link TD-W8960N | User Guide - Page 24
TD-W8960N Wireless N ADSL2+ Modem Router User Guide Figure 4-3 ¾ VPI/VCI: the VPI and VCI values provided by your ISP. Do not change them unless it was required by your ISP. ¾ DSL Link Type: Select a DSL Link Type which is provided by your ISP. The options include EoA (it is for PPPoE, IPoE, and - TP-Link TD-W8960N | User Guide - Page 25
TD-W8960N Wireless N ADSL2+ Modem Router User Guide this, it cannot be set for the connection type of CBR and Real-time VBR. If you select the QoS service, the Quality of Service menu will be added to the Web-based Utility, the detailed configuration will be described in 4.4.8 Quality of Service. - TP-Link TD-W8960N | User Guide - Page 26
TD-W8960N Wireless N ADSL2+ Modem Router User Guide Figure 4-6 ¾ Remove: Select the check box in the table on the screen above and then click the Remove button, the corresponding interface will be deleted in the table. ) Note: One ETH is allowed to configure as the layer 2 WAN Interface. 4.4.2 WAN - TP-Link TD-W8960N | User Guide - Page 27
TD-W8960N Wireless N ADSL2+ Modem Router User Guide ) Note: 1) The following section adopts different VPI, VCI to introduce further configuration for the different connection types, if you need to change the configuration of ATM PVC (VPI/VCI), you should go to the previous section (4.4.1 Layer2 - TP-Link TD-W8960N | User Guide - Page 28
TD-W8960N Wireless N ADSL2+ Modem Router User Guide 4. Enter the following parameters and then click Next. Figure 4-10 ¾ PPP Username/Password: Enter the User Name and Password provided by your ISP. These fields are case-sensitive. ¾ PPPoE Service Name: Enter the Service Name if it was provided by - TP-Link TD-W8960N | User Guide - Page 29
TD-W8960N Wireless N ADSL2+ Modem Router User Guide PC, and the NAT and SPI Firewall will be closed. Sometimes you can think it as bridge while PPP dialing in the router. It's a special feature deployed by some ISP. Unless your ISP specifically requires this setup, do not select it. ¾ Use Static - TP-Link TD-W8960N | User Guide - Page 30
TD-W8960N Wireless N ADSL2+ Modem Router User Guide ) Note: If only single PVC with IPoA is configured, you must enter static DNS server IP addresses. 7. On the next screen you will see the detailed settings you've made. Please click the Apply/Save button to save these - TP-Link TD-W8960N | User Guide - Page 31
TD-W8960N Wireless N ADSL2+ Modem Router User Guide 4.4.2.2 ATM-EoA-IPoE If your ISP provides an IPoE connection and you need to use an ATM Interface, follow the steps below to add a WAN service over a selected ATM interface: 1. Add a new ATM interface and select EoA option for DSL Link client - TP-Link TD-W8960N | User Guide - Page 32
TD-W8960N Wireless N ADSL2+ Modem Router User Guide the first identity and be incremented for each subsequent identity. For example, the device may use IAID value 1 for the first physical interface and value 2 - TP-Link TD-W8960N | User Guide - Page 33
TD-W8960N Wireless N ADSL2+ Modem Router User Guide 6. Select a preferred WAN interface as the system default gateway and click Next. Figure 4-17 7. Configure the DNS Server Addresses on the screen as follows. ) Note: Figure 4-18 If only single PVC with IPoA is configured, you must enter static - TP-Link TD-W8960N | User Guide - Page 34
TD-W8960N Wireless N ADSL2+ Modem Router User Guide Figure 4-19 4.4.2.3 ATM-EoA-Bridging If you want to adopt the Bridge service and you need to use an ATM Interface, follow the steps below to add a WAN service over a selected ATM interface: 1. Add a new ATM interface and select EoA option for DSL - TP-Link TD-W8960N | User Guide - Page 35
TD-W8960N Wireless N ADSL2+ Modem Router User Guide 4.4.2.5 ATM-IPoA If your ISP provides an IPoA connection and you need to use an ATM Interface, follow the steps below to add a WAN service over a selected ATM interface. 1. Add a new ATM interface and select IPoA option for DSL Link Type (see - TP-Link TD-W8960N | User Guide - Page 36
TD-W8960N Wireless N ADSL2+ Modem Router User Guide Figure 4-20 4.4.3 LAN Choose "Advanced Setup"Æ"LAN", and you will see the LAN screen (shown in Figure 4-21), the section allows you to configure the Router's LAN ports settings. 29 - TP-Link TD-W8960N | User Guide - Page 37
TD-W8960N Wireless N ADSL2+ Modem Router User Guide Figure 4-21 ¾ IP Address: You can configure the Router's IP Address and Subnet Mask for LAN Interface. • IP Address: Enter the Router's local IP Address, then you can access to the Web-based Utility via the IP Address, the default value is 192.168 - TP-Link TD-W8960N | User Guide - Page 38
TD-W8960N Wireless N ADSL2+ Modem Router User Guide • Start IP Address: Enter a value for the DHCP server to start with when issuing IP addresses. Because the default IP address for the Router is 192.168.1.1, the default Start IP Address is 192.168.1.2, and the Start IP Address must be 192.168.1.2 - TP-Link TD-W8960N | User Guide - Page 39
TD-W8960N Wireless N ADSL2+ Modem Router User Guide The WAN Interface List displays the Lay2 Interfaces you have configured on the section 4.4.1 Layer2 Interface and its default MAC Address. If you have not configured corresponding WAN Service for the interface on the section 4.4.2 WAN Service, the - TP-Link TD-W8960N | User Guide - Page 40
TD-W8960N Wireless N ADSL2+ Modem Router User Guide Figure 4-24 4.4.5.1 Virtual Servers Choose "Advanced Setup"Æ"NAT"Æ"Virtual Servers", you can set up virtual servers on the screen below (shown in Figure 4-25). Virtual servers can be used for setting up public services on your LAN, such as DNS, - TP-Link TD-W8960N | User Guide - Page 41
TD-W8960N Wireless N ADSL2+ Modem Router User Guide ¾ Remove: Select the check box in the table ( in Figure 4-25. ) Note: If you select the service from the drop-down list, the External Port Start, External Port End, Internal Port Start, Internal Port End and the Protocol will be added in the table - TP-Link TD-W8960N | User Guide - Page 42
TD-W8960N Wireless N ADSL2+ Modem Router User Guide 4.4.5.2 Port Triggering Choose "Advanced Setup"Æ"NAT"Æ"Port Triggering", you can set Port Triggering on the screen (shown in Figure 4-27). Some applications require that specific ports in the Router's firewall should be opened for access by remote - TP-Link TD-W8960N | User Guide - Page 43
TD-W8960N Wireless N ADSL2+ Modem Router User Guide Figure 4-28 2. Select the DMZ Host Choose "Advanced Setup"Æ"NAT"Æ"DMZ Host", you can set up DMZ Host on the screen (shown in Figure 4-29). The DMZ host feature can make a local host be exposed to the Internet for a special-purpose service - TP-Link TD-W8960N | User Guide - Page 44
TD-W8960N Wireless N ADSL2+ Modem Router User Guide Figure 4-29 To add a new DMZ Host: You can enter the computer's IP address and then click Save/Apply to activate the DMZ host you set on this page. ) Note: DMZ host forwards all the ports at the same time. Any PC whose port is being forwarded must - TP-Link TD-W8960N | User Guide - Page 45
TD-W8960N Wireless N ADSL2+ Modem Router User Guide The Outgoing IP Filtering feature allows you to control some IP traffic from LAN to access to some specifically addresses. By default and then type the Source Subnet Mask and Source Port (port or port: port) in the text boxes separately. 5. Enter a - TP-Link TD-W8960N | User Guide - Page 46
TD-W8960N Wireless N ADSL2+ Modem Router User Guide ) Note: When you add an Outgoing IP Filtering entry, you must configure at least one condition on the preceding screen except the Filter name. If you leave the Protocol blank, it means that the rule is effective - TP-Link TD-W8960N | User Guide - Page 47
TD-W8960N Wireless N ADSL2+ Modem Router User Guide Figure 4-34 2. Enter the Filter name for the rule, it is exclusive and must be filled in. 3. Select Protocol in the drop-down list, enter Source IP address, Source Subnet Mask, Source Port, Destination IP address, Destination Subnet Mask, and - TP-Link TD-W8960N | User Guide - Page 48
TD-W8960N Wireless N ADSL2+ Modem Router User Guide Figure 4-35 ¾ Change Policy: There are two policies for the MAC filters: FORWARDED and BLOCKED. Select the Change checkbox and click the Change Policy button to change from one policy to another. When you set FORWARDED, it means that all MAC layer - TP-Link TD-W8960N | User Guide - Page 49
TD-W8960N Wireless N ADSL2+ Modem Router User Guide Figure 4-36 2. Select Protocol Type in Setup"Æ"Parental Control". You can configure the Parental Control rules on the screen as shown in Figure 4-37. This function allows you control the internet activities of the child, limit the child to access - TP-Link TD-W8960N | User Guide - Page 50
TD-W8960N Wireless N ADSL2+ Modem Router User Guide Figure 4-38 To add a Time Restriction entry for Parental Control rule: 1. Click the Add button in Figure 4-38, and then you will see the next screen as shown in Figure 4-39. Figure 4-39 2. Enter the User to connect to the internet during that time. - TP-Link TD-W8960N | User Guide - Page 51
TD-W8960N Wireless N ADSL2+ Modem Router User Guide 4.4.7.2 URL Filter This section allows you to configure the filter rules based on URL to control the computers in the LAN to access the specified port. Figure 4-40 There are two policies for the URL Filter. ¾ Exclude: Block the PCs to access the - TP-Link TD-W8960N | User Guide - Page 52
TD-W8960N Wireless N ADSL2+ Modem Router User Guide higher priority, such as voice data packets give higher priority than Web data packets. This option will provide better service of selected network traffic over various technologies. Figure 4-42 Select the Enable QoS checkbox to enable all QoS for - TP-Link TD-W8960N | User Guide - Page 53
TD-W8960N Wireless N ADSL2+ Modem Router User Guide Figure 4-44 ¾ Name: Set a name for the entry. ¾ Enable: Select Enable option to take this entry effect. ¾ Interface: Assigned a specific Wan Service for this QoS queue entry. ¾ Precedence: Specify precedence for this QoS queue entry. ¾ DSL Latency: - TP-Link TD-W8960N | User Guide - Page 54
TD-W8960N Wireless N ADSL2+ Modem Router User Guide Figure 4-46 After you specify the condition, click Save/Apply to save the entry. 4.4.9 Routing Choose "Advanced Setup"Æ"Routing", it includes three menus: Default Gateway, Static Route and RIP (shown in Figure 4-47). The detailed descriptions are - TP-Link TD-W8960N | User Guide - Page 55
TD-W8960N Wireless N ADSL2+ Modem Router User Guide 4.4.9.1 Default Gateway Choose "Advanced Setup"Æ"Routing"Æ"Default Gateway", you can see the Default Gateway screen. Deselect the checkbox before Auto Gateway, and then you will be able to select a WAN Interface from the drop-down list as the - TP-Link TD-W8960N | User Guide - Page 56
TD-W8960N Wireless N ADSL2+ Modem Router User Guide default Use Interface will be adopted for the Static Route. ¾ Use Gateway IP Address: If you select the IPoE or IPoA mode be correctly configured if IP based Interface (IPoE, IPoA) is selected. 4.4.9.3 RIP Choose "Advanced Setup"Æ"Routing"Æ"RIP", - TP-Link TD-W8960N | User Guide - Page 57
TD-W8960N Wireless N ADSL2+ Modem Router User Guide ) Note: Figure 4-51 RIP cannot be configured on the WAN Interface which has NAT enabled (such as PPPoE). To activate RIP for the device, configure an individual interface, select the desired RIP version and operation, and select Enabled - TP-Link TD-W8960N | User Guide - Page 58
TD-W8960N Wireless N ADSL2+ Modem Router User Guide 4.4.10.1 DNS Server Choose "Advanced Setup"Æ"DNS"Æ"DNS Server", and you can see the DNS Server Configuration screen. Deselect the checkbox before Auto DNS Server, and then you will be able to manually configure the DNS Server Addresses as shown in - TP-Link TD-W8960N | User Guide - Page 59
TD-W8960N Wireless N ADSL2+ Modem Router User Guide Figure 4-54 To add a DDNS entry: 1. Click the Add button (pop-up Figure 4-54), and then you will set the DDNS in the next screen (shown in Figure 4-55). Figure 4-55 2. Select D-DNS provider in the drop-down list. 3. Enter the Hostname of the DNS - TP-Link TD-W8960N | User Guide - Page 60
TD-W8960N Wireless N ADSL2+ Modem Router User Guide Figure 4-56 You can select the modulation type, phone line pair and the capability of Bitswap or SRA. After you set them up, click Save/Apply to save the configurations. 4.4.12 UPNP Choose "Advanced Setup"Æ"Upnp", you can Enable or Disable the UPnP - TP-Link TD-W8960N | User Guide - Page 61
TD-W8960N Wireless N ADSL2+ Modem Router User Guide Figure 4-57 Select the checkbox and click Save/Apply to enable the UPnP function. 4.4.13 Interface Grouping Choose "Advanced Setup"Æ"Interface Grouping", you can configure multiple ports to PVC and bridging groups to perform as an independent - TP-Link TD-W8960N | User Guide - Page 62
TD-W8960N Wireless N ADSL2+ Modem Router User Guide Figure 4-59 2. Enter a unique name for Group. 3. Select the Interface which you want to use from the drop-down list. ) Note: If you like to automatically add LAN clients to a WAN Interface in the new group add the DHCP vendor ID string. By - TP-Link TD-W8960N | User Guide - Page 63
TD-W8960N Wireless N ADSL2+ Modem Router User Guide ) Note: These clients may obtain public IP addresses. 5. Click Save/Apply to make the entry effective immediately. ) Note: If a vendor ID is configured for a specific client device, please REBOOT the client device attached to the modem to allow it - TP-Link TD-W8960N | User Guide - Page 64
TD-W8960N Wireless N ADSL2+ Modem Router User Guide Figure 4-61 This section will guide you to configure a VPN tunnel between two TD-W8960Ns. The topology is as follows. ) Note: You could also use other VPN Routers to set VPN tunnels with TD-W8960N. TD-W8960N supports up to 10 VPN tunnels - TP-Link TD-W8960N | User Guide - Page 65
TD-W8960N Wireless N ADSL2+ Modem Router User Guide Click Add New Connection in Figure 4-61 and then you will enter the screen shown in Figure 4-62. Figure 4-62 ¾ IPSec Connection Name: Enter a name for your VPN. ¾ Remote IPSec Gateway Address (IP or Domain Name): Enter the destination gateway IP - TP-Link TD-W8960N | User Guide - Page 66
TD-W8960N Wireless N ADSL2+ Modem Router User Guide ¾ IP Subnetmask: Enter the subnetmask of the remote LAN. ( For example: Input 255.255.255.0 in both Device1 and Device2) ¾ Key Exchange Method: Select Auto (IKE) or Manual. ¾ Authentication Method: Select Pre-Shared Key (recommended) or Certificate - TP-Link TD-W8960N | User Guide - Page 67
TD-W8960N Wireless N ADSL2+ Modem Router User Guide parameters such as Diffie-Hellman groups, and PFS can not be negotiated, resulting in a greater importance of having "compatible" configuration on both ends. ¾ Key Life Time: Enter the number of seconds for the IPSec lifetime. It is the period of - TP-Link TD-W8960N | User Guide - Page 68
TD-W8960N Wireless N ADSL2+ Modem Router User Guide Figure 4-63 This page allows you to configure basic features of the wireless LAN interface. You can enable or disable the wireless LAN interface, hide the network from active scans, set the wireless network name (also known as SSID) and restrict - TP-Link TD-W8960N | User Guide - Page 69
TD-W8960N Wireless N ADSL2+ Modem Router User Guide Figure 4-64 4.5.2.1 QSS (WPS) Setup This section will guide you to add a new wireless device to an existing network quickly by QSS (Quick Security Setup) method. It's also called WPS (Wi-Fi Protected Setup) in some cases. ) Note: 1) This feature is - TP-Link TD-W8960N | User Guide - Page 70
TD-W8960N Wireless N ADSL2+ Modem Router User Guide Figure 4-65 Method One: Hardware push button. Step 1: Press the QSS button on the front panel of the Router. Step 2: Press and hold the QSS button of the adapter directly for 2 or 3 seconds. Step 3: Wait for a while until the next screen of adapter - TP-Link TD-W8960N | User Guide - Page 71
TD-W8960N Wireless N ADSL2+ Modem Router User Guide Figure 4-66 Method Two: Step 1: Press the QSS button on the front panel of the Router. Step 2: For the configuration of the wireless adapter, please choose "Push the button on my access point" in the configuration utility of the QSS as below, and - TP-Link TD-W8960N | User Guide - Page 72
TD-W8960N Wireless N ADSL2+ Modem Router User Guide Step 3: Wait for a while until the next screen appears. Click Finish to complete the QSS configuration. Figure 4-68 II. By PIN If the new device supports Wi-Fi Protected Setup and the PIN method, you can add it to the network by PIN with the - TP-Link TD-W8960N | User Guide - Page 73
TD-W8960N Wireless N ADSL2+ Modem Router User Guide Figure 4-69 ) Note: The PIN code of the adapter is always displayed on the QSS configuration screen. Step 2: For the configuration of the wireless adapter, please choose "Enter a PIN into my access point or a registrar" in the configuration utility - TP-Link TD-W8960N | User Guide - Page 74
TD-W8960N Wireless N ADSL2+ Modem Router User Guide Figure 4-70 ) Note: In this example, the default PIN code of this adapter is 16952898 as the preceding figure shown. Method Two: Enter the PIN of my Router into the wireless adapter. Step 1: Get the Current PIN code generated by the Router as shown - TP-Link TD-W8960N | User Guide - Page 75
TD-W8960N Wireless N ADSL2+ Modem Router User Guide Figure 4-71 Step 2: For the configuration of the wireless adapter, please choose "Enter a PIN from my access point" in the configuration utility of the QSS as below, and enter the PIN code of the Router into the field after "Access Point PIN". Then - TP-Link TD-W8960N | User Guide - Page 76
TD-W8960N Wireless N ADSL2+ Modem Router User Guide Figure 4-72 4.5.2.2 Manual Setup AP Follow the instructions below to configure security features of the wireless LAN interface manually. You can set the network authentication method, select data encryption, specify whether a network key is - TP-Link TD-W8960N | User Guide - Page 77
TD-W8960N Wireless N ADSL2+ Modem Router User Guide Figure 4-73 ¾ Network Authentication: Select an authentication type from the drop-down list. Options available are: Open, Shared, WPA, WPA-PSK, WPA2, WPA2-PSK, Mixed WPA2/WPA, and Mixed WPA2/WPA-PSK. ) Note: For most users, it is recommended to use - TP-Link TD-W8960N | User Guide - Page 78
TD-W8960N Wireless N ADSL2+ Modem Router User Guide below to configure the Shared Keys. Figure 4-74 Figure 4-75 71 - TP-Link TD-W8960N | User Guide - Page 79
TD-W8960N Wireless N ADSL2+ Modem Router User Guide ¾ Encryption strength: Select the appropriate level of encryption, 64-bit or 128-bit. ¾ Current Network Key: To indicate which WEP key to use, select a transmission key number. ¾ Network Key 1-4: If you want to manually enter the WEP keys, then - TP-Link TD-W8960N | User Guide - Page 80
TD-W8960N Wireless N ADSL2+ Modem Router User Guide 2. WPA WPA security for wireless communication has been developed to overcome some of the shortcomings of WEP. WPA combines the key generation with the authentication services of a RADIUS server. Figure 4-77 ¾ WPA Group ReKey Interval: Enter the - TP-Link TD-W8960N | User Guide - Page 81
TD-W8960N Wireless N ADSL2+ Modem Router User Guide Figure 4-78 3. WPA-PSK WPA-PSK requires a shared key and does not use a separate server for authentication. PSK keys can be ASCII or Hex type. Figure 4-79 ¾ WPA Pre-Shared Key: Enter the key shared by the Router and your other network devices. It - TP-Link TD-W8960N | User Guide - Page 82
TD-W8960N Wireless N ADSL2+ Modem Router User Guide Configure WPA-PSK settings 1. Select WPA-PSK. The menu or Hex type. 3. Change the Group Key Interval as desired or use the default setting. 4. Click Save/Apply to save the new configuration. Figure 4-80 ) Note: If you click the option "Click here to - TP-Link TD-W8960N | User Guide - Page 83
TD-W8960N Wireless N ADSL2+ Modem Router User Guide Figure 4-82 ¾ WPA2 Preauthentication: Select Enable from the -authentication function, while leave it blank or enter "0" to disable it. 5. WPA2-PSK To configure WPA2-PSK settings, select the WPA2-PSK option from the drop-down list. The menu will - TP-Link TD-W8960N | User Guide - Page 84
TD-W8960N Wireless N ADSL2+ Modem Router User Guide 6. Mixed WPA2/WPA To configure Mixed WPA2/WPA settings, select the Mixed WPA2/WPA option from the drop-down list. The menu will change to offer the appropriate settings. The - TP-Link TD-W8960N | User Guide - Page 85
TD-W8960N Wireless N ADSL2+ Modem Router User Guide 4.5.3 MAC Filter Choose "Wireless"Æ"MAC Filter", you will see the screen of Wireless--MAC Filter settings shown as below. Figure 4-86 Wireless access can be filtered by using the MAC addresses of the wireless devices transmitting within your - TP-Link TD-W8960N | User Guide - Page 86
TD-W8960N Wireless N ADSL2+ Modem Router User Guide 4.5.4 Wireless Bridge Choose "Wireless"Æ"Wireless Bridge", you will see the screen of Wireless--Bridge settings shown as below. You can configure wireless bridge features of the wireless LAN interface and click Apply/Save button to save the current - TP-Link TD-W8960N | User Guide - Page 87
TD-W8960N Wireless N ADSL2+ Modem Router User Guide • Enabled (Scan): Select this option to enables wireless bridge restriction, and it will scan the environment for APs that exist around the device. Only those selected AP will be granted access. • Refresh: Click this button to scan and display the - TP-Link TD-W8960N | User Guide - Page 88
N ADSL2+ Modem Router User Guide ¾ Channel: Select the channel you want to use from the drop-down List. This field determines which operating frequency will be used. It is not necessary to change the wireless channel unless you notice interference problems with another nearby access point. ¾ Mode - TP-Link TD-W8960N | User Guide - Page 89
TD-W8960N Wireless N ADSL2+ Modem Router User Guide Figure 4-92 This page shows authenticated wireless stations and their status. ¾ MAC: Displays the connected wireless station's MAC address. ¾ Associated: Displays whether the wireless station has associated with the access point. ¾ Authorized: - TP-Link TD-W8960N | User Guide - Page 90
TD-W8960N Wireless N ADSL2+ Modem Router User Guide 4.7 Management Choose "Management", there are eight submenus under the main menu. They are Settings, System Log, SNMP Agent, TR-069 Client, Access Control, Update Software and Reboot. Click any of them, and you will be able to configure the - TP-Link TD-W8960N | User Guide - Page 91
TD-W8960N Wireless N ADSL2+ Modem Router User Guide To back up the Router's current settings: 1. Click the Backup 4-97). Figure 4-97 4.7.1.2 Update Choose "Management"Æ"Settings"Æ"Update", you can see the Update screen, this screen (shown in Figure 4-98) allows you to update the Router's settings. 84 - TP-Link TD-W8960N | User Guide - Page 92
TD-W8960N Wireless N ADSL2+ Modem Router User Guide Figure 4-98 To update the Router's settings: 1. Click the Browse button to locate the update file for the device, and you can also enter the exact path to the Setting file in the text box. 2. After you have selected the file for updating the - TP-Link TD-W8960N | User Guide - Page 93
TD-W8960N Wireless N ADSL2+ Modem Router User Guide Figure 4-100 To View the System Log: Click the View System Log button, you will see the screen (shown in Figure 4-101) which displays the Router's recent logs. Figure 4-101 ¾ Refresh: Click the button, the information in the table will be updated. - TP-Link TD-W8960N | User Guide - Page 94
TD-W8960N Wireless N ADSL2+ Modem Router User Guide ¾ Disable/Enable: Select the Enable to log the events, record the events. ¾ Server UDP Port: Type the UDP Port of the server. 4.7.3 SNMP Agent Choose "Management"Æ"SNMP Agent", you can see the SNMP-Configuration screen as shown below. SNMP (Simple - TP-Link TD-W8960N | User Guide - Page 95
TD-W8960N Wireless N ADSL2+ Modem Router User Guide ¾ SNMP Agent: You can select the checkbox to disable or enable the function. ) Note: SNMP Community string provides a simple method of authentication between the Router (SNMP Agent) and a remote network manager (SNMP Manager). You can specify the - TP-Link TD-W8960N | User Guide - Page 96
TD-W8960N Wireless N ADSL2+ Modem Router User Guide ¾ Inform: You can select the checkbox to disable or enable the Inform Interval. ¾ Inform Interval: Type the interval time of your Router contact with the ACS. ¾ ACS URL: Please accept this information from your ISP. And through ACS (Auto- - TP-Link TD-W8960N | User Guide - Page 97
TD-W8960N Wireless N ADSL2+ Modem Router User Guide 2. Enter the Old Password in the text box. 3. Enter the New Password and Confirm Password. The Confirm Password should be the same as the New Password. 4. Click Save/Apply to make your change take effect. ) Note: 1) Access to your DSL Modem Router - TP-Link TD-W8960N | User Guide - Page 98
TD-W8960N Wireless N ADSL2+ Modem Router User Guide 2) Before upgrading the Router's firmware, you should write down some of your customized settings to avoid losing important configuration settings of the Router. 3) Do not turn off the Router or press the Reset button while the software is being - TP-Link TD-W8960N | User Guide - Page 99
TD-W8960N Wireless N ADSL2+ Modem Router User Guide Appendix A: FAQ 1. How do I configure the Router to access Internet by ADSL users? 1) First, configure the ADSL Modem configured in RFC1483 bridge model. 2) Connect the Ethernet cable from your ADSL Modem to the WAN port on the Router. The - TP-Link TD-W8960N | User Guide - Page 100
TD-W8960N Wireless N ADSL2+ Modem Router User Guide ) Note: Your opposite side should call your WAN IP, which is displayed on the "Status" page. 4) How to enable DMZ Host: Log in to the Router, click the "Advanced Setup-NAT" menu on the left of your browser, and click "DMZ Host" submenu. On the "DMZ - TP-Link TD-W8960N | User Guide - Page 101
TD-W8960N Wireless N ADSL2+ Modem Router User Guide 4. I want to build a WEB Server on the LAN, what should I do? Log in to the Router, click the "Advanced Setup-NAT" menu on the left of your browser, and click the "Virtual Servers" submenu. On the "Virtual Servers" page, click Add New, then on the - TP-Link TD-W8960N | User Guide - Page 102
TD-W8960N Wireless N ADSL2+ Modem Router User Guide Appendix B: Configuring the PC In this section, we'll introduce how to install and configure the TCP/IP correctly in Windows XP. First make sure your Ethernet Adapter is working, refer to the adapter's manual if necessary. 1. Configure TCP/IP - TP-Link TD-W8960N | User Guide - Page 103
TD-W8960N Wireless N ADSL2+ Modem Router User Guide Figure 0-2 5) The following TCP/IP Properties window will display and the IP Address tab is open on this window by default. Now you have two ways to configure the TCP/IP protocol below: ¾ Setting IP address automatically Select Obtain an IP address - TP-Link TD-W8960N | User Guide - Page 104
TD-W8960N Wireless N ADSL2+ Modem Router User Guide Figure 0-3 ) Note: For Windows 98 OS or before, the PC and Router may need to be restarted. ¾ Setting IP address manually 1 Select Use the following IP address radio button. And the following items available. 2 If the Router's LAN IP address is 192 - TP-Link TD-W8960N | User Guide - Page 105
TD-W8960N Wireless N ADSL2+ Modem Router User Guide Now: Click OK to keep your settings. Figure 0-4 98 - TP-Link TD-W8960N | User Guide - Page 106
TD-W8960N Wireless N ADSL2+ Modem Router User Guide Appendix C: Specifications General Standards Protocols Ports Cabling Type LED Safety & Emissions ANSI T1.413, ITU G.992.1, ITU G.992.2, ITU G.992.3, ITU G.992.5, IEEE 802.3, IEEE 802.3u, IEEE 802.11b , IEEE 802. - TP-Link TD-W8960N | User Guide - Page 107
TD-W8960N Wireless N ADSL2+ Modem Router User Guide Appendix D: Glossary ¾ 802.11n - 802.11n builds upon previous 802.11 standards by adding MIMO (multiple-input multiple-output). MIMO uses multiple transmitter and receiver antennas to allow for increased data throughput via spatial multiplexing and - TP-Link TD-W8960N | User Guide - Page 108
TD-W8960N Wireless N ADSL2+ Modem Router User Guide ¾ DDNS (Dynamic Domain Name System) - Allows the hosting of a website, FTP server, or e-mail server with a fixed domain name (e.g., www.xyz.com) and a dynamic IP address. ¾ Default Gateway - A device that forwards Internet traffic from your local - TP-Link TD-W8960N | User Guide - Page 109
TD-W8960N Wireless N ADSL2+ Modem Router User Guide ¾ LAN - The computers and networking products that make up your local network. ¾ MAC (Media Access Control) Address - The unique address that a manufacturer assigns to each networking device. ¾ NAT (Network Address Translation) - NAT technology - TP-Link TD-W8960N | User Guide - Page 110
TD-W8960N Wireless N ADSL2+ Modem Router User Guide ¾ Static Routing - Forwarding data in a network via a fixed path. ¾ Subnet Mask - An address code that determines the size of the network. ¾ TCP (Transmission Control Protocol) - A network protocol for
-
 1
1 -
 2
2 -
 3
3 -
 4
4 -
 5
5 -
 6
6 -
 7
7 -
8
-
9
-
10
-
11
-
12
-
13
-
14
-
15
-
16
-
17
-
18
-
19
-
20
-
21
-
22
-
23
-
24
-
25
-
26
-
27
-
28
-
29
-
30
-
31
-
32
-
33
-
34
-
35
-
36
-
37
-
38
-
39
-
40
-
41
-
42
-
43
-
44
-
45
-
46
-
47
-
48
-
49
-
50
-
51
-
52
-
53
-
54
-
55
-
56
-
57
-
58
-
59
-
60
-
61
-
62
-
63
-
64
-
65
-
66
-
67
-
68
-
69
-
70
-
71
-
72
-
73
-
74
-
75
-
76
-
77
-
78
-
79
-
80
-
81
-
82
-
83
-
84
-
85
-
86
-
87
-
88
-
89
-
90
-
91
-
92
-
93
-
94
-
95
-
96
-
97
-
98
-
99
-
100
-
101
-
102
-
103
-
104
-
105
-
106
-
107
-
108
-
109
-
110
 |
 |

TD-W8960N
Wireless N ADSL2+ Modem Router
Rev: 2.0.0
1910010281