TP-Link TL-WN7200ND User Guide - Page 9
Installation Guide, 2.1 Hardware Installation, 2.2.1 Overview - windows 7
 |
UPC - 845973050535
View all TP-Link TL-WN7200ND manuals
Add to My Manuals
Save this manual to your list of manuals |
Page 9 highlights
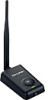
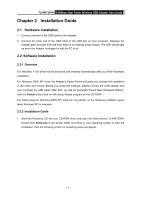
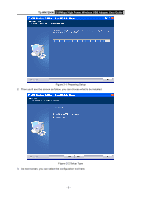
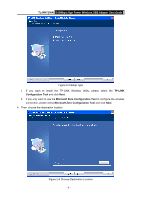
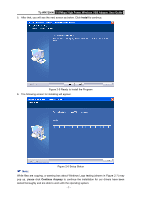
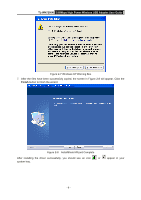
TL-WN7200N 150Mbps High Power Wireless USB Adapter User Guide Chapter 2 Installation Guide 2.1 Hardware Installation 1. Connect one end of the USB cable to the Adapter. 2. Connect the other end of the USB cable to the USB port on your computer. Because the Adapter gets its power from the host, there is no external power supply. The LED should light up when the Adapter is plugged in and the PC is on. 2.2 Software Installation 2.2.1 Overview For Windows 7, the driver will be searched and installed automatically after you finish hardware installation. For Windows 2000/ XP/ Vista, the Adapter's Setup Wizard will guide you through the installation of the Utility and drivers. Before you install the software, please connect the USB adapter with your computer by USB cable. After that, you will be prompted "Found New Hardware Wizard", click the Cancel button, and run the Setup Wizard program on the CD-ROM. The Setup steps for Windows 2000/ XP/ Vista are very similar, so the following installation guide takes Windows XP for example. 2.2.2 Installation Guide 1. Insert the Resource CD into your CD-ROM drive, and open the folder named TL-WN7200N. Double-click Setup.exe in the proper folder according to your operating system to start the installation, then the following screen for preparing setup will appear. - 4 -
-
 1
1 -
2
-
3
-
 4
4 -
 5
5 -
 6
6 -
 7
7 -
 8
8 -
 9
9 -
 10
10 -
 11
11 -
 12
12 -
 13
13 -
 14
14 -
15
-
16
-
17
-
18
-
19
-
20
-
21
-
22
-
23
-
24
-
25
-
26
-
27
-
28
-
29
-
30
-
31
-
32
-
33
-
34
-
35
-
36
-
37
-
38
-
39
-
40
-
41
 |
 |