TP-Link TL-WR542G User Guide - Page 19
IP Address, Subnet Mask, Default Gateway, Primary, Secondary DNS, Wireless, Radio - access point
 |
View all TP-Link TL-WR542G manuals
Add to My Manuals
Save this manual to your list of manuals |
Page 19 highlights
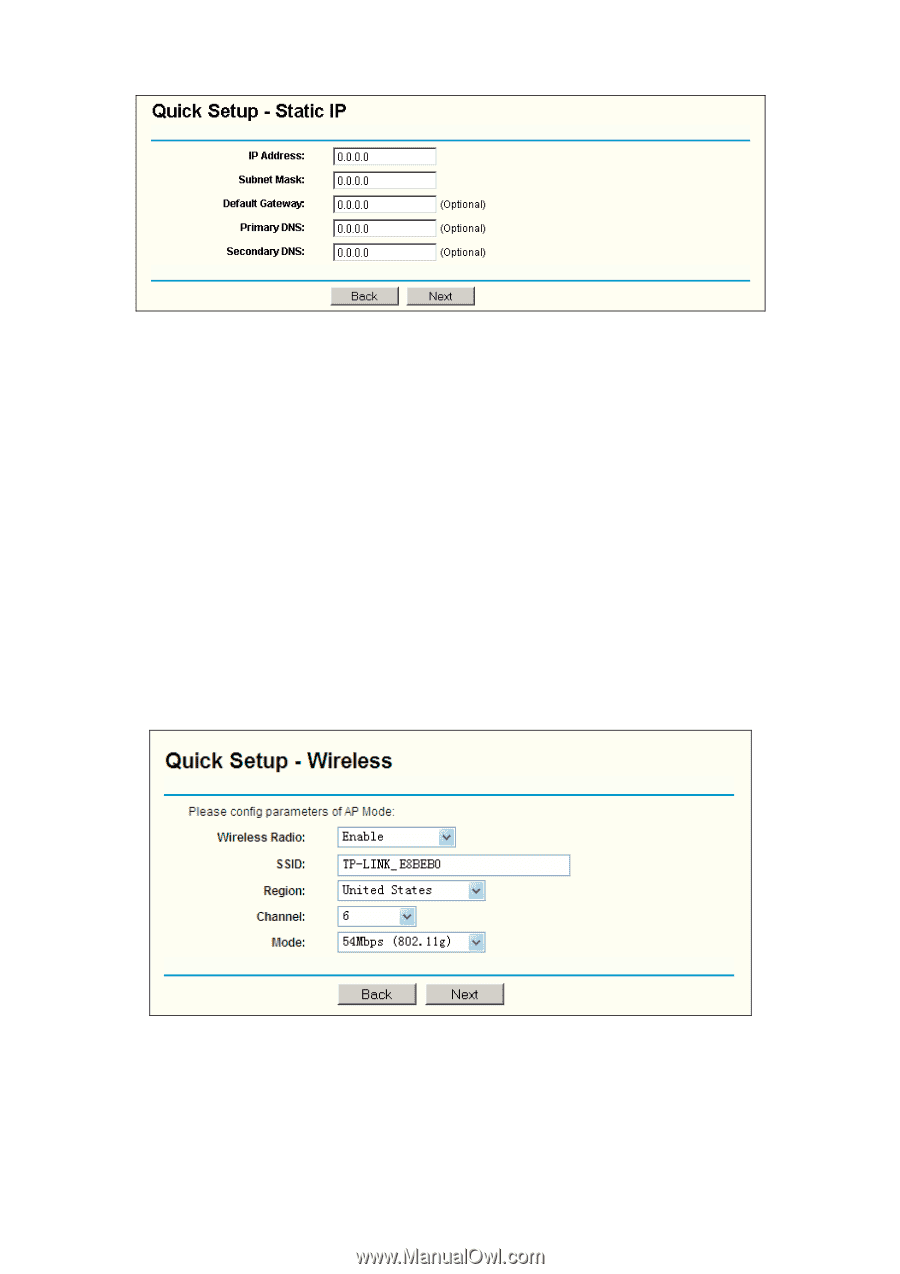
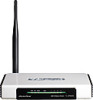
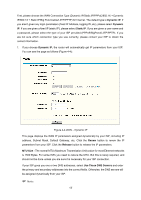
Figure 3-8 Quick Setup - Static IP ) Note: The IP parameters should have been provided by your ISP. ¾ IP Address - This is the WAN IP address as seen by external users on the Internet (including your ISP). Enter the IP address into the field. ¾ Subnet Mask - The Subnet Mask is used for the WAN IP address, it is usually 255.255.255.0 ¾ Default Gateway - Enter the gateway IP address into the box if required. ¾ Primary DNS - Enter the DNS Server IP address into the boxes if required. ¾ Secondary DNS - If your ISP provides another DNS server, enter it into this field. After you complete the above, click Next, the Wireless settings page will appear, shown in Figure 3-9. Figure 3-9 Quick Setup - Wireless settings In this page, you can configure the following wireless parameters: ¾ Wireless Radio - Indicates whether the Access Point feature of the router is enabled or disabled. If disabled, the WLAN LED on the front panel will not be lit and the wireless 12
-
 1
1 -
2
-
3
-
4
-
5
-
6
-
7
-
8
-
9
-
10
-
11
-
12
-
13
-
 14
14 -
 15
15 -
 16
16 -
 17
17 -
 18
18 -
 19
19 -
 20
20 -
 21
21 -
 22
22 -
 23
23 -
 24
24 -
25
-
26
-
27
-
28
-
29
-
30
-
31
-
32
-
33
-
34
-
35
-
36
-
37
-
38
-
39
-
40
-
41
-
42
-
43
-
44
-
45
-
46
-
47
-
48
-
49
-
50
-
51
-
52
-
53
-
54
-
55
-
56
-
57
-
58
-
59
-
60
-
61
-
62
-
63
-
64
-
65
-
66
-
67
-
68
-
69
-
70
-
71
-
72
-
73
-
74
-
75
-
76
-
77
-
78
-
79
-
80
-
81
-
82
-
83
-
84
-
85
-
86
-
87
-
88
-
89
-
90
 |
 |