TRENDnet TU-S9 Quick Installation Guide - Page 11
Click, Next., Select, Specify, Location, click, Browse, button., Browse, Folder, window, appeared,
 |
UPC - 710931303209
View all TRENDnet TU-S9 manuals
Add to My Manuals
Save this manual to your list of manuals |
Page 11 highlights
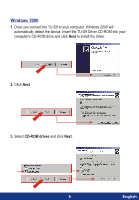
3. Click Next. ==== Wh. do you w. W.nt to tl, t < Back o Next> I Cancel 0,OOadolealladtivershape. fc _j I Cancel I 7. Click Finish. Ro. USPoSerie, Comm Pod location of dim \SEFIWPI.
-
 1
1 -
2
-
3
-
4
-
5
-
 6
6 -
 7
7 -
 8
8 -
 9
9 -
 10
10 -
 11
11 -
 12
12 -
 13
13 -
 14
14 -
 15
15
 |
 |

3.
Click
Next.
<
Back
t
o
Next>
I
Cancel
====
Wh.
do
you
w. W.nt
to
tl
,
0,OOadolealladtivershape.
<11.,
I
N.*,
_
fc
_j
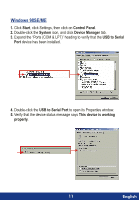
4.
Select
Specify
a
Location,
and
then
click
the
Browse
button.
5.
From
the
"Browse
for
Folder"
window
that
has
appeared,
select
the
icon
for
the
CD-ROM
drive
containing
the
TU-S9
CD-ROM
and
click
OK.
►
l
Specify
a!ocation:
<flack
1.0
0„
.
0
NM>
Cancel
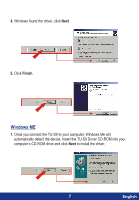
6.
After
Windows
finds
the
driver,
click
Next.
<
Back
Next
>
I
Cancel
I
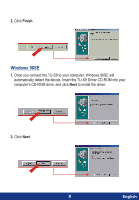
7.
Click
Finish.
NPPY.
,
divet
Speofy
alo.ort.
W.
I
Ro.
USPoSerie,
Comm
Pod
location
of
dim
\SEFIWPI.
Cancel
I
<la
,
IL:
0a
a
PAfic.R.Sefial
Cam
Patt
9
En
•
lish