Texas Instruments TINSPIRE Getting Started - Page 72
Understanding the status bar, Adding classes
 |
View all Texas Instruments TINSPIRE manuals
Add to My Manuals
Save this manual to your list of manuals |
Page 72 highlights
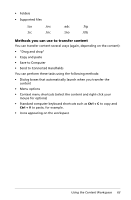
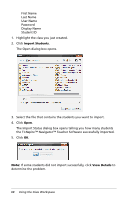
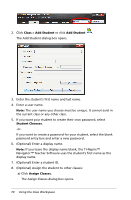
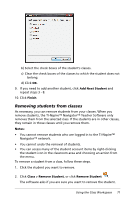
Æ Status bar. See additional details below. Ç Student View. Lets you display the students in the classroom area in Seating Chart view or Student List view. Understanding the status bar The status bar gives you information about the network status and the student login status. Network status Student login status The network status shows how many TI-Nspire™ CX Wireless Network Adapters and TI-Nspire™ Navigator™ Cradles are currently connected to the system. You can click here to launch the Network Manager window. The student login status shows how many students are currently logged into class, and how many students are assigned to the current class. If class is not in session, the student login status shows "Class not started." Student view lets you view the current classroom in the seating chart view or the seating list view. The seating chart view shows your students as student icons with display names. The student list view shows your students in a table that contains their display names, first name, last name, user name, and student ID. Adding classes When you start using the TI-Nspire™ Navigator™ Teacher Software, one of the first things you should do is create your classes. Make sure you create a class for each of the class periods you plan to teach with the TI-Nspire™ Navigator™ Teacher Software. You can use a mix of TI-Nspire™ CX, TI-Nspire™ CX CAS, TI-Nspire™, and TI-Nspire™ CAS handhelds in the same class. Adding a class 1. Use the Workspace selector to select the Class workspace. 2. Click Class > Add a Class. The Add Class dialog box opens. 66 Using the Class Workspace
-
 1
1 -
2
-
3
-
4
-
5
-
6
-
7
-
8
-
9
-
10
-
11
-
12
-
13
-
14
-
15
-
16
-
17
-
18
-
19
-
20
-
21
-
22
-
23
-
24
-
25
-
26
-
27
-
28
-
29
-
30
-
31
-
32
-
33
-
34
-
35
-
36
-
37
-
38
-
39
-
40
-
41
-
42
-
43
-
44
-
45
-
46
-
47
-
48
-
49
-
50
-
51
-
52
-
53
-
54
-
55
-
56
-
57
-
58
-
59
-
60
-
61
-
62
-
63
-
64
-
65
-
66
-
 67
67 -
 68
68 -
 69
69 -
 70
70 -
 71
71 -
 72
72 -
 73
73 -
 74
74 -
 75
75 -
 76
76 -
 77
77 -
78
-
79
-
80
-
81
-
82
-
83
-
84
-
85
-
86
-
87
-
88
-
89
-
90
-
91
-
92
-
93
-
94
-
95
-
96
-
97
-
98
-
99
-
100
-
101
-
102
-
103
-
104
-
105
-
106
-
107
-
108
-
109
-
110
-
111
-
112
-
113
-
114
-
115
-
116
-
117
-
118
-
119
-
120
-
121
-
122
-
123
-
124
-
125
-
126
-
127
-
128
-
129
-
130
-
131
-
132
-
133
-
134
-
135
-
136
-
137
-
138
-
139
-
140
-
141
-
142
-
143
-
144
-
145
-
146
-
147
-
148
-
149
-
150
-
151
-
152
-
153
-
154
-
155
-
156
-
157
-
158
-
159
-
160
-
161
-
162
-
163
-
164
-
165
-
166
-
167
-
168
-
169
-
170
-
171
-
172
-
173
-
174
-
175
-
176
-
177
-
178
-
179
-
180
-
181
-
182
-
183
-
184
-
185
-
186
-
187
-
188
-
189
-
190
-
191
-
192
-
193
-
194
-
195
-
196
-
197
-
198
-
199
-
200
-
201
-
202
-
203
-
204
-
205
-
206
-
207
-
208
-
209
-
210
-
211
-
212
-
213
-
214
-
215
-
216
-
217
-
218
-
219
-
220
-
221
-
222
-
223
-
224
-
225
-
226
-
227
-
228
-
229
-
230
 |
 |