Thermador PODS301W Instruction manual - Page 27
Steam Programs
 |
View all Thermador PODS301W manuals
Add to My Manuals
Save this manual to your list of manuals |
Page 27 highlights
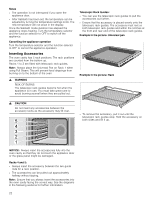
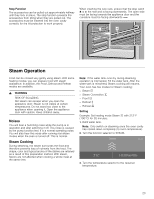
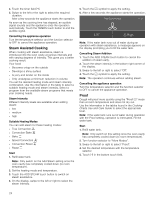
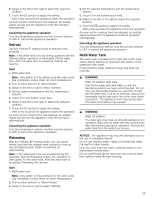
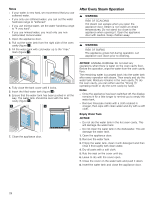
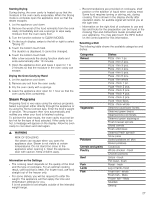
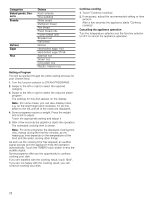
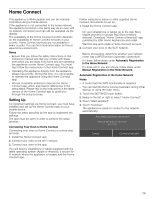
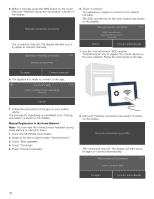
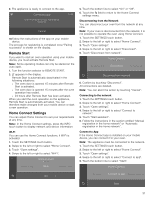
Starting Drying During drying, the oven cavity is heated up so that the moisture in the oven cavity evaporates. When the Drying mode is complete open the appliance door so that the steam escapes. 1. Let the appliance cool down. 2. Remove the worst of the food remnants from the oven cavity immediately and use a sponge to wipe away moisture from the oven cavity floor. 3. Turn the function selector to CLEAN MODES. 4. On the touch display, swipe to the left or right to select "Drying ª". 5. Touch the bottom touch field. The duration is displayed. It cannot be changed. 6. Touch the bottom touch field. After a few seconds the drying function starts and ends automatically after 10 minutes. 7. Open the appliance door and leave it open for 1 to 2 minutes so that the moisture in the oven cavity can escape. Drying the Oven Cavity by Hand 1. Let the appliance cool down. 2. Remove any soil from the oven cavity. 3. Dry the oven cavity with a sponge. 4. Leave the appliance door open for 1 hour so that the oven cavity dries completely. Steam Programs Preparing food is very easy using the various programs. Select a program either directly through the appliance or by using the Home Connect App. Enter the food's weight or amount. The program then runs automatically and notifies you when your food is finished cooking. To achieve the best results, the oven cavity must not be too hot for the type of food selected. If the cavity is too hot, a message will appear on the display. Allow the oven cavity to cool down and start again. 9 WARNING RISK OF SCALDING Hot steam can escape when you open the appliance door. Steam is not visible at certain temperatures. Do not stand too close to the appliance when opening it. Open the appliance door with caution. Keep children away. Information on the Settings ▯ The cooking result depends on the quality of the food and the type of cookware. For an optimal cooking result, use food that is fresh. For frozen food, use food straight out of the freezer only. ▯ For some dishes, you will be required to enter the weight. The appliance will then apply the time and temperature settings for you. It is not possible to set weights outside of the intended weight range. ▯ Recommendations are provided on cookware, shelf position or the addition of liquid when cooking meat. Some food requires turning or stirring, etc. during cooking. This is shown in the display shortly after operation starts. An audible signal will remind you at the right time. ▯ Information on the right kind of cookware to use and tips and tricks for the preparation can be found in the Cooking Tips and Instructions Guide provided with your appliance. You may also touch the INFO button on the control panel for this information. Selecting a Dish The following table shows the available categories and dishes. Categories Reheat Vegetables Potatoes Cereals and grains Poultry Beef Pork Lamb Fish Dishes Pizza - thin 1 pc. Pizza - thin 2 pcs. Pizza - thin 3 pcs. Pizza - thin 4 pcs. Pizza - thin 5 pcs. Pizza - thin 6 pcs. Pizza - thin whole Pizza - thick 1 pc. Pizza - thick 2 pcs. Pizza - thick 3 pcs. Pizza - thick 4 pcs. Pizza - thick 5 pcs. Pizza - thick 6pcs. Pizza - thick whole Steamed cauliflower florets Steamed green beans Steamed broccoli florets Steamed green asparagus Fresh brussel sprouts Sliced carrots Fresh artichokes Steamed fresh spinach Snow peas Boiled potatoes w/ skin Boiled potatoes Couscous Whole chicken - fresh Chicken portions Sirloin - fresh Pot roast - fresh Roast - fresh Leg of lamb- fresh Fresh fish - whole Fresh fish - fillets Frozen fish - fillets Shellfish Shrimp 27
-
 1
1 -
2
-
3
-
4
-
5
-
6
-
7
-
8
-
9
-
10
-
11
-
12
-
13
-
14
-
15
-
16
-
17
-
18
-
19
-
20
-
21
-
 22
22 -
 23
23 -
 24
24 -
 25
25 -
 26
26 -
 27
27 -
 28
28 -
 29
29 -
 30
30 -
 31
31 -
 32
32 -
33
-
34
-
35
-
36
-
37
-
38
-
39
-
40
-
41
-
42
-
43
-
44
-
45
-
46
-
47
-
48
-
49
-
50
-
51
-
52
-
53
-
54
-
55
-
56
-
57
-
58
-
59
-
60
-
61
-
62
-
63
-
64
-
65
-
66
-
67
-
68
-
69
-
70
-
71
-
72
-
73
-
74
-
75
-
76
-
77
-
78
-
79
-
80
-
81
-
82
-
83
-
84
-
85
-
86
-
87
-
88
 |
 |