Toshiba D-VR660 Owner's Manual - English - Page 113
Troubleshooting
 |
UPC - 022265001462
View all Toshiba D-VR660 manuals
Add to My Manuals
Save this manual to your list of manuals |
Page 113 highlights
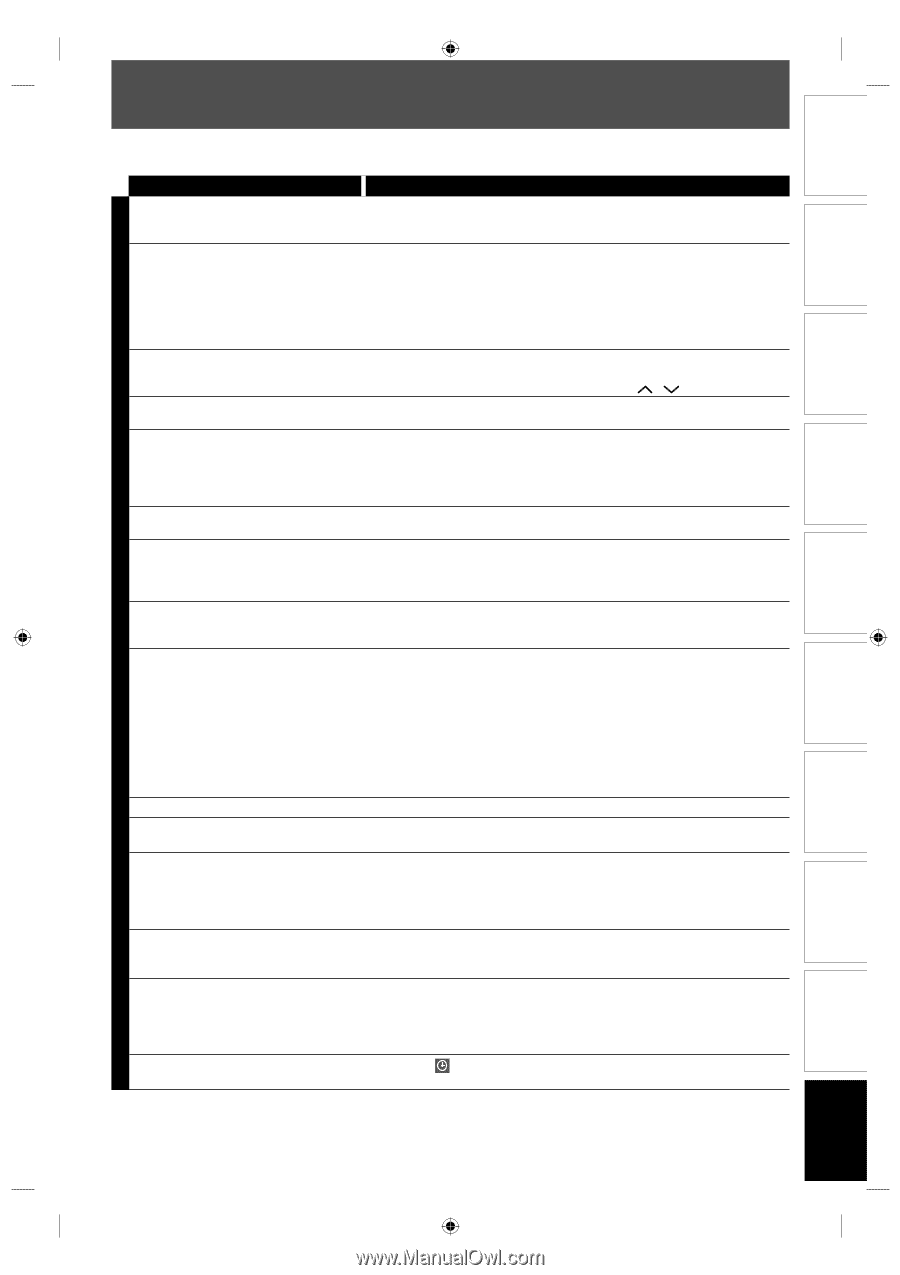
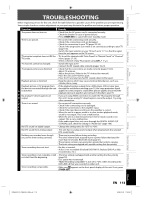
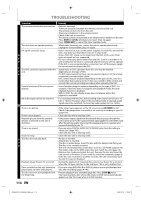
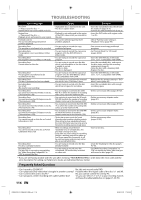
Introduction Connections Basic Setup Disc Management Recording TROUBLESHOOTING Before requesting service for this unit, check the table below for a possible cause of the problem you are experiencing. Some simple checks or a minor adjustment on your part may eliminate the problem and restore proper operation. Symptom Remedy The power does not turn on. • Check that the AC power cord is connected securely. • Check the breaker (in case of power failure). • Press [TIMER SET] to cancel the timer standby mode. There is no picture. • Re-connect the connecting cords securely. • Check if the connecting cords are damaged. • Check the connection to your TV (pages 22-24). • Check if the progressive scan mode is set correctly according to your TV (page 105). • Switch the input selector on your TV (such as to "L1") so that the signal from the unit appears on the TV screen. TV program reception does not fill the • Try to set the channels with "Auto Preset" or "Manual Preset" in "Channel" TV screen. menu (pages 27-29). • Select a channel of any TV program using [CH / ]. TV channels cannot be changed. • Switch the input to TV. • Connect the RF coaxial cable correctly (pages 19-21). TV program pictures are distorted. • Check if all the connections are made correctly (pages 19-24). • Adjust TV antenna. • Adjust the picture. (Refer to the TV's instruction manual.) • Place the unit and TV farther apart. • Place the TV and any bunched RF coaxial cables farther apart. Playback picture is distorted. • Keep the device which may cause electrical disturbances, such as a cellular phone, away. Playback picture or TV program from • If the playback picture output from a DVD player, VCR or tuner goes the device connected through the unit through the unit before reaching your TV, the copy-protection signal D is distorted. V No analog TV closed captions are D output. applied to some programs could affect picture quality. Disconnect the playback device in question and connect it directly to your TV. • If you are using HDMI connection to watch the TV programs through this unit's tuner, analog TV closed caption cannot be output. Try using • other connection. V There is no sound. C • Re-connect all connections securely. • Check if the connecting cord is damaged. • Check the connections to the amplifier input. R • Check if the input device setting on the amplifier is correct. • When the unit is in pause mode or in slow-motion playback mode, sound is not output. This is not a malfunction. • When the unit is in fast forward or fast reverse mode, sound is not output. This is not a malfunction. • If the audio signal does not come through the DIGITAL AUDIO OUT (COAXIAL) jack, check the setting in "Audio Out" (page 100). No DTS sound on digital output. • Change the setting menu for "DTS" to "ON". No DTS sound from analog output • This unit has no analog sound output when playing back the selected DTS sound mode. Nothing was recorded even though you set the timer setting correctly. • There was a power failure during recording. • The unit's internal clock stopped due to a power failure that lasted for more than 30 seconds. Reset the clock (page 31). • The program contains copy protection signals that restricts copying. • The timer setting overlapped with another setting that has priority. Timer recording does not start. • No disc is inserted. • A disc is not recordable (finalized DVD-RW/-R, finalized DVD+R, a fully recorded disc, etc.). Timer recording is not complete or did • The timer setting overlapped with another setting that has priority not start from the beginning. (page 53). • Disc space was not enough. • "Make Recording Compatible" is not set to "ON", when recording onto DVD+RW/+R that was recorded on other unit. Timer recording is impossible. • Make sure appears on the front panel display of this unit. If not, press [TIMER SET]. Playback Editing Function Setup VCR Function Others E9MG0UD_D-VR660KU_EN.indd 113 EN 113 2008/01/29 17:22:21
-
 1
1 -
2
-
3
-
4
-
5
-
6
-
7
-
8
-
9
-
10
-
11
-
12
-
13
-
14
-
15
-
16
-
17
-
18
-
19
-
20
-
21
-
22
-
23
-
24
-
25
-
26
-
27
-
28
-
29
-
30
-
31
-
32
-
33
-
34
-
35
-
36
-
37
-
38
-
39
-
40
-
41
-
42
-
43
-
44
-
45
-
46
-
47
-
48
-
49
-
50
-
51
-
52
-
53
-
54
-
55
-
56
-
57
-
58
-
59
-
60
-
61
-
62
-
63
-
64
-
65
-
66
-
67
-
68
-
69
-
70
-
71
-
72
-
73
-
74
-
75
-
76
-
77
-
78
-
79
-
80
-
81
-
82
-
83
-
84
-
85
-
86
-
87
-
88
-
89
-
90
-
91
-
92
-
93
-
94
-
95
-
96
-
97
-
98
-
99
-
100
-
101
-
102
-
103
-
104
-
105
-
106
-
107
-
 108
108 -
 109
109 -
 110
110 -
 111
111 -
 112
112 -
 113
113 -
 114
114 -
 115
115 -
 116
116 -
 117
117 -
 118
118 -
119
-
120
-
121
-
122
-
123
 |
 |