Toshiba D-VR660 Owner's Manual - English - Page 50
to select a recording media
 |
UPC - 022265001462
View all Toshiba D-VR660 manuals
Add to My Manuals
Save this manual to your list of manuals |
Page 50 highlights
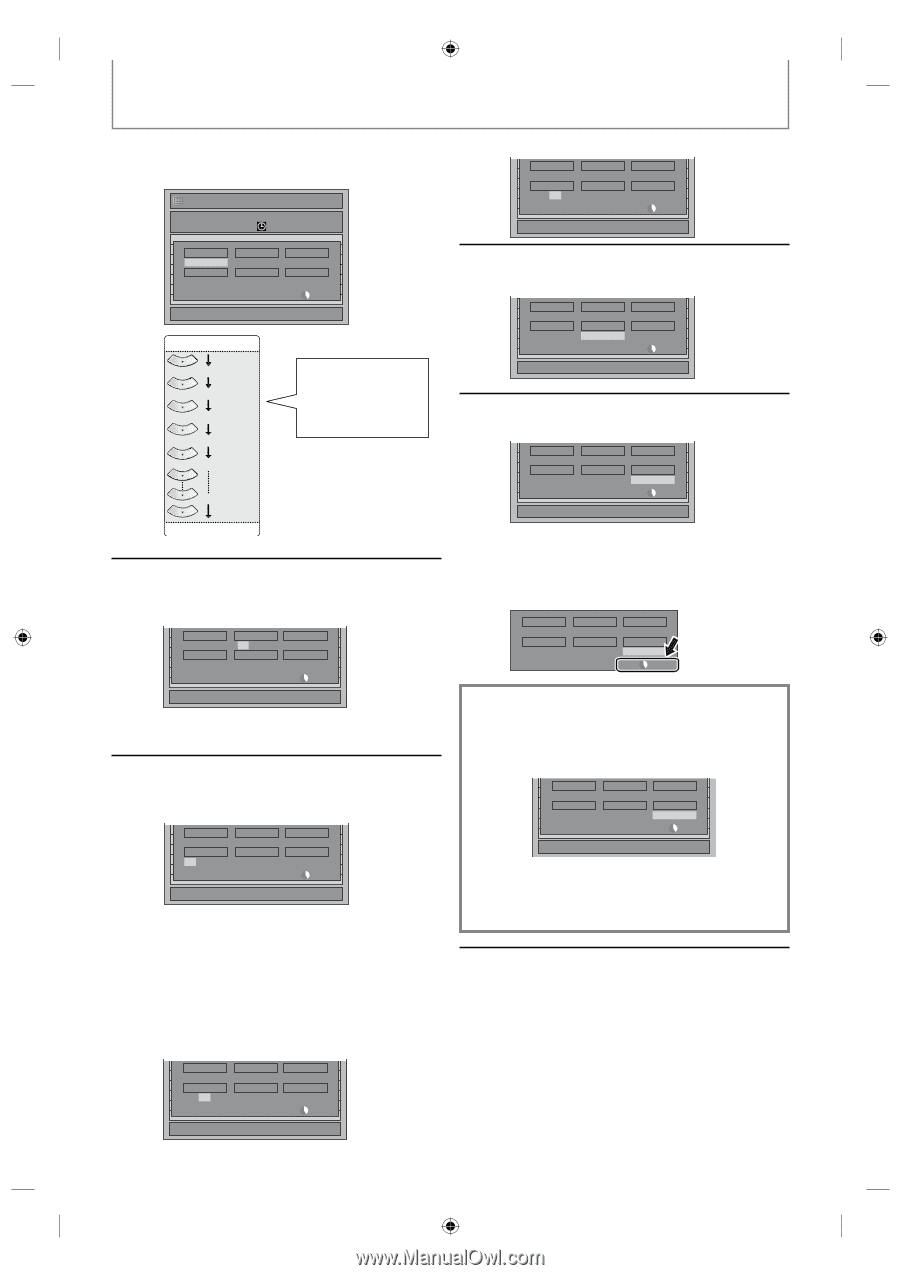
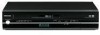
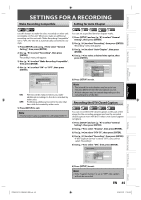
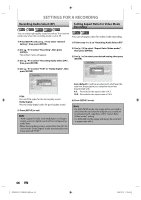
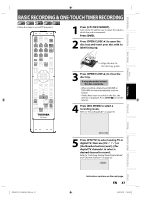
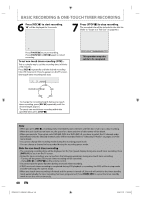
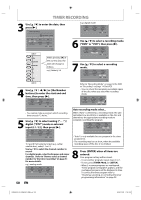
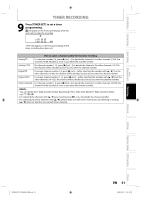
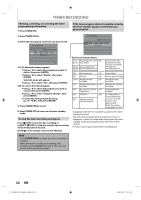
TIMER RECORDING 3 Use [K / L] to enter the date, then press [B]. Timer Programming Date Date JAN/02 CH DTV125- 1 TUE JAN/01 10:00AM Start End NewSPtraorgt ram - - : - REC To DVD CH End - - : - Mode SP SP 2 : 00 1/1 JAN/01 Daily MON-SAT MON-FRI SAT FRI When pressing [L] at the current date, the date will change as follows. e.g.) January 1st SUN JAN/31 4 Use [K / L / { / B] or [the Number buttons] to enter the start and end time, then press [B]. Date JAN/02 CH DTV125- 1 NewSPtraorgt ram 12 : 00AM REC To DVD End - - : - Mode SP SP 2 : 00 1/1 • You cannot make a program which recording time exceeds 12 hours. 5 Use [K / L] to select analog digital ("DTV") mode or external input (L1 / L2), then press [B]. Date JAN/02 CH L1 NewSPtraorgt ram 12 : 00AM REC To DVD End 1 : 00AM Mode SP SP 1 : 00 1/1 To record from external input (e.g., cable/ satellite box), select L1 or L2. Use [K / L] to select the channel number to record. For digital mode, select both major and minor channels. Refer to "How to select a channel number for the timer recording" on page 51 for more details. e.g.) analog mode Date JAN/02 CH 10 NewSPtraorgt ram 12 : 00AM REC To DVD End 1 : 00AM Mode SP SP 1 : 00 1/1 e.g.) digital mode Date JAN/02 CH DTV125- 1 NewSPtraorgt ram 12 : 00AM REC To DVD End 1 : 00AM Mode SP SP 1 : 00 1/1 6 Use [K / L] to select a recording media ("DVD" or "VCR"), then press [B]. Date JAN/02 CH DTV125- 1 NewSPtraorgt ram 12 : 00AM REC To DVD End 1 : 00AM Mode SP SP 1 : 00 1/1 7 Use [K / L] to select a recording mode. Date JAN/02 CH DTV125- 1 NewSPtraorgt ram 12 : 00AM REC To DVD End 1 : 00AM Mode SP SP 1 : 00 1/1 Refer to "Recording Mode" on page 44 for DVD or "Recording" on page 110 for VCR. • You can check the remaining recordable space of the disc when you select the recording mode. Date JAN/02 CH DTV125- 1 Start 12 : 00AM REC To DVD End 1 : 00AM Mode SP SP 1 : 00 Auto recording mode select... When "Auto" is selected as a recording mode, the unit calculates how much time is available on the disc and determines the appropriate recording mode to complete recording the program. Date JAN/02 CH DTV125- 1 NewSPtraorgt ram 12 : 00AM REC To DVD End 1 : 00AM Mode Auto Auto 1 : 00 1/1 • "Auto" is only available for one program in the timer program list. • The recording may be cut short, when the available recording space of the disc is too limited. 8 Press [ENTER] when all items are entered. Your program setting will be stored. • To set another program, repeat steps 2 to 7. • To exit, press [TIMER PROG.] or [SETUP]. • When 2 or more programs are overlapped, "Timer program overlapped" appears, and the overlapped program will be displayed in blue. To correct the timer program refer to "Checking, canceling, or correcting the timer programming information" on page 52. 50 EN E9MG0UD_D-VR660KU_EN.indd 50 2008/01/29 17:21:00
-
 1
1 -
2
-
3
-
4
-
5
-
6
-
7
-
8
-
9
-
10
-
11
-
12
-
13
-
14
-
15
-
16
-
17
-
18
-
19
-
20
-
21
-
22
-
23
-
24
-
25
-
26
-
27
-
28
-
29
-
30
-
31
-
32
-
33
-
34
-
35
-
36
-
37
-
38
-
39
-
40
-
41
-
42
-
43
-
44
-
 45
45 -
 46
46 -
 47
47 -
 48
48 -
 49
49 -
 50
50 -
 51
51 -
 52
52 -
 53
53 -
 54
54 -
 55
55 -
56
-
57
-
58
-
59
-
60
-
61
-
62
-
63
-
64
-
65
-
66
-
67
-
68
-
69
-
70
-
71
-
72
-
73
-
74
-
75
-
76
-
77
-
78
-
79
-
80
-
81
-
82
-
83
-
84
-
85
-
86
-
87
-
88
-
89
-
90
-
91
-
92
-
93
-
94
-
95
-
96
-
97
-
98
-
99
-
100
-
101
-
102
-
103
-
104
-
105
-
106
-
107
-
108
-
109
-
110
-
111
-
112
-
113
-
114
-
115
-
116
-
117
-
118
-
119
-
120
-
121
-
122
-
123
 |
 |