Toshiba Satellite L510 PSLQ0C-02S00C Users Manual Canada; English - Page 88
Using TOSHIBA Web Camera Application, Delete Recorded File
 |
View all Toshiba Satellite L510 PSLQ0C-02S00C manuals
Add to My Manuals
Save this manual to your list of manuals |
Page 88 highlights
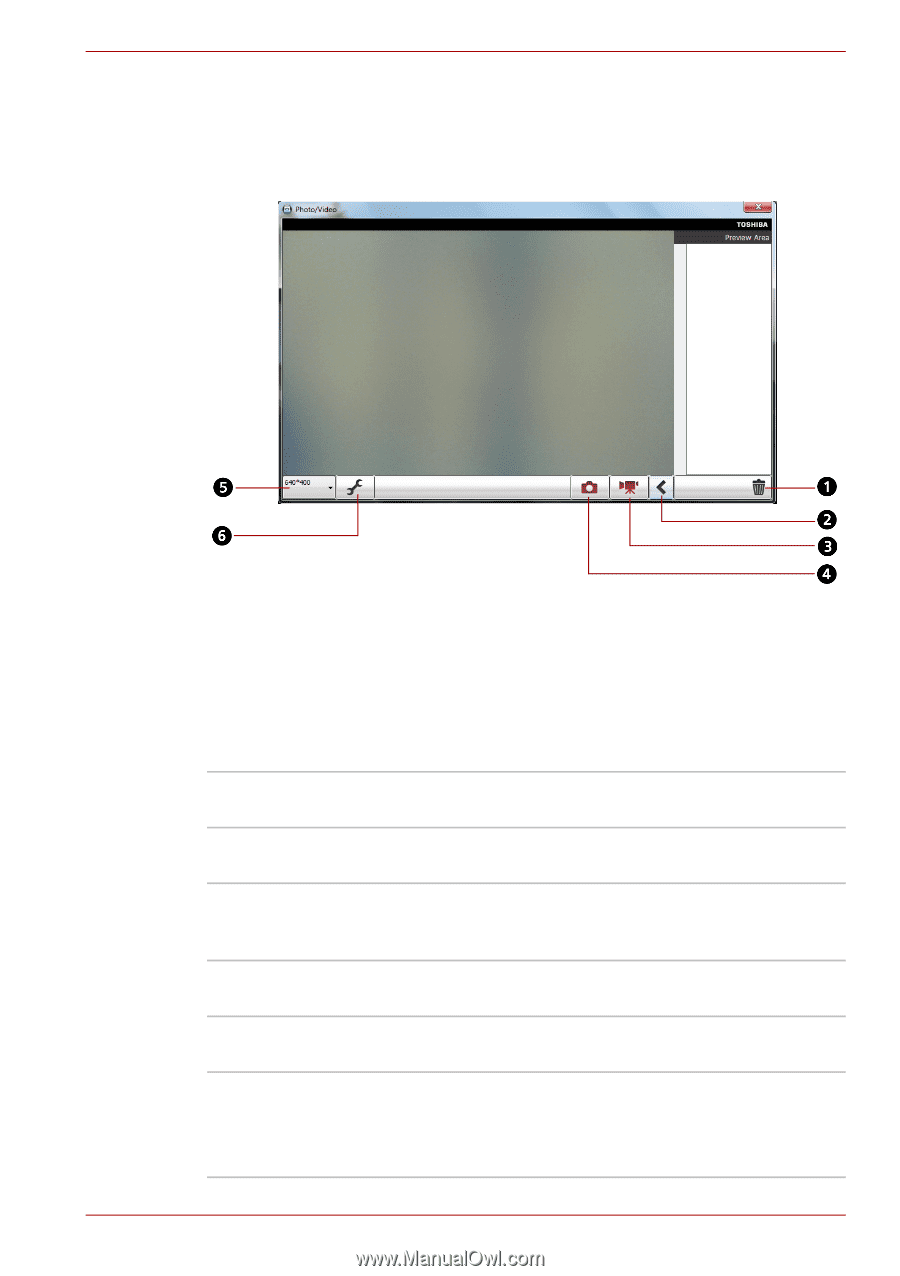
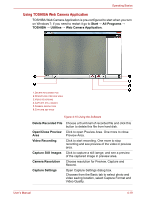
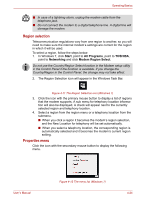
Operating Basics Using TOSHIBA Web Camera Application TOSHIBA Web Camera Application is pre-configured to start when you turn on Windows 7; if you need to restart it go to Start → All Programs → TOSHIBA → Utilities → Web Camera Application. 1.DELETE RECORDED FILE 2.OPEN/CLOSE PREVIEW AREA 3.VIDEO RECORDING 4.CAPTURE STILL IMAGES 5.CAMERA RESOLUTION 6.CAPTURE SETTINGS Figure 4-10 Using the Software Delete Recorded File Choose a thumbnall of recorded file and click this button to delete this file from hard disk. Open/Close Preview Click to open Preview Area. One more to close Area Preview Area. Video Recording Click to start recording. One more to stop recording and see preview of the video in preview area. Capture Still Images Click to capture a still iamge, and see a preview of the captured image in preview area. Camera Resolution Choose resolution for Preview, Capture and Record. Capture Settings Open Capture Settings dialog box. Chooses from the Basic tab to select photo and video saving location, select Capture Format and Video Quality. User's Manual 4-19
-
 1
1 -
2
-
3
-
4
-
5
-
6
-
7
-
8
-
9
-
10
-
11
-
12
-
13
-
14
-
15
-
16
-
17
-
18
-
19
-
20
-
21
-
22
-
23
-
24
-
25
-
26
-
27
-
28
-
29
-
30
-
31
-
32
-
33
-
34
-
35
-
36
-
37
-
38
-
39
-
40
-
41
-
42
-
43
-
44
-
45
-
46
-
47
-
48
-
49
-
50
-
51
-
52
-
53
-
54
-
55
-
56
-
57
-
58
-
59
-
60
-
61
-
62
-
63
-
64
-
65
-
66
-
67
-
68
-
69
-
70
-
71
-
72
-
73
-
74
-
75
-
76
-
77
-
78
-
79
-
80
-
81
-
82
-
 83
83 -
 84
84 -
 85
85 -
 86
86 -
 87
87 -
 88
88 -
 89
89 -
 90
90 -
 91
91 -
 92
92 -
 93
93 -
94
-
95
-
96
-
97
-
98
-
99
-
100
-
101
-
102
-
103
-
104
-
105
-
106
-
107
-
108
-
109
-
110
-
111
-
112
-
113
-
114
-
115
-
116
-
117
-
118
-
119
-
120
-
121
-
122
-
123
-
124
-
125
-
126
-
127
-
128
-
129
-
130
-
131
-
132
-
133
-
134
-
135
-
136
-
137
-
138
-
139
-
140
-
141
-
142
-
143
-
144
-
145
-
146
-
147
-
148
-
149
-
150
-
151
-
152
-
153
-
154
-
155
-
156
-
157
-
158
-
159
-
160
-
161
-
162
-
163
-
164
-
165
-
166
-
167
-
168
-
169
-
170
-
171
-
172
-
173
-
174
-
175
-
176
-
177
-
178
-
179
-
180
-
181
-
182
-
183
-
184
-
185
-
186
-
187
-
188
-
189
-
190
 |
 |