Toshiba Satellite L735D-S3300 User Guide - Page 75
Toshiba Recovery, Erase the hard disk
 |
View all Toshiba Satellite L735D-S3300 manuals
Add to My Manuals
Save this manual to your list of manuals |
Page 75 highlights
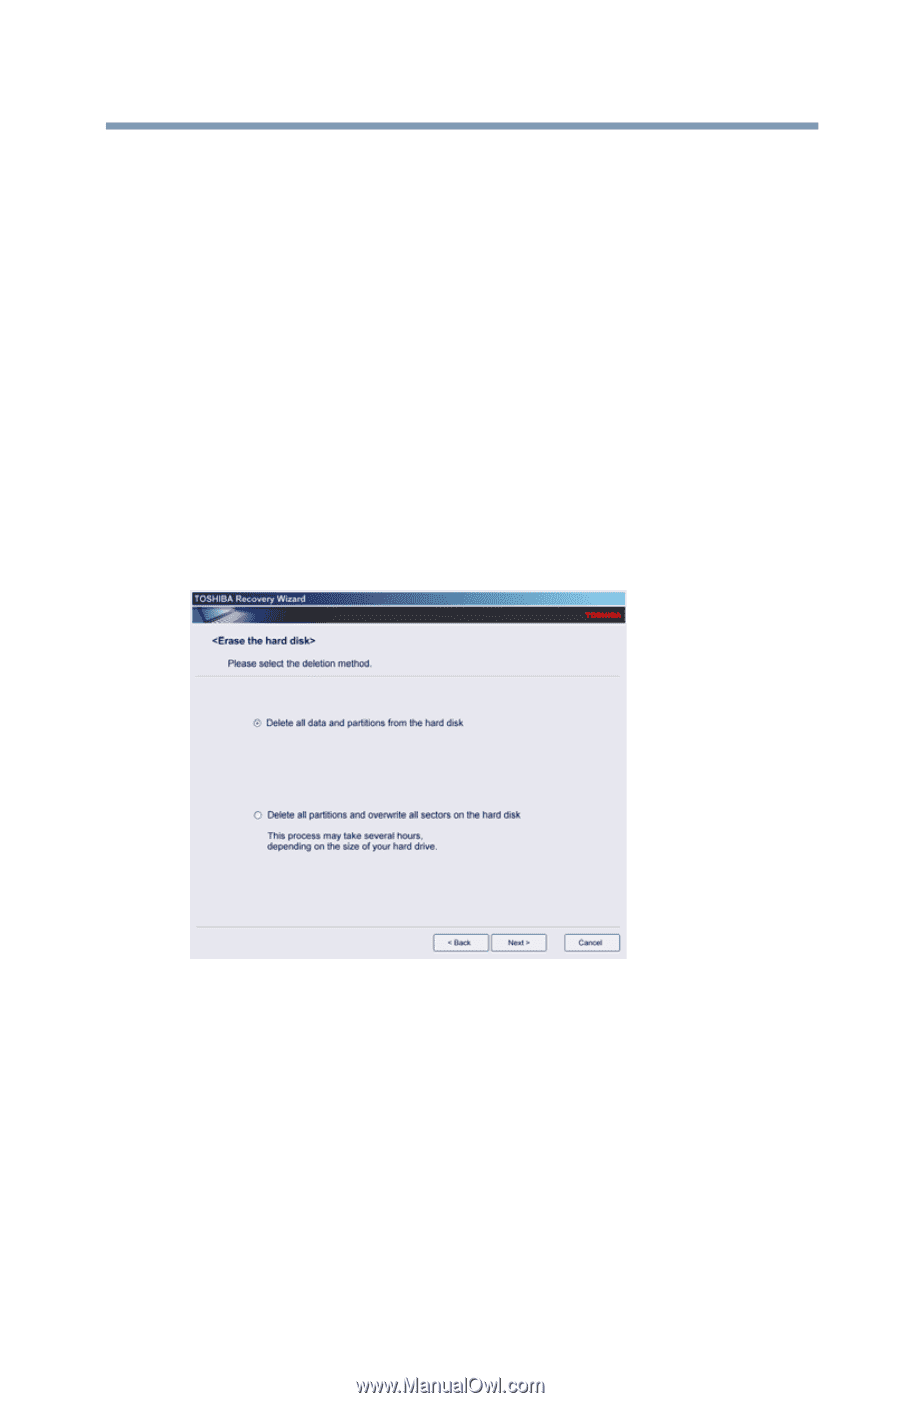
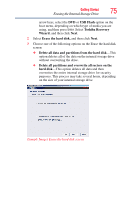
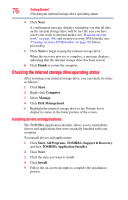
Getting Started 75 Erasing the Internal Storage Drive arrow keys, select the DVD or USB Flash option on the boot menu, depending on which type of media you are using, and then press Enter. Select Toshiba Recovery Wizard, and then click Next. 2 Select Erase the hard disk, and then click Next. 3 Choose one of the following options on the Erase the hard disk screen: ❖ Delete all data and partitions from the hard disk-This option deletes all of the data on the internal storage drive without overwriting the drive. ❖ Delete all partitions and overwrite all sectors on the hard disk-This option deletes all data and then overwrites the entire internal storage drive for security purposes. This process may take several hours, depending on the size of your internal storage drive. (Sample Image) Erase the hard disk screen
-
 1
1 -
2
-
3
-
4
-
5
-
6
-
7
-
8
-
9
-
10
-
11
-
12
-
13
-
14
-
15
-
16
-
17
-
18
-
19
-
20
-
21
-
22
-
23
-
24
-
25
-
26
-
27
-
28
-
29
-
30
-
31
-
32
-
33
-
34
-
35
-
36
-
37
-
38
-
39
-
40
-
41
-
42
-
43
-
44
-
45
-
46
-
47
-
48
-
49
-
50
-
51
-
52
-
53
-
54
-
55
-
56
-
57
-
58
-
59
-
60
-
61
-
62
-
63
-
64
-
65
-
66
-
67
-
68
-
69
-
 70
70 -
 71
71 -
 72
72 -
 73
73 -
 74
74 -
 75
75 -
 76
76 -
 77
77 -
 78
78 -
 79
79 -
 80
80 -
81
-
82
-
83
-
84
-
85
-
86
-
87
-
88
-
89
-
90
-
91
-
92
-
93
-
94
-
95
-
96
-
97
-
98
-
99
-
100
-
101
-
102
-
103
-
104
-
105
-
106
-
107
-
108
-
109
-
110
-
111
-
112
-
113
-
114
-
115
-
116
-
117
-
118
-
119
-
120
-
121
-
122
-
123
-
124
-
125
-
126
-
127
-
128
-
129
-
130
-
131
-
132
-
133
-
134
-
135
-
136
-
137
-
138
-
139
-
140
-
141
-
142
-
143
-
144
-
145
-
146
-
147
-
148
-
149
-
150
-
151
-
152
-
153
-
154
-
155
-
156
-
157
-
158
-
159
-
160
-
161
-
162
-
163
-
164
-
165
-
166
-
167
-
168
-
169
-
170
-
171
-
172
-
173
-
174
-
175
-
176
-
177
-
178
-
179
-
180
-
181
-
182
-
183
-
184
-
185
-
186
-
187
-
188
-
189
-
190
-
191
-
192
-
193
-
194
-
195
-
196
-
197
-
198
-
199
-
200
-
201
-
202
-
203
-
204
-
205
-
206
 |
 |