Troy-Bilt TB30 Operation Manual - Page 27
Changing the Deck Belt, Battery
 |
View all Troy-Bilt TB30 manuals
Add to My Manuals
Save this manual to your list of manuals |
Page 27 highlights
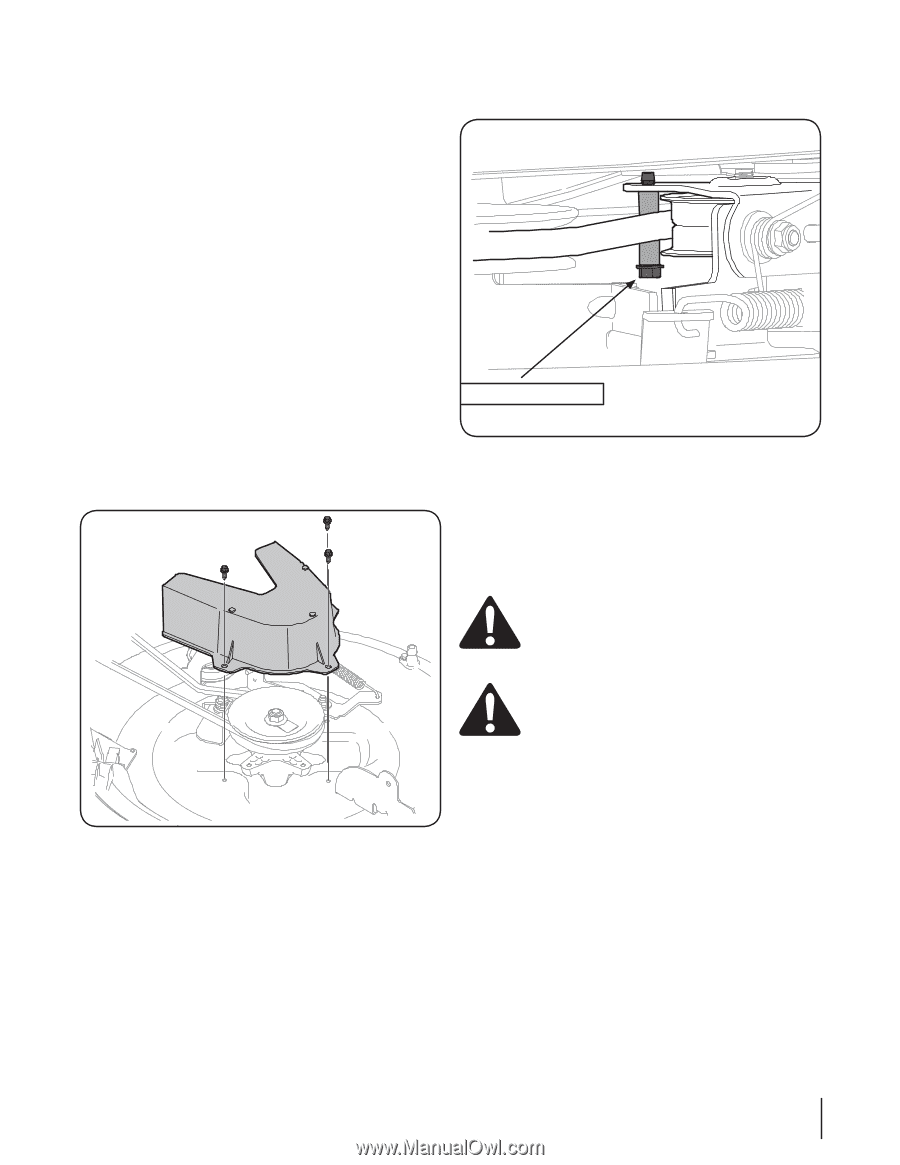
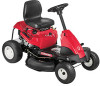
Changing the Deck Belt NOTE: It is possible to change the deck belt with the cutting deck still installed on the tractor, however it is much easier to remove the deck first, change the deck belt, then reinstall the cutting deck. 6. Remove the belt keeper by removing the hex bolt that secures it. See Figure 7-6. To change the cutting deck belt, proceed as follows: 1. It is easiest to change the deck belt by first removing the cutting deck as instructed earlier in this section first. Skip this step if deciding to change the deck belt with the mowing deck still installed on the unit. Otherwise, remove the cutting deck now. 2. If changing the deck belt with the cutting deck still installed on the unit, lower the deck to the lowest mowing position. 3. Remove the deck belt from around the unit's PTO drive pulley as shown in Figure 7-2. Simply roll one side of the belt off of the pulley and then work it off the pulley by continuing around the pulley until the belt is off of the pulley. 4. Pull the belt towards the front of the unit, pulling it through and out of the belt keeper rod, shown in Figure 7-2. 5. Remove the deck belt cover by removing the three hex bolts that secure it. See Figure 7-5. Belt Keeper Hex bolt Figure 7-6 7. Change the belt then reinstall the all the components removed in the reverse order beginning with the idler pulley, and then belt cover. 8. Feed the deck belt through the belt keeper rod and work it around and onto the PTO drive pulley as shown in Figure 7-2. Battery Figure 7-5 CALIFORNIA PROPOSITION 65 WARNING! Battery posts, terminals, and related accessories contain lead and lead compounds, chemicals known to the State of California to cause cancer and reproductive harm. Wash hands after handling. CAUTION: If removing the battery, disconnect the NEGATIVE (Black) wire from it's terminal first, followed by the POSITIVE (Red) wire. When reinstalling the battery, always connect the POSITIVE (Red) wire its terminal first, followed by the NEGATIVE (Black) wire. Battery Failures Some common causes for battery failure are: • Incorrect initial activation • Overcharging • Freezing • Undercharging • Corroded connections These failures are NOT covered by your tractor's warranty. Section 7 - Service 27
-
 1
1 -
2
-
3
-
4
-
5
-
6
-
7
-
8
-
9
-
10
-
11
-
12
-
13
-
14
-
15
-
16
-
17
-
18
-
19
-
20
-
21
-
 22
22 -
 23
23 -
 24
24 -
 25
25 -
 26
26 -
 27
27 -
 28
28 -
 29
29 -
 30
30 -
 31
31 -
 32
32 -
33
-
34
-
35
-
36
-
37
-
38
-
39
-
40
-
41
-
42
-
43
-
44
-
45
-
46
-
47
-
48
-
49
-
50
-
51
-
52
-
53
-
54
-
55
-
56
-
57
-
58
-
59
-
60
-
61
-
62
-
63
-
64
-
65
-
66
-
67
-
68
-
69
-
70
-
71
-
72
 |
 |