ViewSonic PJ558D PJ558D User Guide - Page 22
Remote Control - projector replacement
 |
UPC - 766907240115
View all ViewSonic PJ558D manuals
Add to My Manuals
Save this manual to your list of manuals |
Page 22 highlights
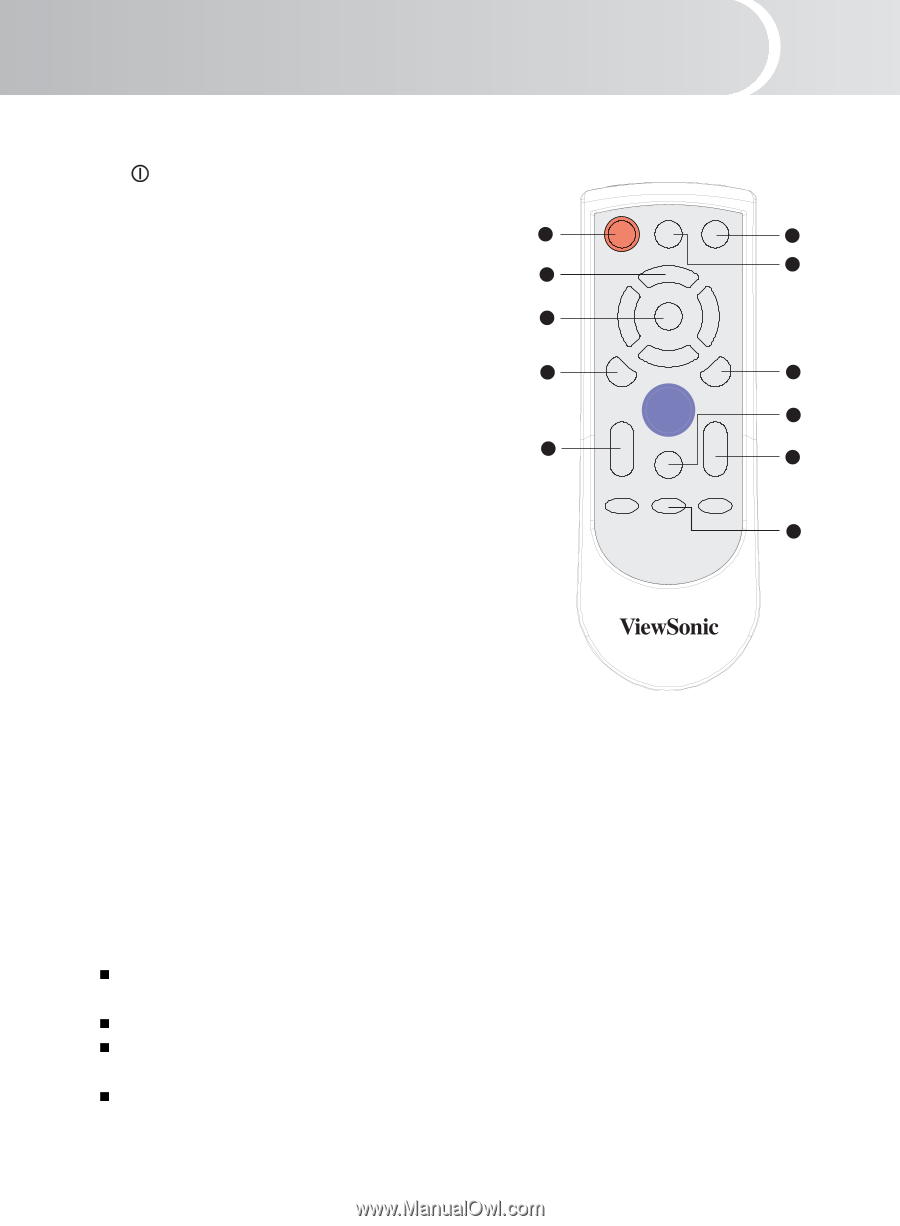
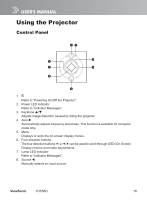
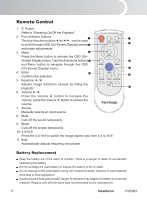
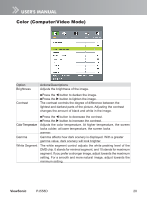
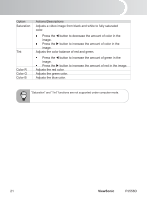
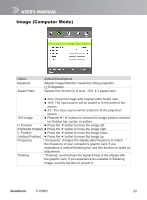
English Remote Control 1. Power Refer to "Powering On/Off the Projector". 2. Four direction buttons 1 7 The four direction buttons can be used to scroll through OSD (On-Screen Display) menus 2 POWER AUTO SOURCE 11 and make adjustments. 3. Menu 3 Press the Menu button to activate the OSD (On- MENU Screen Display) menu. Use the directional buttons 4 9 and Menu button to navigate through the OSD ENTER BLANK (On-Screen Display) menu. 10 4. Enter Confirms the selection 6 LASER 5 5. Keystone / VOLUME 4:3/16:9 KEYSTONE Adjusts image distortion caused by tilting the projector. MUTE 8 6. Volume / Press the Volume button to increase the volume; press the Volume button to reduce the volume. 7. Source Manually selects an input source. 8. Mute Cuts off the sound temporarily. 9. Blank Cuts off the screen temporarily. 10. 4:3/16:9 Press the 4:3/16:9 to switch the image aspect ratio from 4:3 to 16:9. 11. Auto Automatically adjusts frequency and phase. Battery Replacement Keep the battery out of the reach of children. There is a danger of death by accidentally swallowing the battery. Do not recharge the used battery or expose the battery to fire or water. Do not dispose of the used battery along with household waste. Dispose of used batteries according to local regulations. Avoid excessive heat and humidity. Danger of explosion may happen if a battery is incorrectly replaced. Replace only with the same type recommended by the manufacturer. 17 ViewSonic PJ558D
-
 1
1 -
2
-
3
-
4
-
5
-
6
-
7
-
8
-
9
-
10
-
11
-
12
-
13
-
14
-
15
-
16
-
 17
17 -
 18
18 -
 19
19 -
 20
20 -
 21
21 -
 22
22 -
 23
23 -
 24
24 -
 25
25 -
 26
26 -
 27
27 -
28
-
29
-
30
-
31
-
32
-
33
-
34
-
35
-
36
-
37
-
38
-
39
-
40
-
41
-
42
-
43
 |
 |