ViewSonic PJ558D PJ558D User Guide - Page 24
Menu Options
 |
UPC - 766907240115
View all ViewSonic PJ558D manuals
Add to My Manuals
Save this manual to your list of manuals |
Page 24 highlights
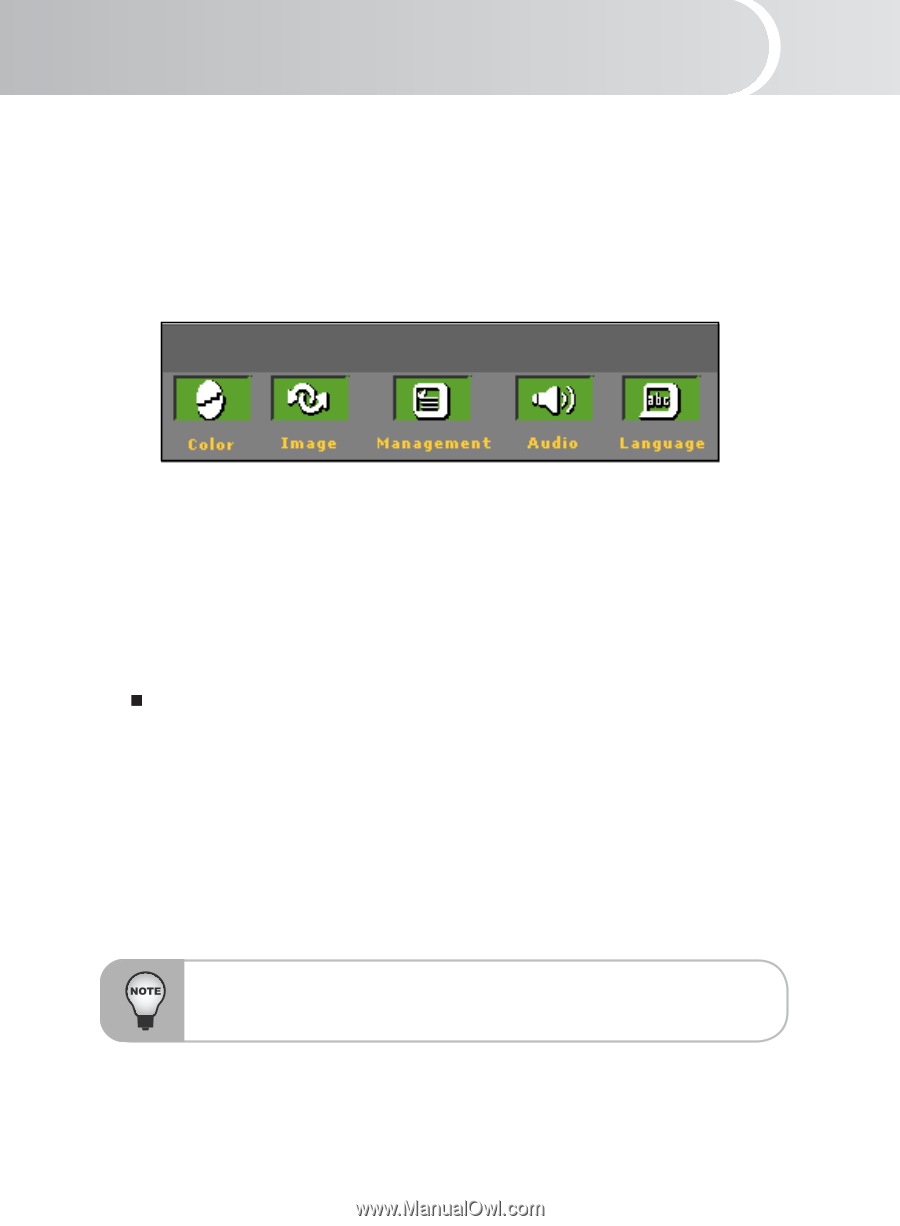
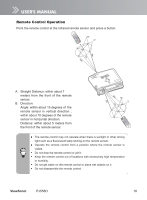
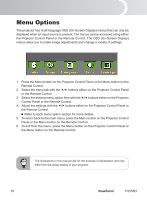
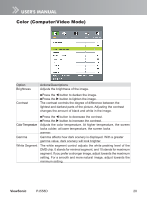
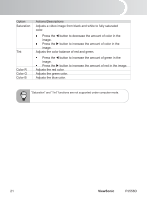
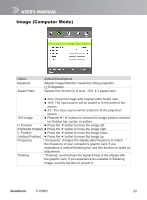
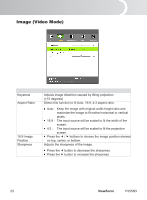
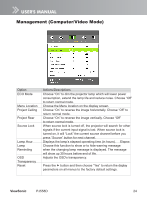
English Menu Options The projector has multi-language OSD (On-Screen Display) menus that can only be displayed when an input source is present. The menus can be accessed using either the Projector Control Panel or the Remote Control. The OSD (On-Screen Display) menus allow you to make image adjustments and change a variety of settings. 1. Press the Menu button on the Projector Control Panel or the Menu button on the Remote Control. 2. Select the menu tab with the / buttons either on the Projector Control Panel or the Remote Control. 3. Select the desired menu option item with the / buttons either on the Projector Control Panel or the Remote Control. 4. Adjust the settings with the / buttons either on the Projector Control Panel or the Remote Control. Refer to each menu option section for more details. 5. To return back to the main menu, press the Menu button on the Projector Control Panel or the Menu button on the Remote Control. 6. To exit from the menu, press the Menu button on the Projector Control Panel or the Menu button on the Remote Control. The illustrations in this manual are for the purpose of explanation and may differ from the actual setting of your projector. 19 ViewSonic PJ558D
-
 1
1 -
2
-
3
-
4
-
5
-
6
-
7
-
8
-
9
-
10
-
11
-
12
-
13
-
14
-
15
-
16
-
17
-
18
-
 19
19 -
 20
20 -
 21
21 -
 22
22 -
 23
23 -
 24
24 -
 25
25 -
 26
26 -
 27
27 -
 28
28 -
 29
29 -
30
-
31
-
32
-
33
-
34
-
35
-
36
-
37
-
38
-
39
-
40
-
41
-
42
-
43
 |
 |