ViewSonic PJL855 User Guide - Page 10
ViewSonic PJL855 - LCD Projector SVGA Manual
 |
UPC - 766907212013
View all ViewSonic PJL855 manuals
Add to My Manuals
Save this manual to your list of manuals |
Page 10 highlights
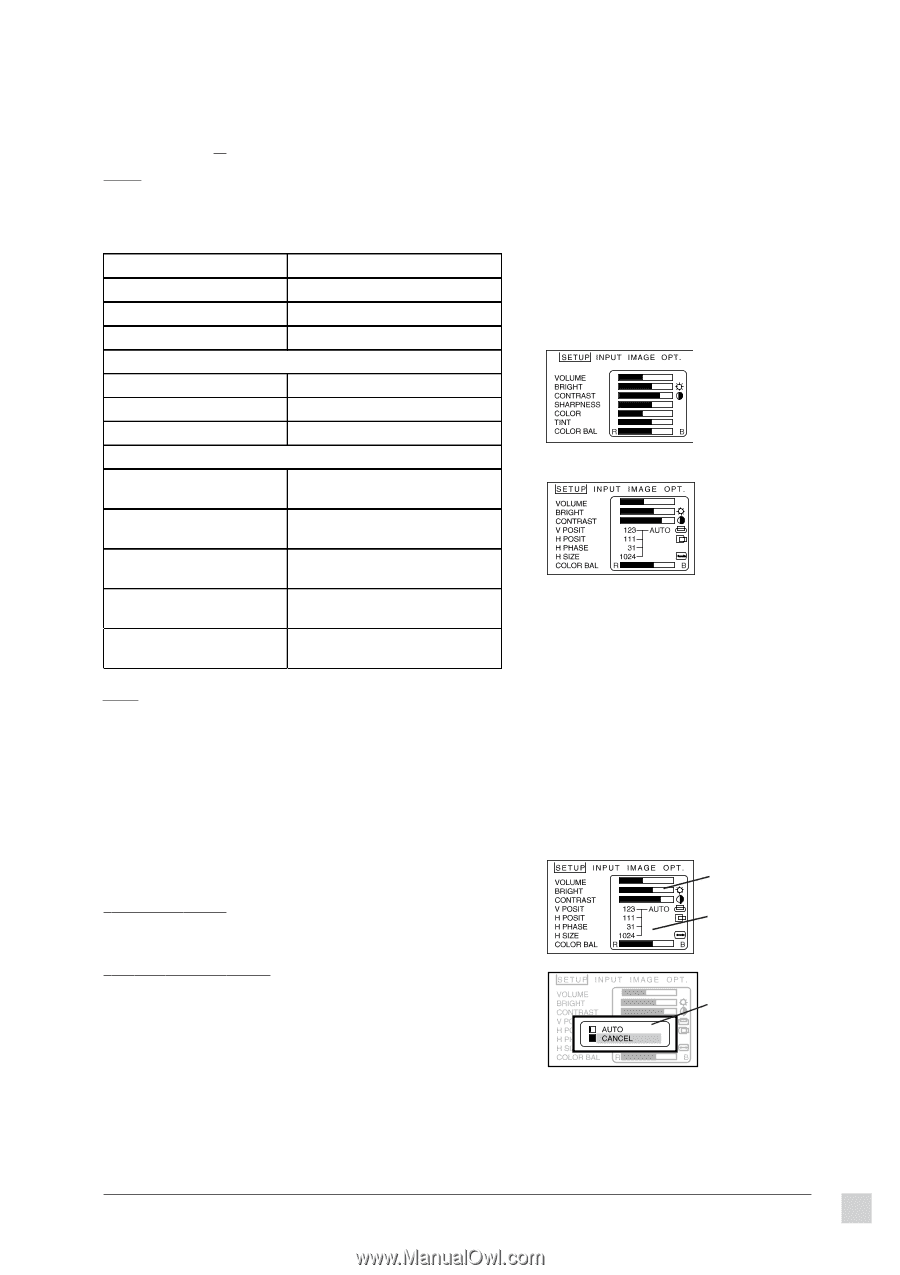
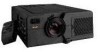
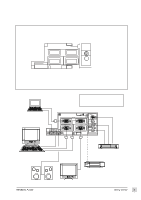
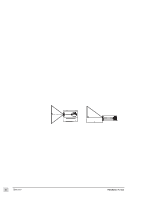
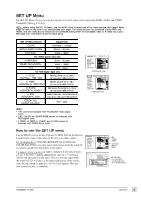
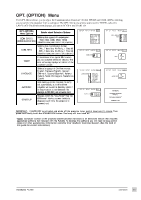
SET UP Menu The SET UP Menu allows you to adjust the picture for each input source separately: RGB1, RGB2, and VIDEO (Composite Video or S-Video). NOTE: Before using the SET UP Menu, use the INPUT Menu to select one of the input sources, then repeat these steps for each of the other input sources (see next page). Two computers can be connected (using RGB1 and RGB2), and one video source should be be connected (using either the Composite video or S-video input port.) See page 5 for information about the input ports. SET UP Menu Options Adjustments VOLUME BRIGHT (BRIGHTNESS) CONTRAST Decrease -- Increase Darker -- Brighter Lower -- Higher For VIDEO signal input only SHARPNESS COLOR (SATURATION) TINT Softer -- Sharper Lower -- Higher Red -- Green For RGB signal input only VIDEO signal input V POSIT (VERTICAL POSITION) H POSIT (HORIZONTAL POSITION) H PHASE (HORIZONTAL PHASE) H SIZE (HORIZONTAL SIZE) COLOR BAL (COLOR BALANCE) Moves picture up or down (or use automatic control) Moves picture left or right (or use automatic control) Decreases flicker/picture rolling (or use automatic control) Widens/narrows horizontal size of picture (or use automatic control) Red -- Blue RGB signal input NOTE: • TINT cannot be adjusted with PAL/SECAM video signal input. • TINT, COLOR, and SHARPNESS cannot be adjusted with RGB signal nput. • V. POSIT, H. POSIT, H. PHASE, and H. SIZE cannot be adjusted with VIDEO signal input. How to use the SET UP menu Use the MENU buttons on the projector (or DISK PAD on the Remote Control Unit) to move the cursor to the item you want to adjust. For bar display items (VOLUME, BRIGHTNESS, CONTRAST, COLOR BALANCE) you must make adjustments manually using the on-screen controls (see illustration to the right). For numerical display items (V POSIT, H POSIT, H PHASE, H SIZE) you have the option making adjustements manually or selecting AUTO (see illustration to the right). During automatic adjustment, the word "AUTO" will flash in the lower right corner of the screen; when the adjustment is complete, AUTO will disappear. This may take several seconds to complete. bar display items numerical display items AUTO option (only applies to numerical display items shown above) ViewSonic PJL855 Operation 9
-
 1
1 -
2
-
3
-
4
-
 5
5 -
 6
6 -
 7
7 -
 8
8 -
 9
9 -
 10
10 -
 11
11 -
 12
12 -
 13
13 -
 14
14 -
 15
15 -
16
-
17
-
18
-
19
 |
 |