ViewSonic PJL855 User Guide - Page 17
ViewSonic PJL855 - LCD Projector SVGA Manual
 |
UPC - 766907212013
View all ViewSonic PJL855 manuals
Add to My Manuals
Save this manual to your list of manuals |
Page 17 highlights
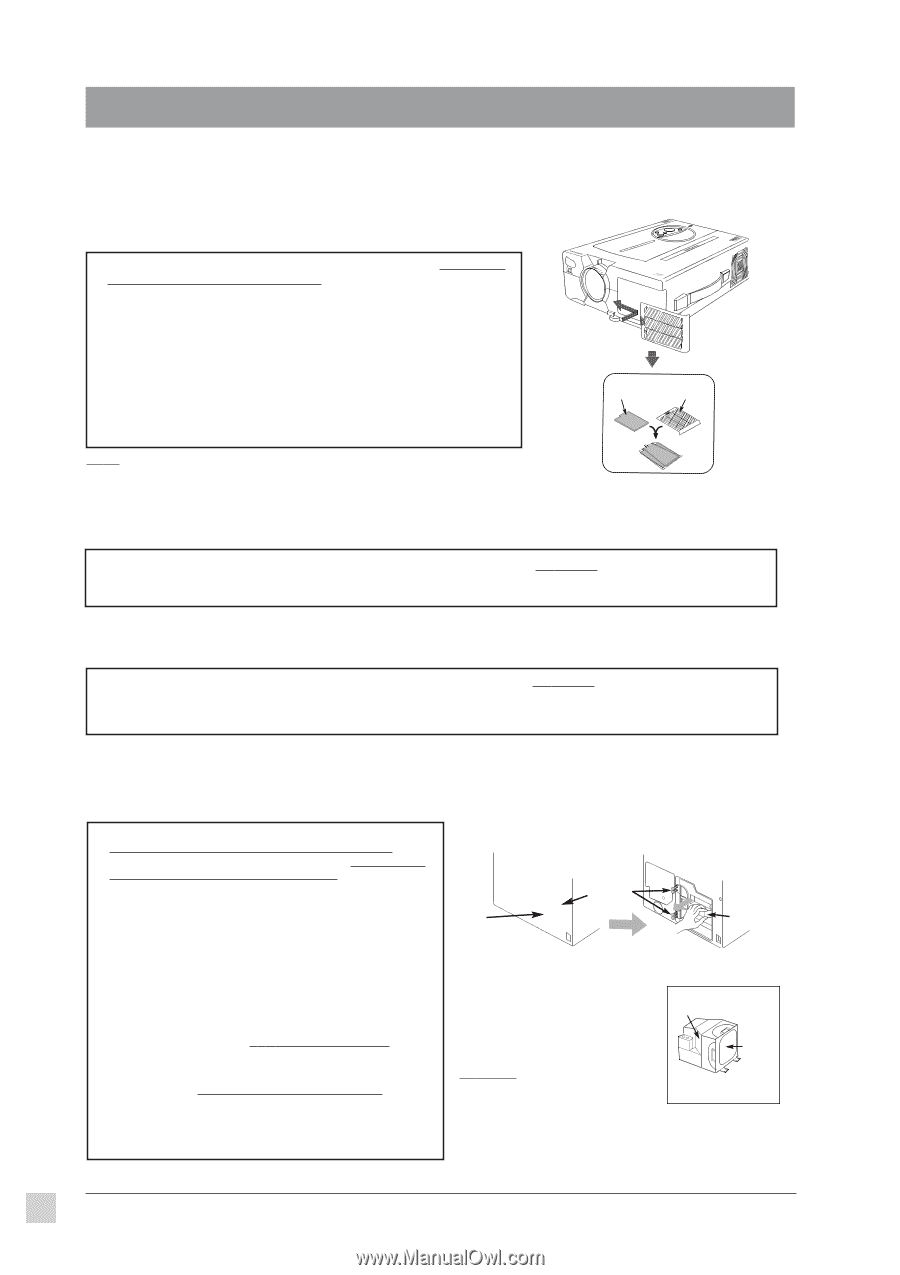
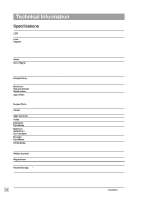
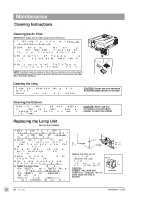
Maintenance Cleaning Instructions To ensure that the projector functions properly, follow the recommended cleaning instructions below. Cleaning the Air Filter IMPORTANT: Clean the air filter about every 100 hours. 1 Turn OFF the Main Power switch of the projector and disconnect the power cord from the wall outlet. 2 Carefully place the projector on its side (with the lens pointing up) onto a flat surface covered with soft material (like a towel). Then loosen the thumb screw and remove the air-filter plate. 3 Remove the air filter from the Front Filter Cover (as shown in the illustration to the right) and use a vacuum cleaner to clean the filter. 4 Re-install the air filter, then the Front Filter Cover. Tighten the thumb screw and plug the power cord back into the wall outlet. NOTE: If sufficient dust, etc. collects in the air filter, a protection circuit in the projector will automatically turn off the power. To prevent this from occurring, make sure you clean the air filter every 100 hours. Air filter Front Filter Cover Cleaning the Lens • To clean the lens, use a camera lens cleaning tissue or a camel hair brush. • Be careful not to scratch the lens with a sharp or hard object. CAUTION: Never use any ammonia or alcohol based cleaner on the lens. Cleaning the Cabinet • Use a soft, dry, lint-free cloth to wipe dust, etc. from the cabinet. • If this is insufficient, use a soft, lint-free cloth moistened with a mild detergent diluted with water. Then wipe the surface with a soft, dry, lint-free cloth. CAUTION: Never use any ammonia or alcohol-based cleaner to clean the cabinet. Replacing the Lamp Unit To order a new lamp unit (Part No. RLU-150-03A) contact ViewSonic® Customer Support. 1 Make sure the Main Power switch is OFF, then disconnect the power cord from the wall outlet. If the projector has recently been turned on, wait at least 45 minutes for the lamp to cool down. 2 Carefully place the projector onto a flat surface covered with soft material (like a towel). Then loosen the Lamp Cover screw and remove the Lamp Plate (as shown to the right). 3 Loosen the four (4) lamp-unit screws, grasp the Lamp Unit Handle, and gently pull the lamp unit out of the projector. 4 Carefully insert the new lamp unit into the projector and tighten the lamp-unit screws. 5 Re-install the Lamp Cover and tighten the Lamp Cover screw securely. Power-on the projector. 6 Reset the lamp time (within 10 minutes) • Press RESET (on projector) or TIMER (on Remote Control Unit) and hold for three (3) seconds • Press RESET (on projector) or MENU ON (on Remote Control Unit) • Select "0" on the screen using MENU [
-
 1
1 -
2
-
3
-
4
-
5
-
6
-
7
-
8
-
9
-
10
-
11
-
 12
12 -
 13
13 -
 14
14 -
 15
15 -
 16
16 -
 17
17 -
 18
18 -
 19
19
 |
 |