ViewSonic PJL855 User Guide - Page 7
ViewSonic PJL855 - LCD Projector SVGA Manual
 |
UPC - 766907212013
View all ViewSonic PJL855 manuals
Add to My Manuals
Save this manual to your list of manuals |
Page 7 highlights
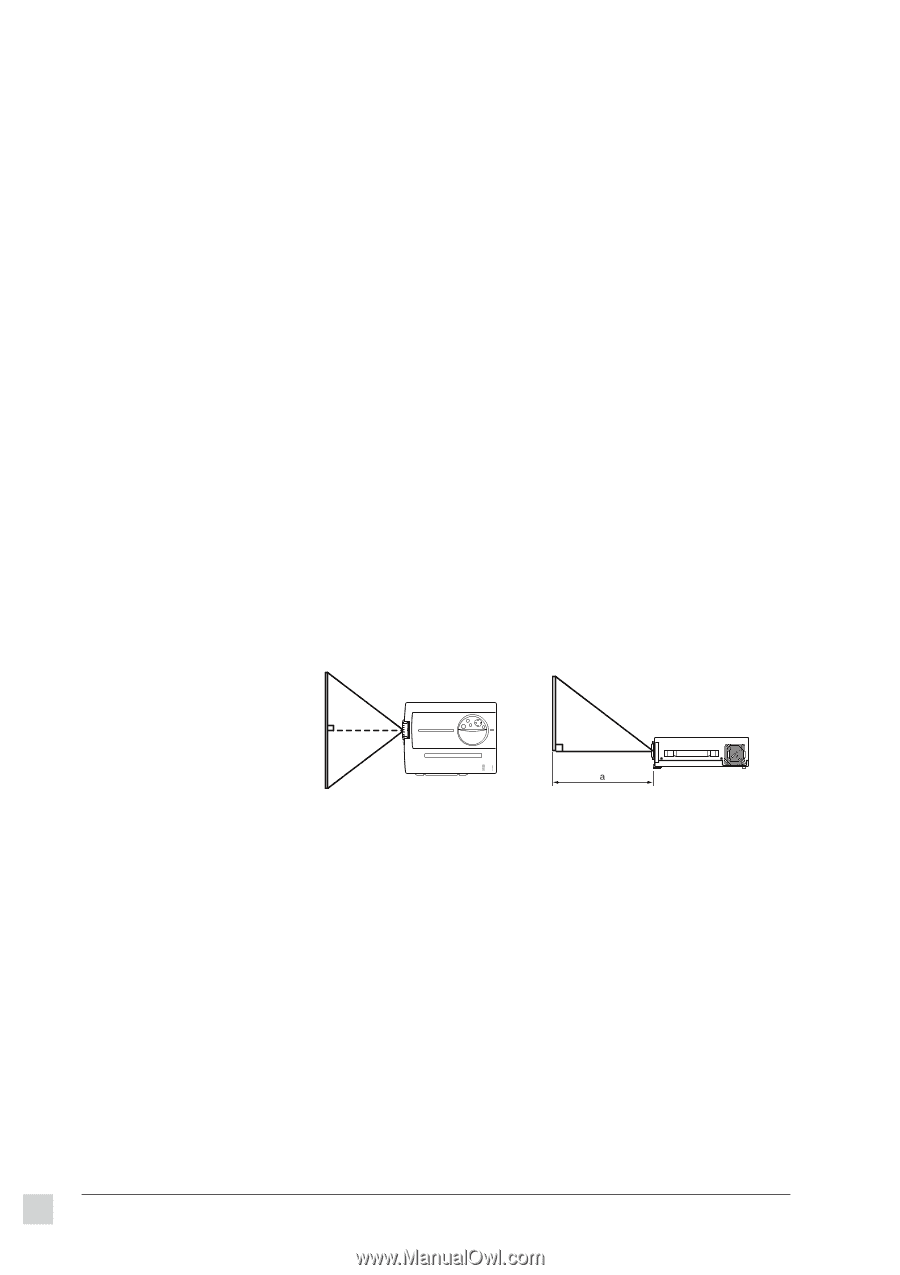
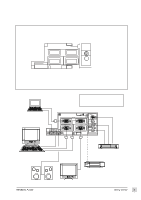
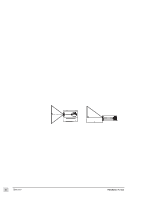
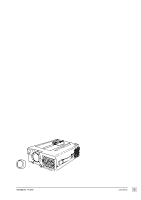
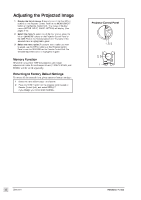
Operation Projecting a Picture 1 2 Power ON the projector. Set the MAIN POWER switch to ON (located on the side Connector Panel). The ON indicator lights orange. Press the STANDBY/ON button on the Projector Control Panel or on the Remote Control Unit. (See page 7) The ON indicator blinks green during warm-up and stays green when projector is ready for use. NOTE: The power can not be turned on if the STANDBY/ON button is pressed within 60 seconds after the power is turned off. 3 4 Remove the lens cap. Position the projector the desired distance from the projection screen, then set the projection angle by positioning the foot adjusters. (See Positioning the Projector and Setting the Projection Angle below) Power ON all connected input devices. (See pages 4-5.) Select the signal source: press the INPUT button on the projector or one of the the INPUT buttons (VIDEO/RGB) on the Remote Control Unit. (See pages7.) NOTE: To switch between RGB1 and RGB2, use the INPUT menu (see page 10). 7 Adjust the picture size with the ZOOM knob, then adjust the focus using the FOCUS ring (see page 7). Turning Off the Projector 1 Press STANDBY/ON button (on Control Panel or Remote Control Unit) for one (1) second. The ON indicator blinks orange and the projector lamp turns off. CAUTION: Always press the STANDBY/ON button before turning OFF the MAIN POWER. This allows the fan to cool down the projector. 2 Wait until the fan stops (about one minute after pressing STANDBY/ON button). 3 Power OFF the projector. Set the MAIN POWER switch to OFF. 4 Place the lens cap over the lens. 5 6 NOTE: This projector complies with VESA DDC1/2B specifications. Only RGB1 supports Plug & Play. Positioning the Projector The projector must be horizontal to get a distortion-free picture. Place the projector on a table-top or other flat surface. Use the chart below to determine the placement of the projection screen. Screen Top View Side View Screen Size (inches) Distance "a" (inches) Minimum Maximum 40 60 80 100 120 150 200 64 97 130 163 196 244 326 64 127 169 213 256 319 ---This screen size is full-screen size (800 dots x 600 dots) a = distance from projector to screen CAUTION To prevent a build-up of heat that can damage the projector: • Be especially careful not to block ventilation holes when installing the projector. • Only use this projector in the horizontal position (see Side View shown above). Setting the Projection Angle 1 While firmly grasping the front of the projector with both hands, use an index finger to push, and hold, the Adjuster Button (located above the Front Foot Adjuster). 2 To adjust the viewing angle, tilt the front of the projector up. Then (while still grasping the projector) release the Adjuster Button, securely locking the Front Foot Adjuster. 3 To make fine adjustments, turn the base of the Front Foot Adjuster. Also adjust the Rear Foot Adjuster in this manner. CAUTION • • • To prevent possible injury or damage, make sure you are holding on to the projector securely before you unlock the foot adjusters. Securely lock the Front Foot Adjuster. Do not use unnecessary force when you move either of the foot adjusters. Front View Side View You can adjust horizontal inclanation with the Rear Foot Adjuster. You can make vertical adjustments (0 to 9 degrees) using the Front Foot Adjuster. Front Foot Adjuster 6 Operation ViewSonic PJL855
-
 1
1 -
 2
2 -
 3
3 -
 4
4 -
 5
5 -
 6
6 -
 7
7 -
 8
8 -
 9
9 -
 10
10 -
 11
11 -
 12
12 -
13
-
14
-
15
-
16
-
17
-
18
-
19
 |
 |