Weider 14933 Instruction Manual - Page 9
Orient the Right and Left Frames 5, 6
 |
View all Weider 14933 manuals
Add to My Manuals
Save this manual to your list of manuals |
Page 9 highlights
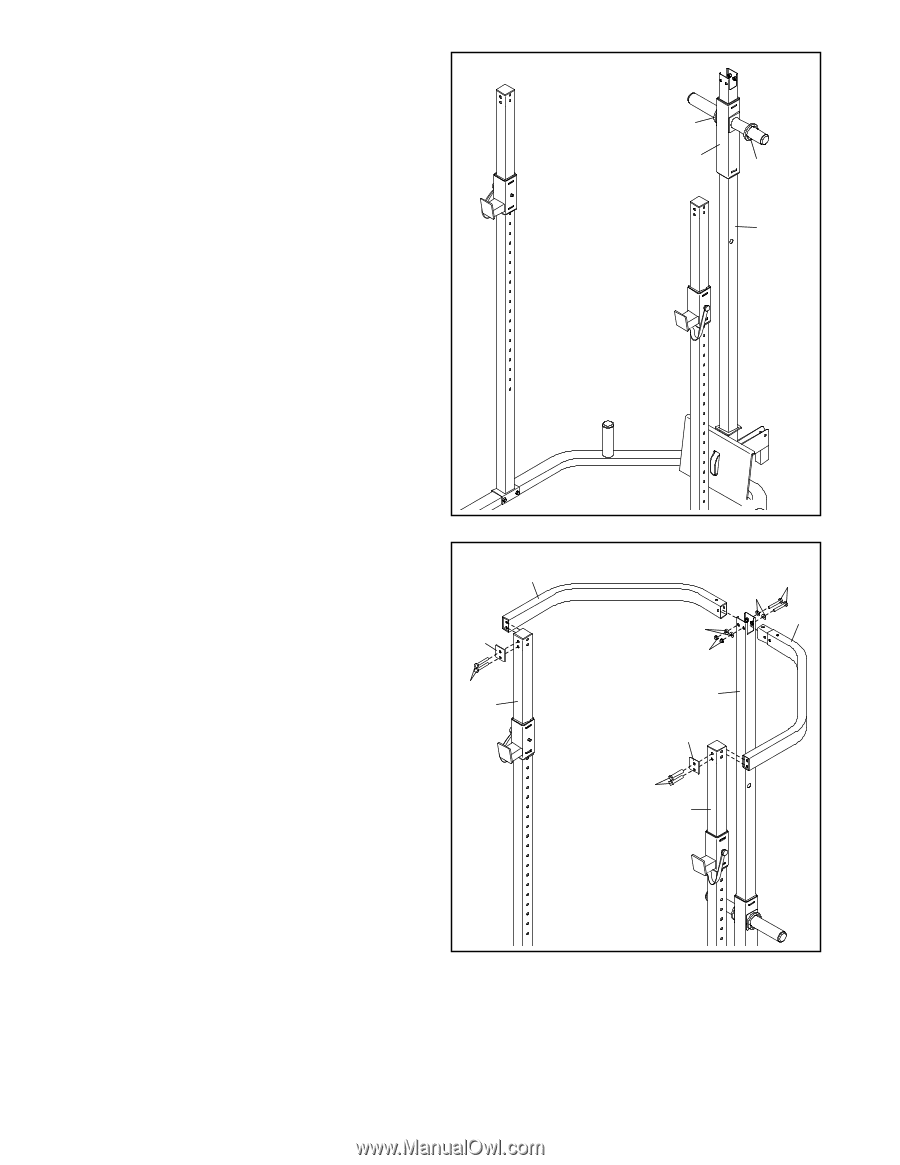
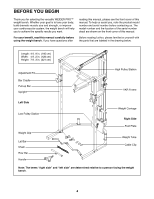
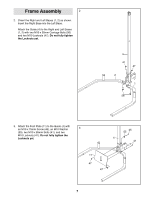
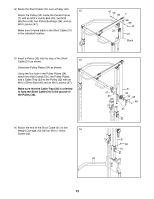
6. Orient the Weight Carriage (10) as shown and slide it onto the Guide (4). 6 Slide a Weight Plate Bumper (20) onto each side of the Weight Carriage (10). 20 10 20 4 7. Orient the Right and Left Frames (5, 6) as shown. Insert the Right Frame into the Left Frame. Have a second person hold the Right and Left Frames (5, 6) near the tops of the Guide (4) and the Uprights (3). Insert the Right and Left Frames (5, 6) into the top of the Guide (4). Attach the Right and Left Frames with two M10 x 75mm Bolts (45), four M10 Washers (55), and two M10 Locknuts (47). Do not fully tighten the Locknuts yet. Attach the Right Frame (5) to the right Upright (3) with two M10 x 80mm Screws (43) and a Plate (51). Do not fully tighten the Screws yet. Attach the Left Frame (6) to the left Upright (3) in the same way. 7 6 51 43 3 55 47 4 51 55 45 5 43 3 9
-
 1
1 -
2
-
3
-
 4
4 -
 5
5 -
 6
6 -
 7
7 -
 8
8 -
 9
9 -
 10
10 -
 11
11 -
 12
12 -
 13
13 -
 14
14 -
15
-
16
-
17
-
18
-
19
-
20
-
21
-
22
-
23
-
24
 |
 |