Weider 245 English Manual - Page 13
Cable Assembly
 |
View all Weider 245 manuals
Add to My Manuals
Save this manual to your list of manuals |
Page 13 highlights
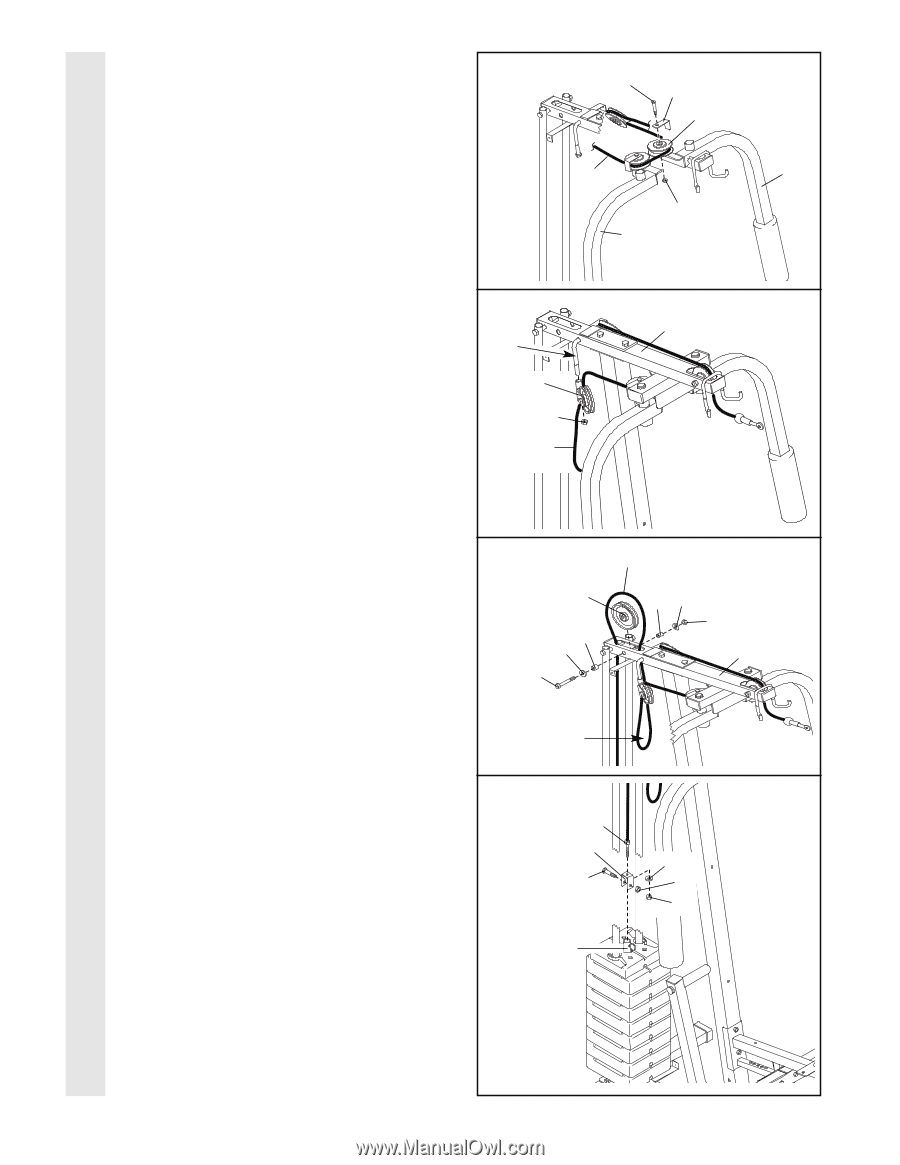
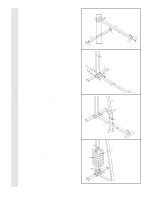
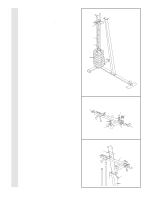
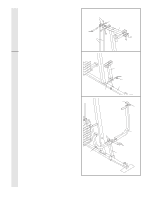
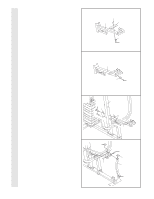
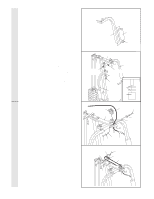
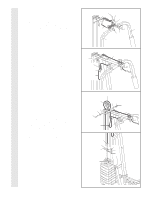
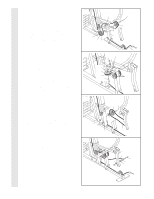
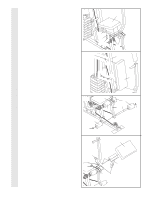
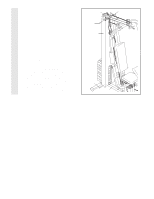
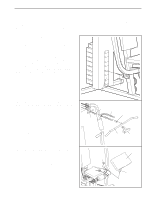
CABLE ASSEMBLY 19. Route the Short Cable (23) around two "V"- 19 Pulleys (6). Attach the Pulleys and two Long Cable Traps (50) to the Left Arm (47) and the 7 50 Right Arm (48) as shown, using two 3/8" x 6 2 1/2" Bolts (7) and two 3/8" Nylon Locknuts (21). Do not overtighten the Nylon Locknuts; the Pulleys must be able to turn freely. 23 47 21 48 20. Remove the 1/2" Nylon Locknut (81) from the 20 rod on the Top Frame (55). Attach the Pulley Bracket (20) to the rod on the Top Frame with 55 the 1/2" Nylon Locknut. Route the Short Rod Cable (23) through the Pulley Bracket as shown. Do not overtighten the Nylon 20 Locknut; the Pulley Bracket must be able to pivot freely. 81 23 21. Loop the Short Cable (23) as shown. Route the Short Cable up through the hole in the Top Frame (55). Open the bag marked "Pro-Pulley". Remove the 4 1/2" Pulley (74). Route the Short Cable (23) over the Pulley and insert the Pulley into the hole in the Top Frame (55). Attach the Pulley using a 3/8" x 3 1/4" Bolt (8), two 3/8" Washers (9), two 5/8" x 3/4" Spacers (40), and a 3/8" Nylon Locknut (21) as shown. Do not overtighten the Nylon Locknut; the Pulley must be able to turn freely. 22. Attach the end of the Short Cable (23) to the "U" Bracket (57) with a 1/4" Washer (78) and a 1/4" Nylon Locknut (2). Attach the "U" Bracket (57) to the Weight Tube (63) using a 5/16" x 1 3/4" Bolt (86) and a 5/16" Nylon Locknut (3). 21 23 74 40 9 8 40 9 21 55 Loop 22 23 57 78 86 3 2 63 13
-
 1
1 -
2
-
3
-
4
-
5
-
6
-
7
-
 8
8 -
 9
9 -
 10
10 -
 11
11 -
 12
12 -
 13
13 -
 14
14 -
 15
15 -
 16
16 -
 17
17 -
 18
18 -
19
-
20
-
21
-
22
-
23
-
24
 |
 |