Weider Pro 4900 English Manual - Page 20
and two Half Finger Guards 42 to the Left Base
 |
View all Weider Pro 4900 manuals
Add to My Manuals
Save this manual to your list of manuals |
Page 20 highlights
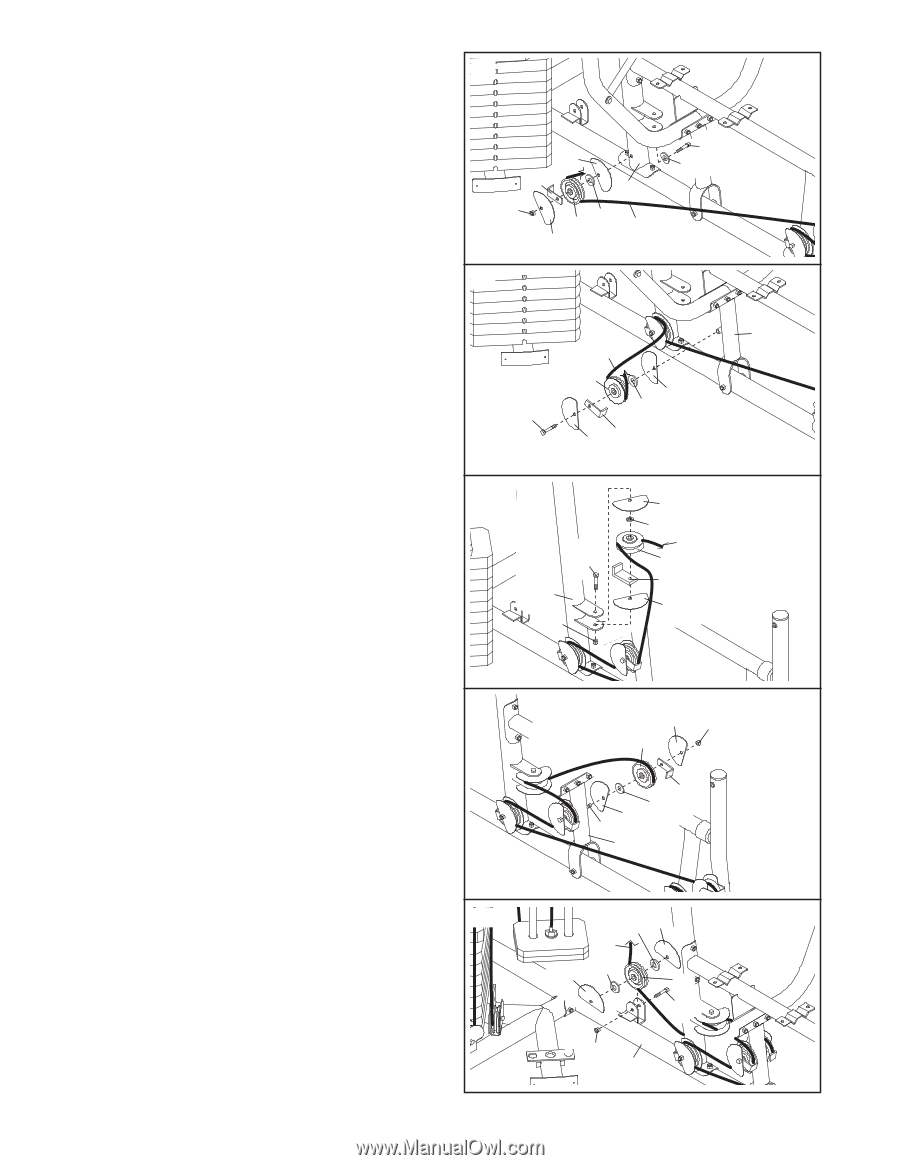
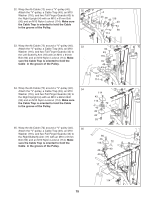
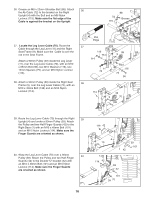
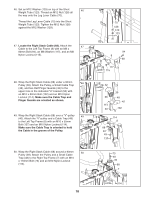
56. Wrap the Press Cable (69) around a 90mm Pulley (39). Attach the Pulley, two Half Finger Guards (42), a Small Cable Trap (48), and an M10 Washer (116) to the Left Upright (5) with an M10 x 108mm Bolt (99), an M10 Washer (116), and an M10 Nylon Locknut (114). Make sure the Cable Trap and Finger Guards are oriented as shown. 56 42 48 5 114 116 39 69 42 99 116 57. Wrap the Press Cable (69) around a 90mm 57 Pulley (39). Attach the Pulley, two Half Finger Guards (42), a Small Cable Trap (48), and an M10 Washer (116) to the Press Frame (13) with an M10 x 135mm Bolt (98). Make sure the Cable Trap and Finger Guards are oriented as 13 69 shown. 39 42 98 116 42 48 58. Wrap the Press Cable (69) around a "V"-pulley 58 (40). Attach the "V"-pulley, two Half Finger Guards (42), a Cable Trap (49), and an M10 Washer (116) to the Left Upright (5) with an M10 x 68mm Bolt (93) and an M10 Nylon Locknut (114). Make sure the Cable Trap and Finger Guards are oriented as shown. 93 5 114 42 116 69 40 49 42 59. Wrap the Press Cable (69) around a 90mm 59 Pulley (39). Attach the Pulley, two Half Finger Guards (42), a Small Cable Trap (48), and an M10 Washer (116) to the Press Frame (13) with the M10 x 135mm Bolt (98) used in step 57 and an M10 Nylon Locknut (114). Make sure the Cable Trap and Finger Guards are oriented as shown. 60. Wrap the Press Cable (69) under a 90mm Pulley 60 (39). Attach the Pulley, two M10 Washers (116), and two Half Finger Guards (42) to the Left Base (2) with an M10 x 52mm Bolt (102) and an M10 Nylon Locknut (114). Make sure the Finger Guards are oriented as shown. 20 42 114 39 48 116 42 98 13 116 42 69 42 116 39 102 114 2
-
 1
1 -
2
-
3
-
4
-
5
-
6
-
7
-
8
-
9
-
10
-
11
-
12
-
13
-
14
-
 15
15 -
 16
16 -
 17
17 -
 18
18 -
 19
19 -
 20
20 -
 21
21 -
 22
22 -
 23
23 -
 24
24 -
 25
25 -
26
-
27
-
28
-
29
-
30
-
31
-
32
-
33
-
34
-
35
-
36
-
37
-
38
-
39
-
40
 |
 |