Xerox 90-8010-200 User Guide - Page 17
Step 3: Connect the Power Supply, Only use the power supply HEG42-240200-7L made - warranty
 |
UPC - 785414106028
View all Xerox 90-8010-200 manuals
Add to My Manuals
Save this manual to your list of manuals |
Page 17 highlights
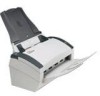
Installation Step 3: Connect the Power Supply 1. Plug the power supply into the power port on the scanner. NOTE: Only use the power supply (HEG42-240200-7L made by HiTron) included with your scanner. Connecting any other type of power supply may damage your scanner, and will void its warranty. 2. Plug the power cord into the power supply and into a wall outlet. 3. Now proceed to the next section, "Step 4: Connect the USB Cable and Turn on the Power". 12 DocuMate 250 Scanner User's Guide
-
 1
1 -
2
-
3
-
4
-
5
-
6
-
7
-
8
-
9
-
10
-
11
-
 12
12 -
 13
13 -
 14
14 -
 15
15 -
 16
16 -
 17
17 -
 18
18 -
 19
19 -
 20
20 -
 21
21 -
 22
22 -
23
-
24
-
25
-
26
-
27
-
28
-
29
-
30
-
31
-
32
-
33
-
34
-
35
-
36
-
37
-
38
-
39
-
40
-
41
-
42
-
43
-
44
-
45
-
46
-
47
-
48
-
49
-
50
-
51
-
52
-
53
-
54
-
55
-
56
-
57
-
58
-
59
-
60
-
61
-
62
-
63
-
64
-
65
-
66
-
67
-
68
-
69
-
70
-
71
-
72
-
73
-
74
-
75
-
76
-
77
-
78
-
79
-
80
-
81
-
82
-
83
-
84
-
85
-
86
-
87
-
88
 |
 |

Installation
12
DocuMate 250 Scanner User’s Guide
Step 3: Connect the Power Supply
1.
Plug the power supply into the power port on the scanner.
2.
Plug the power cord into the power supply and into a wall outlet.
3.
Now proceed to the next section, “Step 4: Connect the USB Cable
and Turn on the Power”.
NOTE:
Only use the power supply (HEG42-240200-7L made by
HiTron) included with your scanner. Connecting any other type of
power supply may damage your scanner, and will void its warranty.