Yamaha DX7 Product Manual - Page 45
Press [OPERATOR SELECT], then use the KEY
 |
View all Yamaha DX7 manuals
Add to My Manuals
Save this manual to your list of manuals |
Page 45 highlights
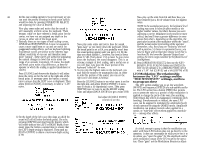
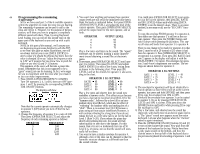
40 In this case scaling operator 2 is not necessary so you Now play up the scale from E4 and hear how you can omit the process of setting its break point (which have removed just a bit of volume from the highest would be done by pressing [OPERATOR SELECT] notes. and adjusting the value as desired). NOTE In the examples just given, the keyboard level Now play some scales and notice that the sound is scaling may seem to have an effect mostly at the still reasonably uniform across the keyboard. That's higher number values, but that's because you were because, while we have selected a break point for the adjusting a carrier Modulator levels tend to be more carrier, we have not yet assigned any depth to the critical, and you'll hear a greater difference in some curves on either side of the break point. voices than others, depending on the algorithm, the 7. Basically there are two types of level scaling curves, particular location of the modulator within the "stack", LINEAR and EXPONENTIAL. Linear curves seem to Now play some scales and notice how the sound and the actual output level setting of the operator cause a more rapid boost or cut and are useful for "goes away" as you move down the keyboard. While Remember, also, that if you are "boosting" the level exaggerated scaling effects, such as keyboard splitting. the break point is set at E4, you probably won't hear with a positive (+) linear or exponential curve, you Exponential curves are similar to the inherent loga- the sound getting quieter until you get to C4. By the have to begin with an Operator Output Level that is rithmic sensitivity of our ears and therefore seem time you reach middle C, however, the level is down less than 99; the lower the Operator Output Level more "natural". These curves are useful for simulating about 22 dB. That's about 1/14 as loud. As you move setting, the more range available for Keyboard Level the natural changes in level that occur across the down the keyboard, the sound disappears. This is an Scaling boost. range of an acoustic instrument. Of course, the depth and break point make a big difference, as does the operator to which the scaling is applied (modulator or carrier). extreme example of level scaling, and a useful one as you will hear. Lets leave the lower portion of the keyboard "rolled off" for now. 9. As you play the highest notes on the keyboard, you 10. Press [OPERATOR SELECT], then use the KEYBOARD LEVEL SCALING buttons and [DATA ENTRY] to set operator 2 to a [BREAK POINT) of E4 with a "LIN" left [CURVE] and a left [DEPTH] of 99. Press [CURVE] and observe the display It will either show the curve set for the left or the right side of the break point. If necessary press the button a second may find the sound to be unnaturally loud. In order to scale this portion of the sound, you can set the right curve and depth as follows: LFO Modulation: The relationship between the "LFO" settings and the "MOD SENSITIVITY" settings, and how time to ensure that the LEFT curve is displayed. Then Press the [CURVE] button to see what curve is set for to programthese adjust [DATA ENTRY], if necessary, to select a "-LIN" curve. the right side, and adjust [DATA ENTRY], if necessary to obtain a (-) exponential curve. Then press [DEPTH] once or twice to see the RIGHT scaling value and adjust [DATA ENTRY] to get a value of 80. The LFO section enables you to set the waveform [WAVE] and frequency [SPEED] of a sub-audible oscillator. The LFO section has a button [PMD] that permits you to preset the voice so a portion of that modulation is And adjust the [DATA ENTRY] applied to change the pitch of the voice (for anything from vibrato-like effects to exaggerated, continuous pitch controls to see this bending). Simultaneously or instead, the same LFO wave can be assigned to modulate the amplitude (level) of each operator by using the [AMD] button. Amplitude modulation can produce tremolo when applied to a carrier, or "wah-wah" effects when applied to a modula- tor - among other effects. 8. Set the depth of the left curve (the slope at which the sound will roll off below the break point). Do so by pressing [DEPTH] and observing the display which will either indicate the LEFT or RIGHT depth; if necessary press the button a second time to ensure that the LEFT depth setting is displayed. Then push up [DATA ENTRY] to obtain a maximum depth setting of 99. A critical concept to grasp is that the modulation you select with these LFO buttons does not go directly to the operators. It does not necessarily do what you've set it to do unless you "open the gates" for the amplitude and/or pitch modulation output of the LFO to get to the operators.- These "gates" are the Modulation Sensitivity adjust-
-
 1
1 -
2
-
3
-
4
-
5
-
6
-
7
-
8
-
9
-
10
-
11
-
12
-
13
-
14
-
15
-
16
-
17
-
18
-
19
-
20
-
21
-
22
-
23
-
24
-
25
-
26
-
27
-
28
-
29
-
30
-
31
-
32
-
33
-
34
-
35
-
36
-
37
-
38
-
39
-
 40
40 -
 41
41 -
 42
42 -
 43
43 -
 44
44 -
 45
45 -
 46
46 -
 47
47 -
 48
48 -
 49
49 -
 50
50 -
51
-
52
-
53
-
54
-
55
-
56
-
57
-
58
-
59
-
60
-
61
-
62
-
63
-
64
-
65
-
66
-
67
-
68
-
69
-
70
-
71
-
72
 |
 |
