Yamaha DX7 Product Manual - Page 49
Programming the remaining, operator, OPERATOR, FREQUENCY, OUTPUT LEVEL, OPERATOR 3 EG SETTINGS, - dx7s manual
 |
View all Yamaha DX7 manuals
Add to My Manuals
Save this manual to your list of manuals |
Page 49 highlights
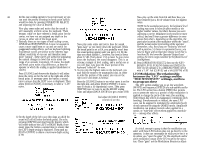
44 Programming the remaining 3. You won't hear anything yet because those operator You could press [OPERATOR SELECT] to set opera- 4 operator* output levels are still set at the initialized value (zero). tor 4 as the current operator, then press [EG RATE] So far we have used just 2 of the 6 available operators Reset the levels as indicated below; first press [OPER- and [EG LEVEL] 4 times each while using [DATA within the algorithm to create the voice you are hearing. ATOR OUTPUT LEVEL], and adjust the level of the ENTRY] to set the desired values. There is an easier The remaining 4 operators can be used to add to the current operator. Then press [OPERATOR SELECT], method, as you may recall; use the "EG COPY" func- voice and richen it. However, for the purpose of demon- and set the output level for the next operator, and so tion. stration, we'll show you how to program a completely different sound with them. Then, by using Keyboard Level Scaling, you can roll off this second voice in the upper part of the keyboard so you end up with a split keyboard. NOTE In this part of the manual, we'll assume you forth. OPERATOR 3 4 5 OUTPUT LEVEL 93 93 70 To copy the envelope FROM operator 3 to operator 4, first make sure that operator 3 is still set as the cur- rent operator. Then press the [STORE] button and hold it down while pressing the [4] button. This copies all rates and levels from operator 3 to operator 4. are beginning to gain some familiarity with the DX7, 6 75 There is one change to be made for operator 4 in that so we won't use quite as many illustrations, nor will we always instruct you to use [DATA ENTRY] to Play a few notes and listen to the sound. The "square" envelopes can be altered, making a major improve- Rate 2 must be set at 29 instead of 20, where it had been for operator 3. Press [OPERATOR SELECT] to alter a value if it should be obvious that that's how the value is changed. If we say "adjust the frequency ratio to 3.00" we'll assume that you know how to push the slider or use the [-1] and [ +1] buttons. This segment of the voice will become a piano-like ment toward obtaining a sound like an electronic piano. 4. If necessary, press [OPERATQR SELECT] until operator 3 is current. Then press [EG RATE] and adjust [DATA ENTRY] for each of the 4 rates, setting them set operator 4 as current. Then press [EG RATE] until rate 2 appears in the display and adjust it with the DATA ENTRY [+1] button. The envelopes for operators 3 and 4 now complement one another. The settings are shown below for operator 4: sound. Remember that this is not supposed to be a "great" sound, just one for learning. In fact, we're eager for you to experiment with the voice after you create it so you can make improvements. 1. Press [OSCILLATOR-FREQUENCY COARSE]. Turn ON operators 3, 4, 5 and 6, then turn OFF operators 1 and 2 by pressing the corresponding [OPERA- as shown in the following chart. Then press [EG LEVEL] and set the 4 levels for operator 3, also according to the chart. OPERATOR 3 EG SETTINGS RATE1 95 RATE 2 20 LEVEL 1 99 LEVEL 2 95 OPERATOR 4 EG SETTINGS RATE 1 = 95 RATE 2 = 29 RATE 3 = 20 RATE 4 == 50 LEVEL 1 = 99 LEVEL 2 = 95 LEVEL 3 = 0 LEVEL 4 = 0 . TOR ON-OFF] buttons. The display will show RATE 3 20 RATE 4 50 LEVEL 3 0 LEVEL 4 0 6. The envelope for operator 6 will be set identically to that of operator 4. Since OP4 is still set as the current Play a few notes and observe how the sound now operator, just press and hold [STORE] and then press resembles a hammer strike. This effect occurs because [6] to copy the envelope from OP4 to OP6. you have a fast rate to maximum level (R1,L1) for the 7. Similarly the envelope from operator 3 can be copied "hammer strike", followed by a slow fall to an inter- to operator 5. Do so by pressing [OPERATOR SE- mediate decay level (R2.L2), which has the effect of LECT] until OP3 is current. Then press down the Note that the current operator automatically changes to operator 3 (OP3) when you turn off the first two operators. 2. Change the frequency of operator 3 to a ratio of 2.00. Then press (OPERATOR SELECT] and adjust the frequency of each remaining operator as follows: OPERATOR FREQUENCY "widening" the hammer strike and making less of a "click". There is no sustain level (L3=0) because a piano string will not sustain indefinitely However, it will continue vibrating for a long time if you do not release the key so a very slow rate is set for the fall to Level 3 (Rate 3=20). If you release the piano key shortly after striking the note, the sound will fall rather quickly to zero due to the damper. For this [STORE] button and hold it while pressing [5] to copy the envelope to OP5. 8. Play a few notes, and observe how the sound has improved, with much more of an electric piano feel to it. The "piano" sound now appears across the entire keyboard. Let's see what happens when the "clarinet" sound is again introduced. 9. Press the (OPERATOR ON-OFF] buttons [1] and [2] 3 2.00 reason, Rate 4 is set to a moderately fast rate of 50. to turn on the clarinet-like sound. Now play from the 4 5 2.00 12.00 Level 4 is, of course, zero so that the sound will eventually fall to silence. bottom of the keyboard to the top. Notice how there is only piano sound on the bottom, and how the 6 4.00 5. You want to have a similar envelope for operator 4, although a few of the rates can be changed so that the clarinet enters in the top half of the keyboard due to the previous keyboard level scaling of operators 1 and harmonic structure changes at a different rate than 2. the overall volume.
-
 1
1 -
2
-
3
-
4
-
5
-
6
-
7
-
8
-
9
-
10
-
11
-
12
-
13
-
14
-
15
-
16
-
17
-
18
-
19
-
20
-
21
-
22
-
23
-
24
-
25
-
26
-
27
-
28
-
29
-
30
-
31
-
32
-
33
-
34
-
35
-
36
-
37
-
38
-
39
-
40
-
41
-
42
-
43
-
 44
44 -
 45
45 -
 46
46 -
 47
47 -
 48
48 -
 49
49 -
 50
50 -
 51
51 -
 52
52 -
 53
53 -
 54
54 -
55
-
56
-
57
-
58
-
59
-
60
-
61
-
62
-
63
-
64
-
65
-
66
-
67
-
68
-
69
-
70
-
71
-
72
 |
 |
