Yamaha DX7 Product Manual - Page 52
The display should look like - replacement keys
 |
View all Yamaha DX7 manuals
Add to My Manuals
Save this manual to your list of manuals |
Page 52 highlights
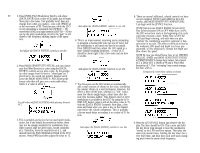
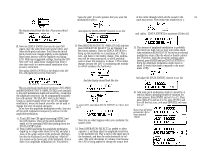
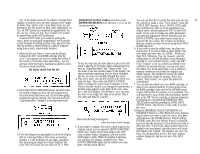
Any of the preset voices can be edited to change them [OPERATOR OUTPUT LEVEL] and then press You can see that this is exactly the same way you use 47 slightly, or totally In fact, the term "primary voice" might be better than "preset voice," since these voices are not [OPERATOR SELECT] until operator 2 is set as the the controls to create a voice "from scratch" using the current operator. [VOICE INIT] function. In fact, [VOICE INIT) really permanent like the presets of most other synthesizers. In does nothing more than to set all parameters to a fact, all DX7 presets are completely programmable. So, default value, and then places the DX7 in the EDIT too, are any voices you may have created from scratch mode. If you want to change any other parameters, or copied from another DX synthesizer. just press the appropriate selector butlon(s) and use A special EDIT mode is provided for editing the [DATA ENTRY] or any other buttons required to voices, preset or personally programmed. We'll provide program the new values. We strongly recommend a brief example of editing a preset voice, and you'll see that you rename an edited voice by using the [VOICE that the process is almost identical to that of program- NAME] function. ming from scratch, as previously detailed. 6. If you wish to save the edited voice, you have sev- eral choices. If you have edited a preset ROM voice. 1. Select the Electric Piano 1 voice from the Master you cannot save that voice on a ROM... ROMs are Group of the DX7 voice ROM cartridge. Play the Read Only Memories. You can, however, save the voice. Lets suppose you want to change the timbre of edited preset on a RAM (Random Access Memory) the sound so it becomes more penetrating... but not alter any of the envelopes, fundamental pitches, modulation, or touch sensitivity. The display should look like this 2. Press the [EDIT/COMPARE] button, and notice that the display changes to show the last programming function which had been used. If you've been going straight through the manual, that function would be "algorithm select," though it is not important really cartridge or in an internal memory within the DX7. So far, the only clue you have that you are in the Edit If the "original" voice you edited was selected from mode is that the LCD display shows editing functions a RAM or an internal memory, you can over-store such as "Algorithm Select" and "Output Level." You the edited voice in the same place, or in a different are about to see that another aspect of the display can memory location so you retain the original and showyouwhetheranything has yet been changed. edited versions. The method of storing the edited (So far, you have not actually changed the voice.) voice is identical to that for storing a voice you 4. Play a few notes, varying the velocity with which you created "from scratch"; we repeat this below for press the keys. Then move the [DATA ENTRY] convenience. slider to change the output level of operator 2 to 90. 7. You can store the edited voice on a RAM cartridge, or Notice that the instant you change this parameter, a store it in an internal memory If you're going to use decimal point appears to the right of the voice num- the RAM cartridge, make sure its On-Off slide switch ber in the LED display This decimal is your clue that is set to OFF so that the memory is not protected. You the voice is no longer the same as the preset. Play a will then have to turn off the software memory protec- few notes and hear for yourself. tion in the DX7 for the cartridge or internal memories by pressing the corresponding [MEMORY PRO- TECT] button and then pressing the [OFF] DATA ENTRY button. The memory is now ready to accept the voice. 8. Press the [MEMORY SELECT-INTERNAL] or [MEMORY SELECT- CARTRIDGE] button, depend- ing on where you want to store the voice, then press Notice this decimal point appears when the output level changes and hold down the [STORE] button. While holding [STORE], press the voice selector button corresponding to the specific location (1-32) in which you want to 3. From the diagram for algorigthm 5 (which the display tells us is the algorithm of this voice), we see that operator 2 is the modulator of one stack, and there- 5. If you want to compare the newly edited sound to the original sound, you can press the [EDIT/COMPARE] button once. Notice the decimal point in the LED voice number display disappears, and the number itself begins to flash. While the number is flashing, you can play the original, unedited voice. Press place the voice. If this is the same location where the original voice was located, the edited voice will erase (and replace) the original. The moment you store the voice, the decimal point in the LED voice number window disappears, and you are out of the EDIT mode. fore increasing its output level may "brighten" the [EDIT/COMPARE] again and the edited voice reap- voice. We won't know for sure until we try it. Press pears, decimal point and all.
-
 1
1 -
2
-
3
-
4
-
5
-
6
-
7
-
8
-
9
-
10
-
11
-
12
-
13
-
14
-
15
-
16
-
17
-
18
-
19
-
20
-
21
-
22
-
23
-
24
-
25
-
26
-
27
-
28
-
29
-
30
-
31
-
32
-
33
-
34
-
35
-
36
-
37
-
38
-
39
-
40
-
41
-
42
-
43
-
44
-
45
-
46
-
 47
47 -
 48
48 -
 49
49 -
 50
50 -
 51
51 -
 52
52 -
 53
53 -
 54
54 -
 55
55 -
 56
56 -
 57
57 -
58
-
59
-
60
-
61
-
62
-
63
-
64
-
65
-
66
-
67
-
68
-
69
-
70
-
71
-
72
 |
 |
