Yamaha DX7 Product Manual - Page 48
Turn LFO Sync ON again by pressing [SYNC]
 |
View all Yamaha DX7 manuals
Add to My Manuals
Save this manual to your list of manuals |
Page 48 highlights
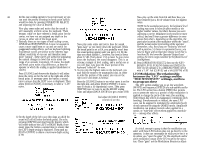
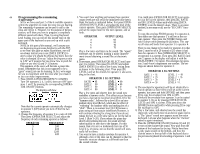
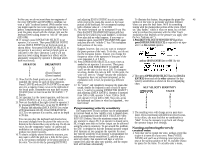
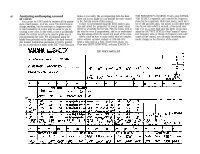
The display should look like this. Play several brief notes "open the gate" for each operator that you want the of the carrier through which all the sound in the 43 modulation to affect. stack must travel. Now reduce the sensitivity to 1. And adjust the [DATA ENTRY] controls to see this and adjust [DATA ENTRY] to maximum (3) then (1) 10. Now use [DATA ENTRY] to turn the sync OFF Again, play the same brief note several times, and listen to the pitch each time. You'll hear the initial pitch of each note change slightly as the randomly timed notes interact with the regularly oscillating LFO. With less exaggerated settings, leaving the LFO Sync OFF will cause minor changes from note to note that result in a more natural simulation of an acoustic instrument. Then adjust [DATA ENTRY] so the display looks like this, and again play several brief notes 13. Press [MOD SENSITIVITY-AMPLITUDE] and then press [OPERATOR SELECT] to set Operator 2 as the current operator. Then use [DATA ENTRY] to bring up the sensitivity to a maximum of 3. Play a note, and listen to the timbre change. This modulation will be very pronounced, so you'll probably want to lower the sensitivity to about 1. The timbre changes because the LFO is modulating the modulator which produces the harmonics. And the display should look like this 15. The amount of amplitude modulation is probably still much too high, but we may want some amplitude modulation SENSITIVITY for use by an external modulation source (like the wheel or breath controller). Therefore, leave the sensitivity settings alone. Instead, press [AMD] and use [DATA ENTRY] to bring the amplitude modulation depth down to about 10 (very little depth compared to the maximum of 99). And adjust the [DATA ENTRY] controls to see this The two amplitude modulation functions, LFO [AMD] and [MOD SENSITIVITY-AMPLITUDE], work similarly to the pitch modulation depth and sensitivity, except that the amplitude sensitivity can be programmed separately for each operator. The SAX-BC1 voice in the Master Group is a good example of the use of LFO amplitude modulation, where the breath controller can be used to change the level of several operators. To see how the amplitude modulation works, lets turn off the pitch modulation temporarily and turn on the amplitude modulation. 11. Turn LFO Sync ON again by pressing [SYNC] and the [ON] button. Then set the pitch modulation depth at 0 by pressing [PMD] and pulling down the [DATA ENTRY] slider. 12. Press [AMD] and bring the amplitude modulation depth up to a high value (from 50 to 99), and play a note on the upper section of the keyboard. (Remember that the Keyboard Level Scaling has "rolled off" this sound on the lower part of the keyboard). Notice there is no amplitude modulation yet. You need to to select OP2, and adjust [DATA ENTRY] to 3 first, then to 1 Now lets see what happens when you modulate the carrier's level. 14. Press [OPERATOR SELECT] as needed to select operator 1, and then adjust its amplitude sensitivity to the maximum (3). Play a note in the upper part of the keyboard, and hear the wide deviations in volume. The wide deviations in volume occur because the LFO is being applied to change the output level 16. Add some pitch modulation depth (it should be at zero) to obtain a pleasing frequency variation for some interest. Press [PMD] and set it to 15. Then press [DELAY] and set it to 55, press [SYNC] and turn off the key sync, and press [SPEED] and reset it to 27. Now reset all these parameters for a more natural sound
-
 1
1 -
2
-
3
-
4
-
5
-
6
-
7
-
8
-
9
-
10
-
11
-
12
-
13
-
14
-
15
-
16
-
17
-
18
-
19
-
20
-
21
-
22
-
23
-
24
-
25
-
26
-
27
-
28
-
29
-
30
-
31
-
32
-
33
-
34
-
35
-
36
-
37
-
38
-
39
-
40
-
41
-
42
-
 43
43 -
 44
44 -
 45
45 -
 46
46 -
 47
47 -
 48
48 -
 49
49 -
 50
50 -
 51
51 -
 52
52 -
 53
53 -
54
-
55
-
56
-
57
-
58
-
59
-
60
-
61
-
62
-
63
-
64
-
65
-
66
-
67
-
68
-
69
-
70
-
71
-
72
 |
 |
