Yamaha EMX5014C Owner's Manual - Page 29
Rack Mounting, How to install the rack-mount hardware
 |
UPC - 086792838274
View all Yamaha EMX5014C manuals
Add to My Manuals
Save this manual to your list of manuals |
Page 29 highlights
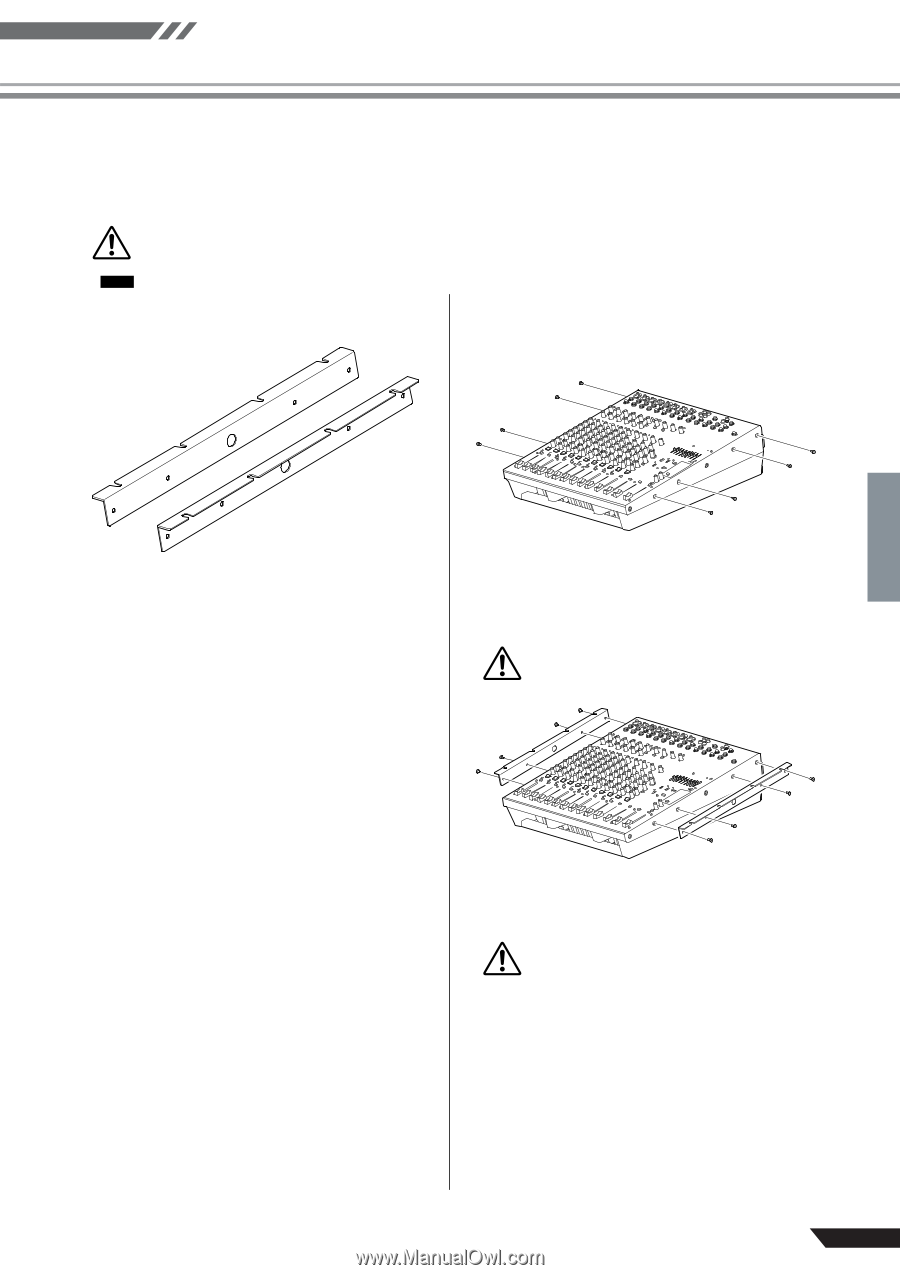
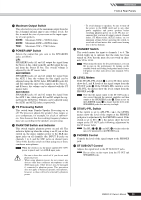
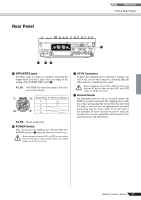
Reference Rack Mounting Rack Mounting To prepare the unit for rack mounting, use the (separately sold) RK5014 rack mount kit. If rack-mounting the unit, be sure to maintain adequate ventilation so the unit does not overheat. Consider attaching a vent panel, and do not use a sealed rack. NOTE The EMX unit requires 12U of rack space. RK5014 Rack Mount Kit How to install the rack-mount hardware 1 Use a screwdriver to remove the screws from the EMX unit. 2 Set the kit's two metal fittings into position, and screw them in using the screws (silver) included in the RK5014. Do not use the screws (black) you just removed from the EMX unit. 3 Mount the unit into the rack, and fasten it into place. Do not install the mixer near power amps or other heat-generating devices. EMX5014C Owner's Manual 29
-
 1
1 -
2
-
3
-
4
-
5
-
6
-
7
-
8
-
9
-
10
-
11
-
12
-
13
-
14
-
15
-
16
-
17
-
18
-
19
-
20
-
21
-
22
-
23
-
 24
24 -
 25
25 -
 26
26 -
 27
27 -
 28
28 -
 29
29 -
 30
30 -
 31
31 -
 32
32 -
 33
33 -
 34
34 -
35
-
36
-
37
 |
 |