Yamaha EMX5014C Owner's Manual - Page 9
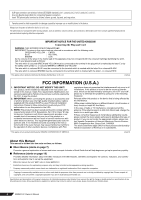
Turn the ON switch on., Set the ST Master fader to the 0 position. - how to use
 |
UPC - 086792838274
View all Yamaha EMX5014C manuals
Add to My Manuals
Save this manual to your list of manuals |
Page 9 highlights
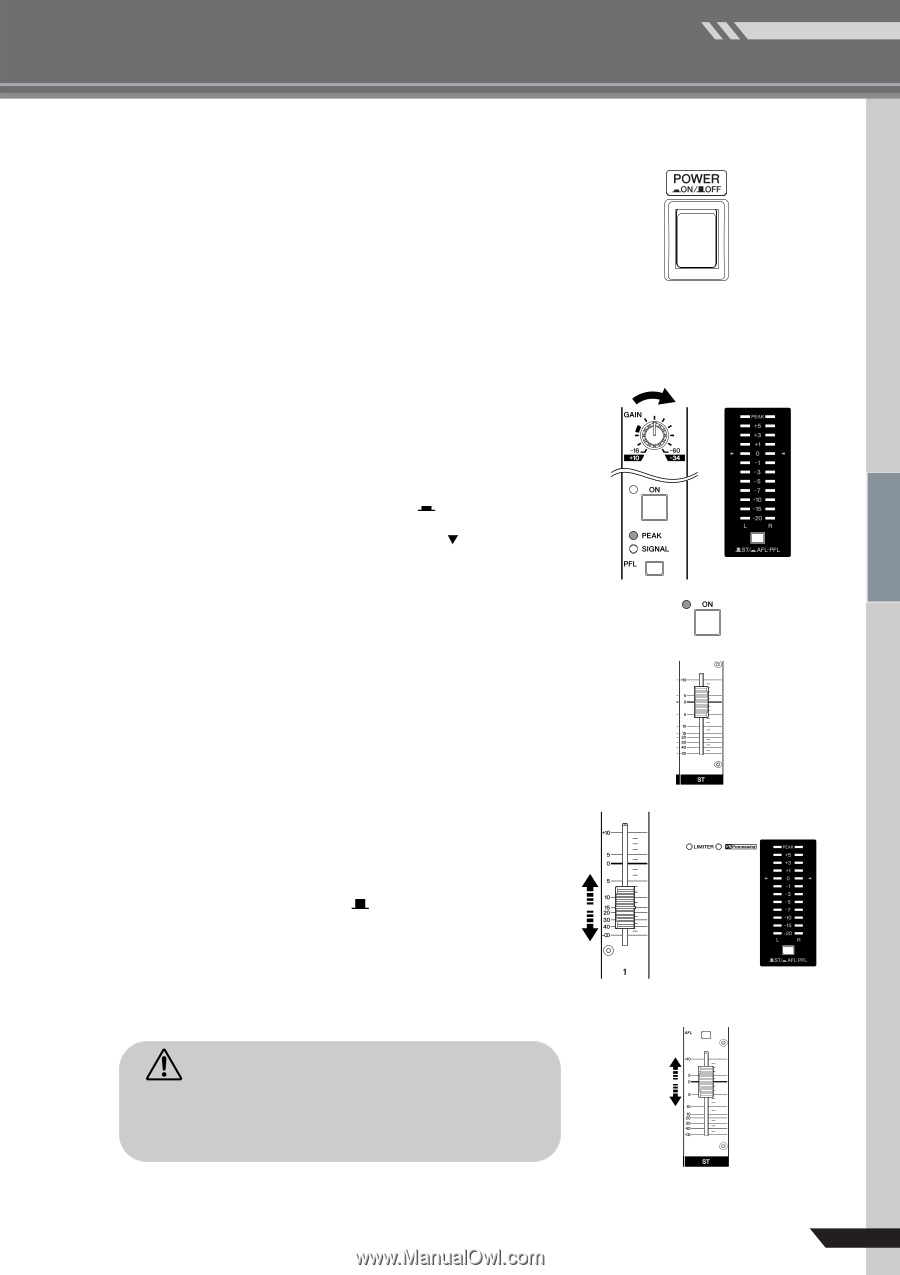
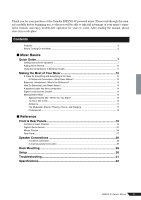
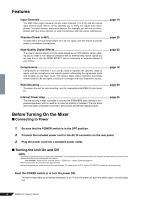
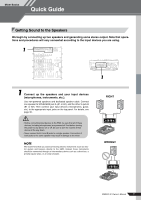
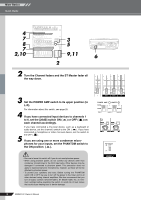
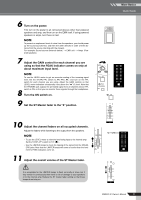
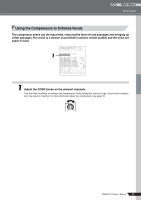
6 Turn on the power. First turn on the power to all connected devices other than powered speakers and amp, and then turn on the EMX itself. If using powered speakers or amps, turn these on last. NOTE To prevent an unpleasant burst of noise from the speakers, you should power up the sound sources first, and then the other devices in order of their distance from the source (starting with the closest). For example: Sound source (external device) → EMX unit → Amps (Pow- ered speakers) 7 Adjust the GAIN control for each channel you are using so that the PEAK indicator comes on only at about maximum input level. 8 NOTE To use the LEVEL meter to get an accurate reading of the incoming signal level: Set the ST/AFL-PFL switch to AFL-PFL( ) and turn on the PFL switch for each channel you are using. Adjust the GAIN controls so that LEVEL meter indication occasionally rises above the " " (0) level. Note that the PHONES jack outputs the pre-faded signal from all channels whose PFL switch is ON, so that you can monitor these signals through the headphones. Turn the ON switch on. 9 Set the ST Master fader to the "0" position. Mixer Basics Quick Guide 10 Adjust the channel faders on all occupied channels. Adjust the faders while listening to the output from the speakers. NOTE • To use the LEVEL meter to view the level being input to the internal amp: Set the ST/AFL-PFL switch to ST( ). • Use the LIMITER lamps to check for clipping of the signal from the SPEAKERS jacks. Note that the LIMITER lamps will come on earlier than the level meter's PEAK indicators come on. 11 Adjust the overall volume of the ST Master fader. It is acceptable for the LIMITER lamps to flash on briefly at times, but if they remain lit continuously then there is risk of damage to your speakers or to the internal amp. Reduce the ST master fader setting so that these lamps do not stay on. EMX5014C Owner's Manual 9
-
 1
1 -
2
-
3
-
 4
4 -
 5
5 -
 6
6 -
 7
7 -
 8
8 -
 9
9 -
 10
10 -
 11
11 -
 12
12 -
 13
13 -
 14
14 -
15
-
16
-
17
-
18
-
19
-
20
-
21
-
22
-
23
-
24
-
25
-
26
-
27
-
28
-
29
-
30
-
31
-
32
-
33
-
34
-
35
-
36
-
37
 |
 |