Yamaha EMX5014C Owner's Manual - Page 8
to 6, set the [26dB] switch ON, If you have connected input devices to channels 1 - powered mixer
 |
UPC - 086792838274
View all Yamaha EMX5014C manuals
Add to My Manuals
Save this manual to your list of manuals |
Page 8 highlights
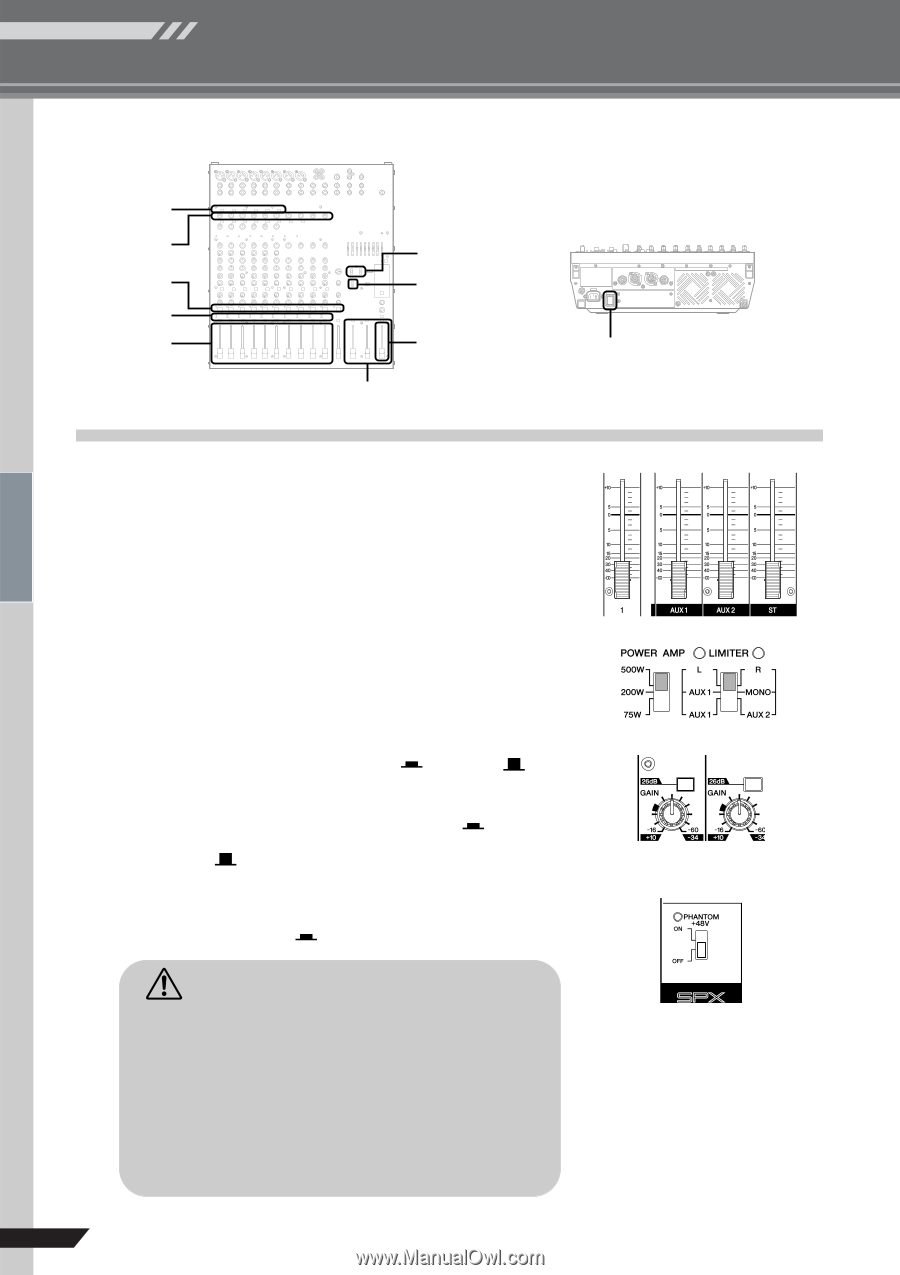
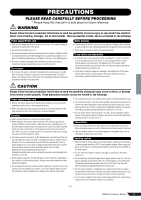
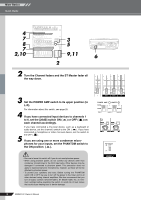
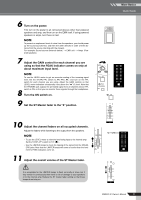
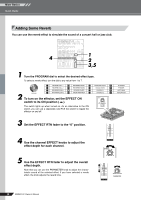
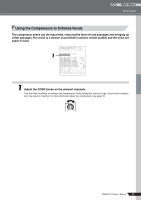
Mixer Basics Quick Guide 4 7 8 7 2,10 23535 29,11 2 8,610 2 Turn the Channel faders and the ST Master fader all the way down. 3 Set the POWER AMP switch to its upper position (to L-R). For information about this switch, see page 25. 4 If you have connected input devices to channels 1 to 6, set the [26dB] switch ON ( ) or OFF ( ) on each channel accordingly. 5 If you have connected a line-level device, such as a keyboard or audio device, set the channel's switch to the ON ( ). If you have connected a microphone or other mic-level device, set the switch to the OFF ( ). If you are using one or more condenser microphones for your inputs, set the PHANTOM switch to the ON position ( ). • Be sure to leave this switch off if you do not need phantom power. • When using phantom power, do not connect any devices other than condenser microphones to the XLR input jacks. Other devices may be damaged if connected to phantom power. This precaution does not apply to balanced dynamic microphones, however, as these will not be affected by phantom power. • To protect your speakers and ears: Before turning the PHANTOM switch ON or OFF, be sure to turn off the power to the mixer and to all other devices having internal amplifiers. We also recommend that you turn all output controls (Channel faders, ST Master fader, etc.) to minimum settings before operating the switch, to avoid risk of loud noises that could cause hearing loss or device damage. 8 EMX5014C Owner's Manual
-
 1
1 -
2
-
 3
3 -
 4
4 -
 5
5 -
 6
6 -
 7
7 -
 8
8 -
 9
9 -
 10
10 -
 11
11 -
 12
12 -
 13
13 -
14
-
15
-
16
-
17
-
18
-
19
-
20
-
21
-
22
-
23
-
24
-
25
-
26
-
27
-
28
-
29
-
30
-
31
-
32
-
33
-
34
-
35
-
36
-
37
 |
 |