Yamaha EMX68S Owner's Manual - Page 11
Sound output, Applying built-in effects, Power off, STEP 3
 |
View all Yamaha EMX68S manuals
Add to My Manuals
Save this manual to your list of manuals |
Page 11 highlights
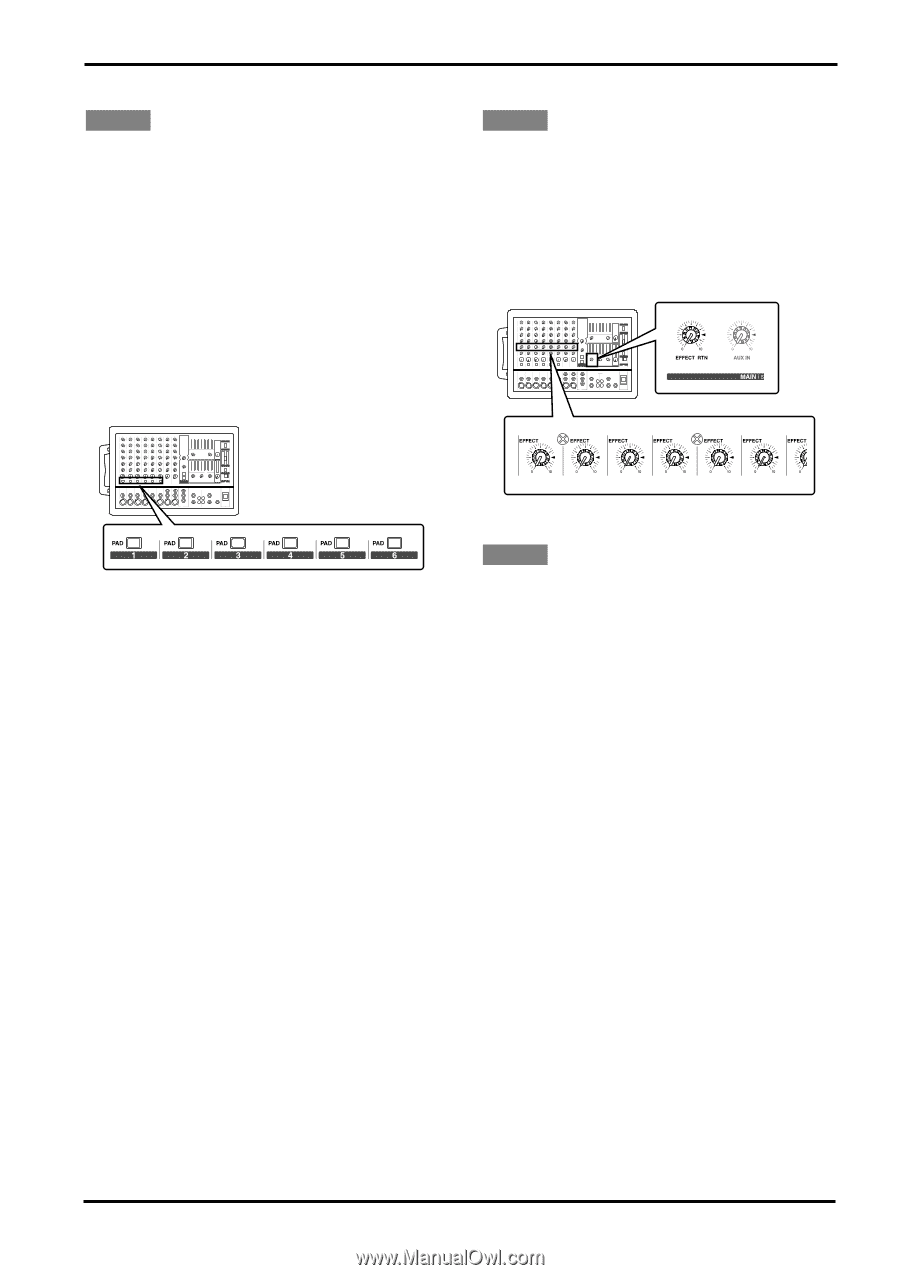
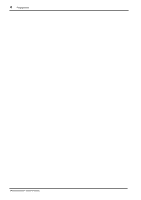
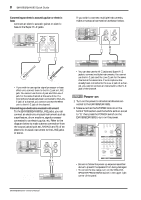
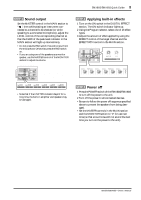
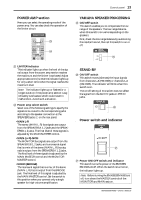
EMX88S/EMX68S Quick Guide 9 STEP 3 Sound output Set the MASTER control in the MAIN section to "√ ," then while playing an instrument connected to a channel to be checked (or while speaking to a connected microphone), adjust the LEVEL control of the corresponding channel so that the 0 LED of the peak level indicator in the MAIN section will light up momentarily. • Do not press the PAD switch if sound is input from the microphone. Otherwise, press the PAD switch on. • If you are using one of the speakers as a monitor speaker, use the MASTER control of the MONITOR section to adjust its volume. EMX88S (EMX68S) STEP 4 Applying built-in effects 1 Turn on the ON switch in the DIGITAL EFFECT section. The ON switch indicator lights up. 2 Using the Program selector, select one of 16 effect types. 3 Adjust the amount of effect applied by using the EFFECT control of the target channel and the EFFECT RTN control in the MAIN section. EMX88S (EMX68S) • Note that if the LIMITER indicator stays lit for a long time, the built-in amplifier and speakers may be damaged. STEP 5 Power off 1 Press the POWER switch of the EMX88S/EMX68S to turn off the power to the unit. 2 Turn off the power to all connected devices. • Be sure to follow the power off sequence specified above to prevent the speakers from being damaged. • Set the MASTER controls in the MAIN section and the MONITOR section to "0" for use next time (so that a loud noise will not sound the next time you turn on the power to the unit). EMX88S/EMX68S-Owner's Manual
-
 1
1 -
2
-
3
-
4
-
5
-
 6
6 -
 7
7 -
 8
8 -
 9
9 -
 10
10 -
 11
11 -
 12
12 -
 13
13 -
 14
14 -
 15
15 -
 16
16 -
17
-
18
-
19
-
20
-
21
-
22
-
23
-
24
-
25
-
26
-
27
-
28
-
29
-
30
-
31
-
32
-
33
-
34
 |
 |