Yamaha MY16-mLAN Installation Guide - Page 3

Contents, English - windows 7

Page 3 highlights

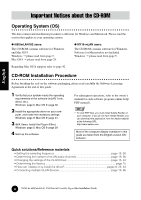
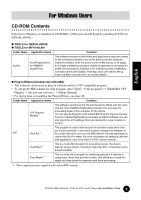
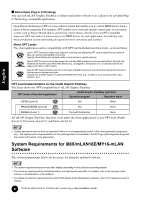
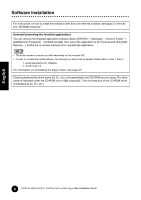
English Contents Important Notices about the CD-ROM 4 Operating System (OS 4 CD-ROM Installation Procedure 4 For Windows Users 5 CD-ROM Contents 5 System Requirements for i88X/mLAN16E/MY16-mLAN Software.........6 Software Installation 8 Connecting a Computer to an mLAN device via mLAN 19 Installing the Plug-in Effect (For i88X Users 26 For Mac OS 9 Users (i88X and mLAN16E only 28 CD-ROM Contents 28 System Requirements for i88X/mLAN16E Software 30 Software Installation 31 Connecting a Computer to an mLAN device via mLAN 36 Plug-in Effect 41 For Mac OS X Users 42 Display Messages 43 Troubleshooting 44 Noise may be generated during the following operations. Before performing these operations, lower the output level of each device. • Turning the power to the computer and mLAN devices on or off • Connecting or disconnecting an IEEE1394 (mLAN) cable • Making an mLAN connection in mLAN Auto Connector • Changing the wordclock master and slave status in mLAN Auto Connector or mLAN Graphic Patchbay • Selecting On or Off in mLAN Manager (Windows) • Starting or quitting the OS • Installing/uninstalling mLAN software For Windows users • Do not turn on the power to the mLAN devices during installation until the computer displays the following message. TOOLS for i88X/mLAN16E, TOOLS for MY16-mLAN, Plug-in Effect Installation Guide 3

  • 1
  • 2
  • 3
  • 4
  • 5
  • 6
  • 7
  • 8
  • 9
  • 10
  • 11
  • 12
  • 13
  • 14
  • 15
  • 16
  • 17
  • 18
  • 19
  • 20
  • 21
  • 22
  • 23
  • 24
  • 25
  • 26
  • 27
  • 28
  • 29
  • 30
  • 31
  • 32
  • 33
  • 34
  • 35
  • 36
  • 37
  • 38
  • 39
  • 40
  • 41
  • 42
  • 43
  • 44
  • 45
  • 46
  • 47
  • 48
  • 49
  • 50

3
TOOLS for i88X/mLAN16E, TOOLS for MY16-mLAN, Plug-in Effect
Installation Guide
English
Contents
Important Notices about the CD-ROM
.............................................
4
Operating System (OS)
..........................................................................
4
CD-ROM Installation Procedure
.............................................................
4
For Windows Users
...........................................................................
5
CD-ROM Contents
..................................................................................
5
System Requirements for i88X/mLAN16E/MY16-mLAN Software
.........
6
Software Installation
...............................................................................
8
Connecting a Computer to an mLAN device via mLAN
........................
19
Installing the Plug-in Effect (For i88X Users)
........................................
26
For Mac OS 9 Users (i88X and mLAN16E only)
............................
28
CD-ROM Contents
................................................................................
28
System Requirements for i88X/mLAN16E Software
............................
30
Software Installation
.............................................................................
31
Connecting a Computer to an mLAN device via mLAN
........................
36
Plug-in Effect
........................................................................................
41
For Mac OS X Users
........................................................................
42
Display Messages
...........................................................................
43
Troubleshooting
..............................................................................
44
Noise may be generated during the following operations. Before performing these operations, lower the output level of
each device.
Turning the power to the computer and mLAN devices on or off
Connecting or disconnecting an IEEE1394 (mLAN) cable
Making an mLAN connection in mLAN Auto Connector
Changing the wordclock master and slave status in mLAN Auto Connector or mLAN Graphic Patchbay
Selecting On or Off in mLAN Manager (Windows)
Starting or quitting the OS
Installing/uninstalling mLAN software
For Windows users
Do not turn on the power to the mLAN
devices during installation until the
computer displays the following
message.