Yamaha PSR-630 Owner's Manual - Page 77
Delete File
 |
View all Yamaha PSR-630 manuals
Add to My Manuals
Save this manual to your list of manuals |
Page 77 highlights
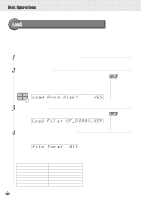
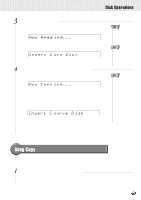
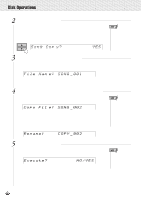
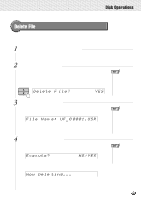
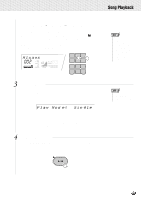
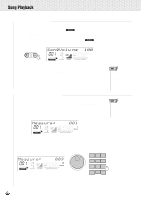
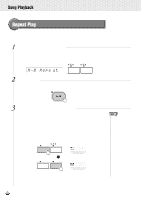
,,QQ,,QQ,,QQ,,QQ,,QQ,,QQ,,QQ,,QQ,,QQ,,QQ,,QQ,,QQDisk,,QQOper,,QQation,,QQs ,,QQ Delete File You can delete saved data (User Songs, User Styles, User Pads, or Registration Memory) from the floppy disk in file units. 1 Insert the Floppy Disk into the Disk Drive Insert the disk with the files you want to delete into the disk drive. 2 Select a Delete File Function Use the MENU [v] and [w] buttons to select the Disk function so that the triangular indicator in the display appears next to "DISK" to the left of the display. Use the SUB MENU [v] and [w] buttons so that "Delete File? YES" appears on the display. SUB MENU Delete F ile? nd PiYES • If the DISK menu is selected when there is no floppy disk inserted into the disk drive, "- - -" will be displayed at the top of the display, and disk operations won't be possible. 3 Select the File to Be Deleted Press the [+] (YES) button, and the file select screen "File Name:....." will appear on the display. File Nam e: UF_0 0001.USR Use the [-] and [+] buttons or the Data Dial to select the file you wish to delete. 4 Execute the Delete Operation Press the SUB MENU [w] button so that "Execute: NO/YES" appears on the display. Execute? isk? NO/YES Press the [+] (YES) button and the delete operation will begin. While it is in progress, "Now Deleting..." will appear at the top of the display. Now Dele ting... _002 • When the floppy disk's write-protect tab is set to ON (see page 64) or the disk is a "purposely copy-protected" disk, the display shows "Disk Write Protected!!" indicating that the Delete File function is not possible. • While the file is being deleted ("Now Deleting" is displayed), never eject the floppy disk or turn the power off. When the delete operation is finished, the sub menu will return to "Delete File? YES." 75
-
 1
1 -
2
-
3
-
4
-
5
-
6
-
7
-
8
-
9
-
10
-
11
-
12
-
13
-
14
-
15
-
16
-
17
-
18
-
19
-
20
-
21
-
22
-
23
-
24
-
25
-
26
-
27
-
28
-
29
-
30
-
31
-
32
-
33
-
34
-
35
-
36
-
37
-
38
-
39
-
40
-
41
-
42
-
43
-
44
-
45
-
46
-
47
-
48
-
49
-
50
-
51
-
52
-
53
-
54
-
55
-
56
-
57
-
58
-
59
-
60
-
61
-
62
-
63
-
64
-
65
-
66
-
67
-
68
-
69
-
70
-
71
-
 72
72 -
 73
73 -
 74
74 -
 75
75 -
 76
76 -
 77
77 -
 78
78 -
 79
79 -
 80
80 -
 81
81 -
 82
82 -
83
-
84
-
85
-
86
-
87
-
88
-
89
-
90
-
91
-
92
-
93
-
94
-
95
-
96
-
97
-
98
-
99
-
100
-
101
-
102
-
103
-
104
-
105
-
106
-
107
-
108
-
109
-
110
-
111
-
112
-
113
-
114
-
115
-
116
-
117
-
118
-
119
-
120
-
121
-
122
-
123
-
124
-
125
-
126
-
127
-
128
-
129
-
130
-
131
-
132
-
133
-
134
-
135
-
136
-
137
-
138
-
139
-
140
-
141
-
142
-
143
-
144
-
145
-
146
-
147
-
148
-
149
-
150
-
151
-
152
-
153
-
154
-
155
-
156
-
157
-
158
-
159
-
160
-
161
-
162
-
163
-
164
-
165
-
166
-
167
-
168
-
169
-
170
-
171
-
172
-
173
-
174
-
175
-
176
-
177
-
178
 |
 |