Yamaha PSR-630 Owner's Manual - Page 94
Punch In/Punch Out, Rehearsal Mode, use the SUB MENU
 |
View all Yamaha PSR-630 manuals
Add to My Manuals
Save this manual to your list of manuals |
Page 94 highlights
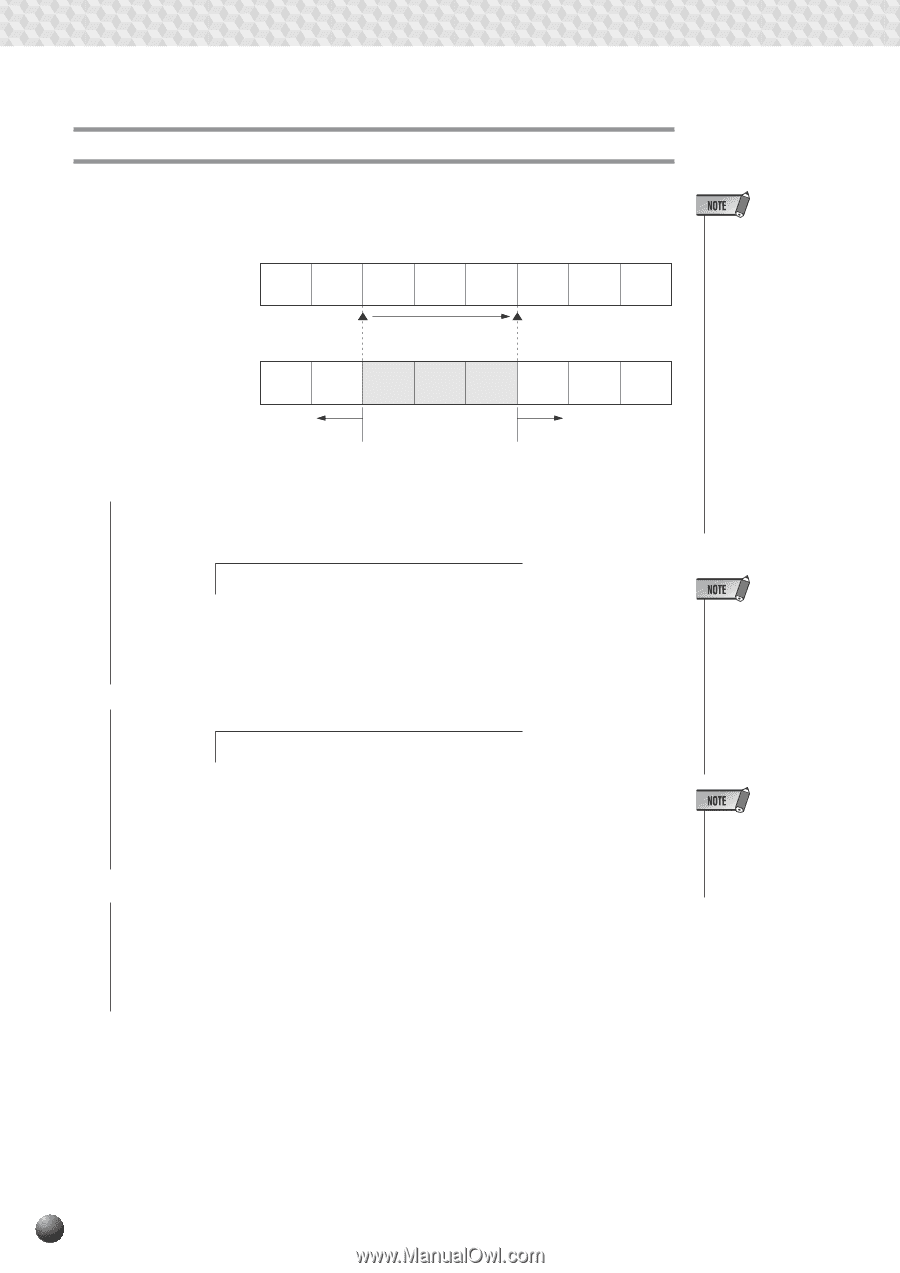
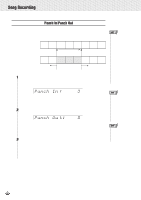
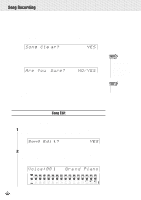
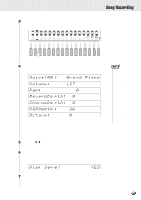
,,QQ,,QQSon,,QQgRec,,QQordin,,QQg ,,QQ,,QQ,,QQ,,QQ,,QQ,,QQ,,QQ,,QQ,,QQ,,QQ,,QQ Punch In/Punch Out The data recorded on tracks for keyboard playing (R1/R2/L) can be re-recorded in parts with the Punch In/Punch Out feature. q Before re-recording 1 2 3 4 5 Recording start (Punch In) q After Re-recording 1 2 Previously played data 3 4 5 Newly played data 6 7 8 Recording stop (Punch Out) 6 7 8 Previously played data 1In the Record Ready Mode (page 88) for the track you will re-record or in the Rehearsal Mode, use the SUB MENU [v] and [w] buttons so that "Punch In:Off" appears on the display. Punch In : 3 Use the [-] and [+] buttons, [1]-[0] number buttons, or the Data Dial to enter the measure number for using the Punch In feature. 2Use the SUB MENU [w] button so that "Punch Out:Off" appears on the display. Punch Ou t: 5 Use the [-] and [+] buttons, [1]-[0] number buttons, or the Data Dial to enter the measure number for using the Punch Out feature. 3Start and Stop Recording Start recording as usual. Even though you start playing from the beginning, only the data played within the Punch In/Punch Out range will be re-recorded. • Punch In/Punch Out recording is available only when Multi record mode is engaged. When in the Quick record-ready mode, "Punch In: - - -" or "Punch Out: - - -" appears on the display and Punch In/ Punch Out recording is not accessible. • If you select the tracks set as the Accompaniment or Harmony, "Punch In: - - -" or "Punch Out: - - -" appears on the display and Punch In/ Punch Out recording is not accessible. • You can use Punch In/Punch Out to rerecord multiple tracks at the same time. • Punch In/Punch Out cannot be used for songs that have no data recorded in them. "Punch In: - - -" will be shown on the display. • The Punch Out measure number cannot be set lower than the Punch In measure number. 92
-
 1
1 -
2
-
3
-
4
-
5
-
6
-
7
-
8
-
9
-
10
-
11
-
12
-
13
-
14
-
15
-
16
-
17
-
18
-
19
-
20
-
21
-
22
-
23
-
24
-
25
-
26
-
27
-
28
-
29
-
30
-
31
-
32
-
33
-
34
-
35
-
36
-
37
-
38
-
39
-
40
-
41
-
42
-
43
-
44
-
45
-
46
-
47
-
48
-
49
-
50
-
51
-
52
-
53
-
54
-
55
-
56
-
57
-
58
-
59
-
60
-
61
-
62
-
63
-
64
-
65
-
66
-
67
-
68
-
69
-
70
-
71
-
72
-
73
-
74
-
75
-
76
-
77
-
78
-
79
-
80
-
81
-
82
-
83
-
84
-
85
-
86
-
87
-
88
-
 89
89 -
 90
90 -
 91
91 -
 92
92 -
 93
93 -
 94
94 -
 95
95 -
 96
96 -
 97
97 -
 98
98 -
 99
99 -
100
-
101
-
102
-
103
-
104
-
105
-
106
-
107
-
108
-
109
-
110
-
111
-
112
-
113
-
114
-
115
-
116
-
117
-
118
-
119
-
120
-
121
-
122
-
123
-
124
-
125
-
126
-
127
-
128
-
129
-
130
-
131
-
132
-
133
-
134
-
135
-
136
-
137
-
138
-
139
-
140
-
141
-
142
-
143
-
144
-
145
-
146
-
147
-
148
-
149
-
150
-
151
-
152
-
153
-
154
-
155
-
156
-
157
-
158
-
159
-
160
-
161
-
162
-
163
-
164
-
165
-
166
-
167
-
168
-
169
-
170
-
171
-
172
-
173
-
174
-
175
-
176
-
177
-
178
 |
 |